


ASSEMBLY
Your generator requires some assembly and is ready for
use after it has been properly serviced with the
recommended oil and fuel.
If you have any problems with the assembly of your
generator, contact the local Snapper service center.
IMPORTANT: Any attempt to run the unit before it has
been serviced with the recommended oil will result in an
engine failure.
Remove Generator From Carton
• Set the carton on a rigid flat surface with “This Side Up”
arrows pointing upward.
• Carefully open the top flaps of the shipping carton.
• Cut down corners at one end of carton from top to
bottom and lay that side of carton down flat.
• Remove all packing material, carton fillers, etc.
• Remove the generator from the shipping carton.
Carton Contents
Check all contents. If any parts are missing or damaged,
contact the local Snapper service center.
• The generator
• Generator and engine owner’s manuals
• Locking 30 Amp plug
• Engine oil
• Wheel kit
Install Wheel Kit
The wheel kit is designed to greatly improve the portability
of your generator.
NOTE: Wheel kit is not intended for over-the-road use.
You will need a socket wrench with 1/2" or 13mm sockets
and a needle-nose pliers to install this kit.
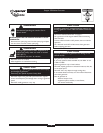
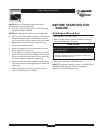
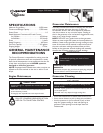
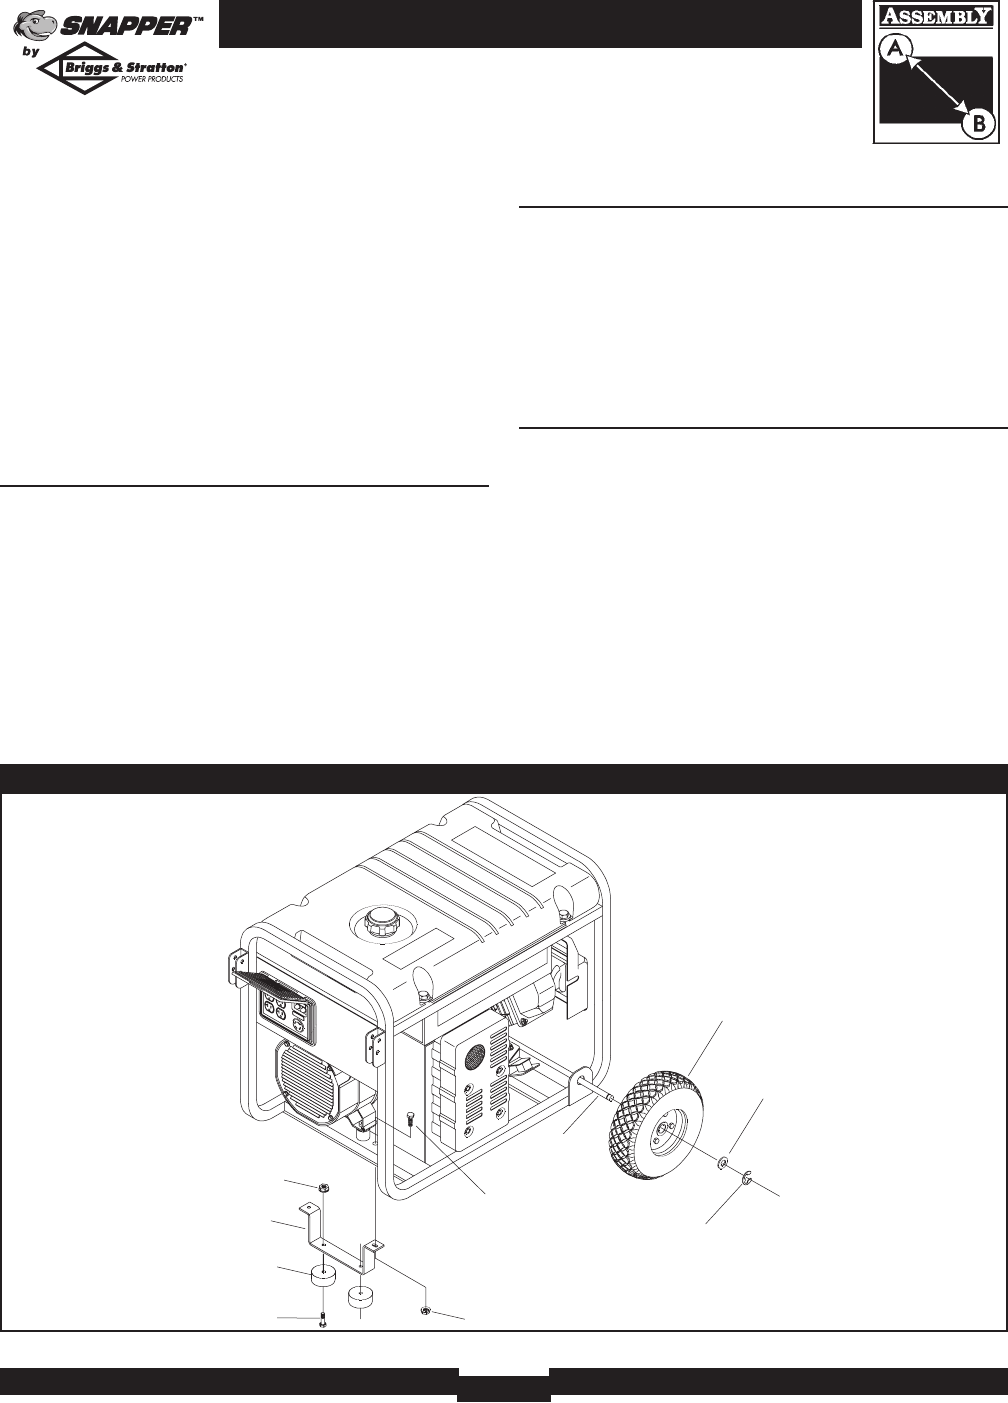
Refer to Figure 1 and install the wheel kit as follows:
1. Place the bottom of the generator cradle on a flat,
even surface.Temporarily place unit on blocks to ease
assembly.
2. Slide axle through both axle mounting brackets on
cradle frame, as shown in Figure 1.
3. Slide a wheel over the axle.
Support Leg
Hex Nut
Axle
Flat Washer
Wheel
E-Ring
Figure 1 — Install Wheel Kit
Cap Screw
Hex Nut
Cap Screw
Vibration Mount
Use existing hardware
to attach left side of
support leg to unit
Snapper 5500 Watt Generator
6