


4
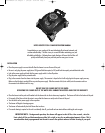
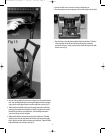
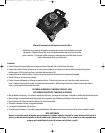
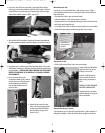
CADDY ASSEMBLY
Check the parts list below, if any parts are missing or damaged call SmartPool’s customer
service department at 732 730 9880 for help.
A. 1 Caddy base
B. 2 Axle stops
C. 6Phillips head machine screws
D. 6 black screw covers
E. 2 axle washers
F. 4 self tapping Phillips head screws
G. 2 cleaner mounting brackets (black)
H. 1 axle rod
I. 1 hook support rod
J. 2 caddy poles large
K. 2 caddy hooks
L. 1 caddy handle
M. 2 wheels
REQUIRED TOOLS
• HAMMER
• PHILLIPS HEAD SCREWDRIVER
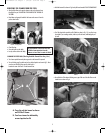
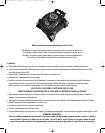
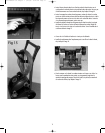
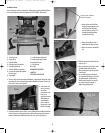
• Take one of the cleaner mounting brackets and locate it onto the caddy base so the claw
faces towards the lower part of the base as shown in figure 8
• Place the caddy poles into the base with the large holes going into the base. Be sure
that the small holes on the top side of the poles are positioned towards the inside of the
caddy as shown in figure 9.
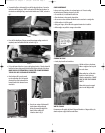
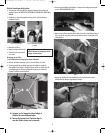
• Turn the caddy base
over and screw two
self tapping screws
into the base and
the cleaner
mounting brackets
connecting the two
parts. Repeat for
the other cleaner
mounting bracket.
FIG 9
TURN HOLES
TOWARD CENTER
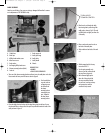
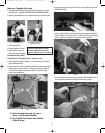
• Place the axle rod through the caddy
base insuring that it passes through the
caddy poles as shown in Fig 10 The axle
rod should stick out slightly on either side
of the caddy
• Place an axle washer onto the axle on
both sides of the caddy base.
• Slide a wheel onto both sides of the axle
rod.
• Slide the tapered end of axle stop
into axle rod FIG 11
• Turn the entire assembly on its
side on a firm flat surface with the
axle stop flat on the ground.
• With a hammer lightly tap the
other side of the axle until the
axle stop seats. When finished
turn unit over, insert last axle stop
and repeat process until the
second axle stop is seated.
Nitro Manual U.S.:Layout 1 1/13/08 10:20 PM Page 4