


Troubleshooting, Adjustment & Service
PARKING BRAKE ADJUSTMENT
1. Disengage the PTO, stop the engine, block the front
wheels, remove the ignition key, and engage the
parking brake.
2. Remove both control covers.
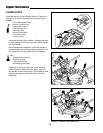
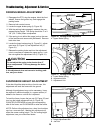
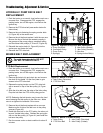
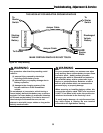
3. Locate the upper brake spring (A, Figure 30).
4. With the parking brake engaged, measure the com-
pressed spring length. The spring should be 2” to 2-
1/8” (5.0 - 5.4cm) when compressed.
5. If the spring is not within this range, jack up the rear
of the machine and secure with jackstands. Remove
both drive tires.
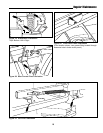
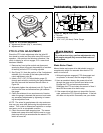
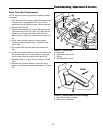
6. Locate the lower brake spring (A, Figure 31), adjust-
ment nuts (B, Figure 31) and adjustment link (C,
Figure 31).
7. Release the parking brake and turn the adjustment
nuts to compress or release the upper spring. Lock
the nuts against the adjustment link (C, Figure 31).
If this adjustment does not correct a braking prob-
lem, see your dealer.
SUSPENSION HEIGHT ADJUSTMENT
If the rider tilts either side-to-side or front-to-rear, this
adjustment will level the frame with the ground.
Although this adjustment may not be necessary, it may
be required if additional weight (ie. a grass catcher) is
added to the frame or a drive tire is replaced.
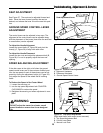
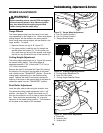
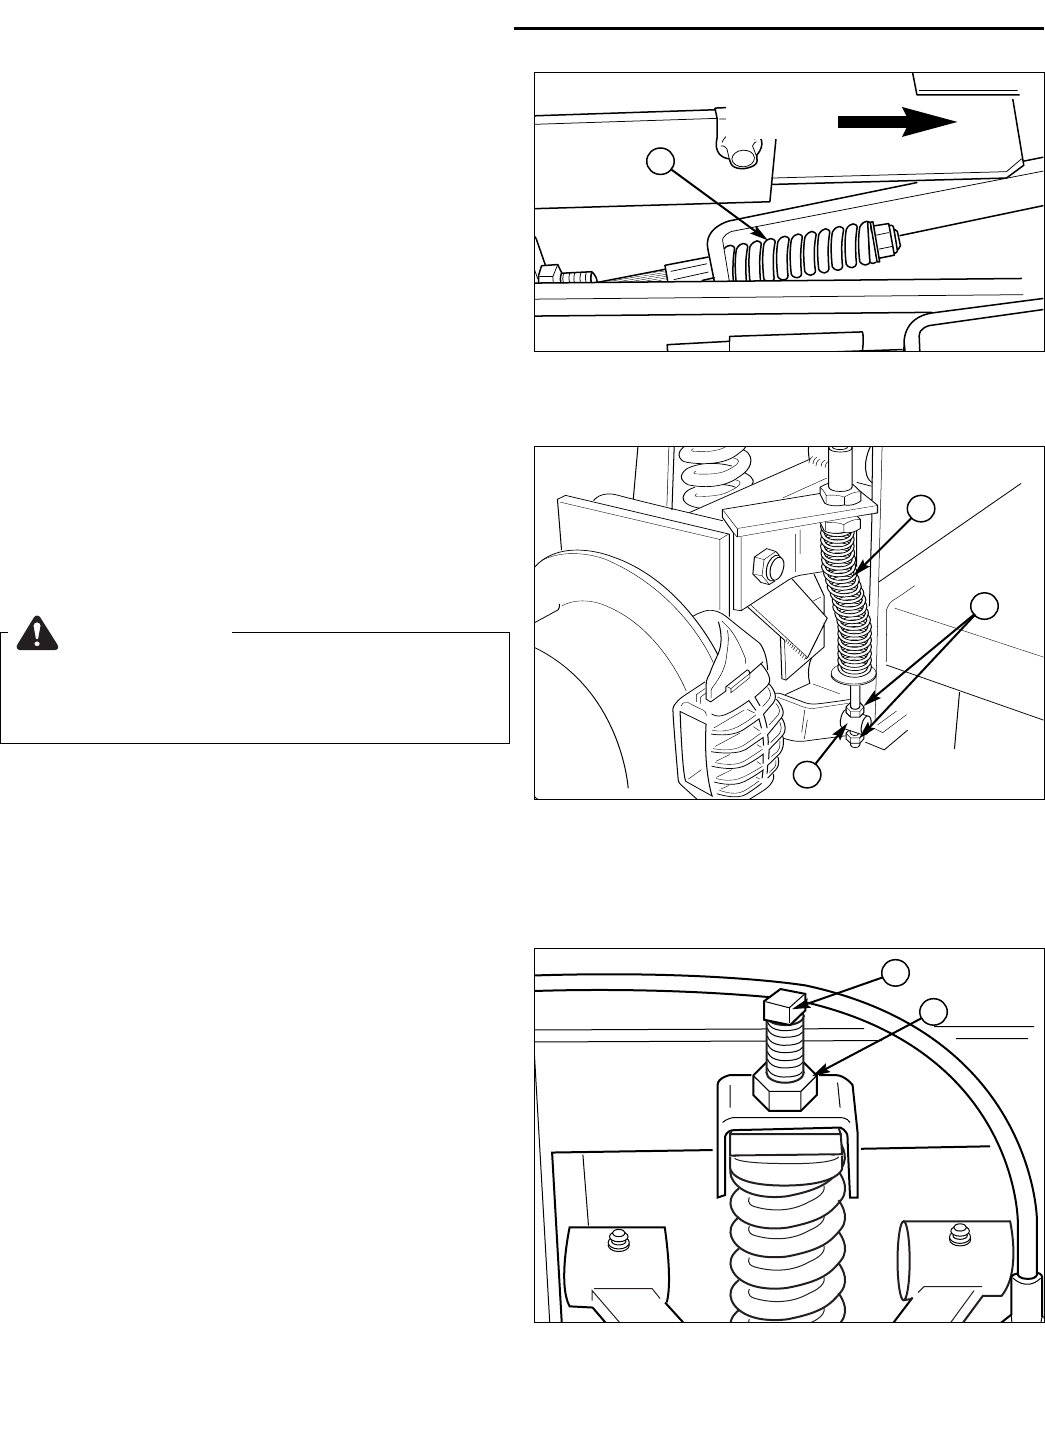
To level the frame, loosen the jam nut (B, Figure 32) and
turn turn the height adjustment bolt (A, Figure 32)
COUNTER-CLOCKWISE to lower the corresponding
side of the frame, and CLOCKWISE to raise the frame.
NOTE: Perform this adjustment on a hard, level surface
such as a concrete floor. Making this adjustment will
affect the mower cutting height. For fine cutting height
adjustment, see your authorized dealer.
A
Figure 32. Suspension Height Adjustment
A. Height Adjustment Bolt
B. Jam Nut
B
FRONT
Figure 30. Parking Brake Adjustment
A. Upper Brake Spring
A
Figure 31. Parking Brake Adjustment
A. Lower Brake Spring
B. Adjustment Nuts
C. Adjustment Link
A
C
B
CAUTION
Do not adjust the spring to be shorter than 2”
when compressed. This may damage the brake
caliper.
26