2
Installation Instructions Mulch Kit
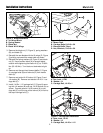
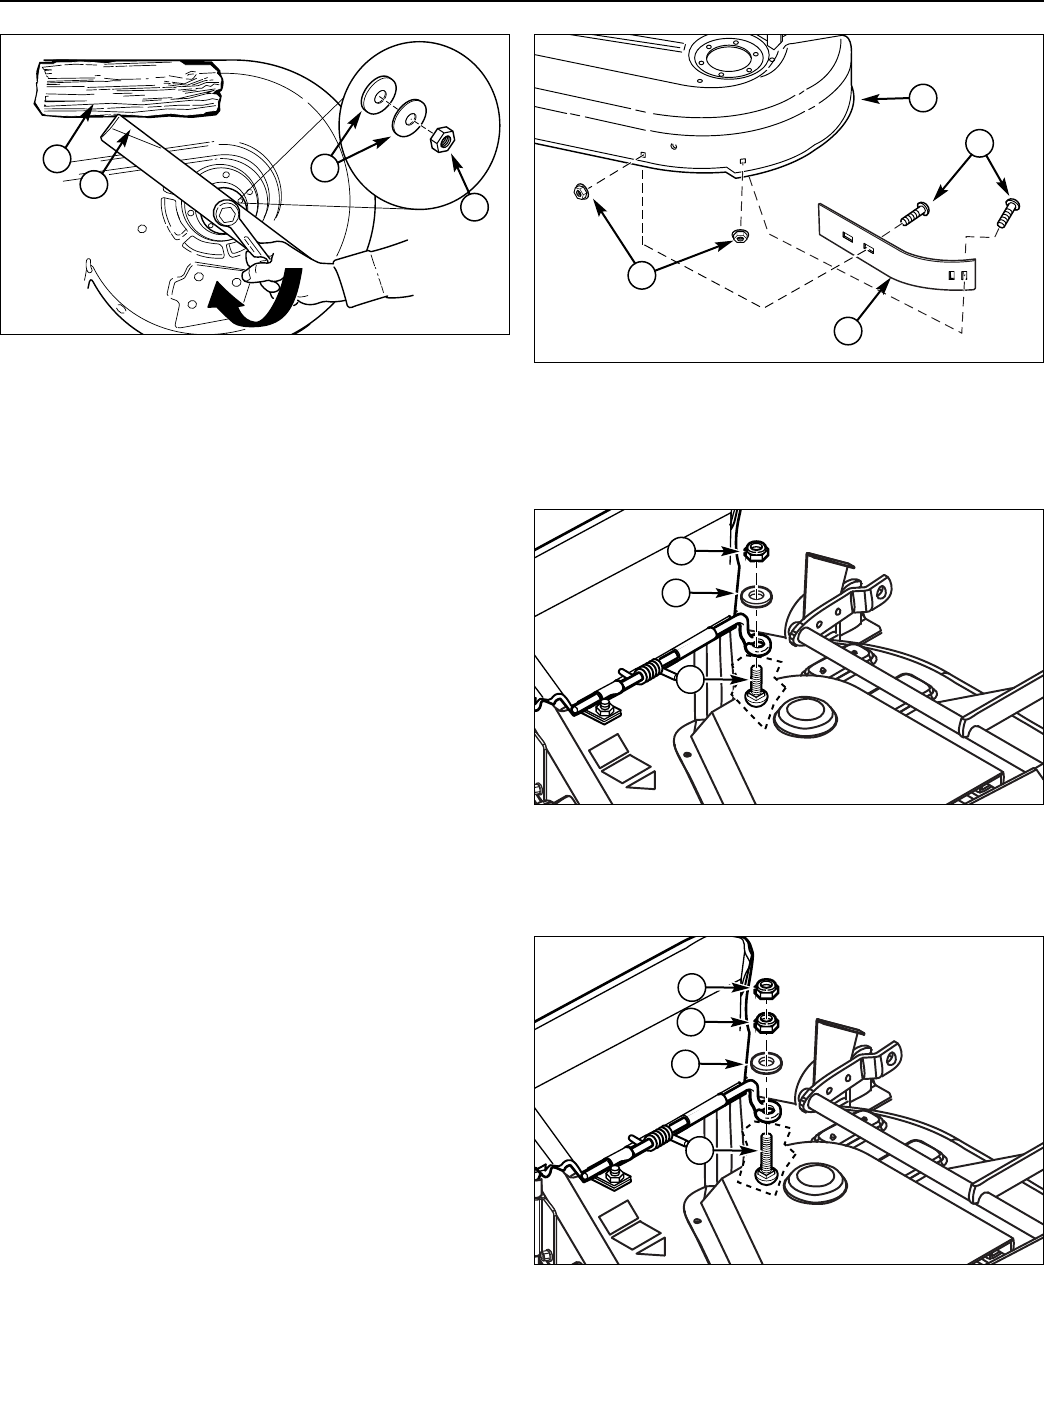
Figure 3. Blade Installation
A. 4x4 Wood Block
B. Spring Washer
C. Blade Nut
D. Blade W/Lift Wings
A
B
C
D
3. Remove the blade nut (C, Figure 3), spring washers
(B), and blade (D).
4. Reinstall the new blades with the lift wings (D, Figure
3) pointing up toward the mower deck as shown.
5. Reinstall the spring washers (B, Figure 3) and blade
nut (C). Use a wooden block (A) to prevent blade
rotation while tightening the blade nut (C) to 70-80 ft.
lbs. (95-108 Nm). Turn blade nut clockwise to tight-
en.
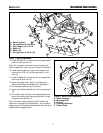
6. Remove and discard short blowout baffle (C, Figure
4), carriage bolts (B) and locknuts (D) from mower
deck (A).
7. Remove and retain1/4-20 locknut (A, Figure 5) and
1/4 washer (B). Remove and discard 1/4-20 x 1 car-
riage bolt (C).
8. Install 1/4-20x 1-1/2 carriage bolt (C, Figure 6) secur-
ing with 1/4 washer (B) and one 1/4-20 locknut (A) as
shown. Connect second 1/4-20 locknut (A) to car-
riage bolt (C) until the top of the locknut (A) is flush to
the top of carriage bolt (C).
Figure 4. Baffle Removal
A. Mower Deck
B. Carriage Bolts,5/16-18 x 3/4
C. Blowout Baffle, Short
D. Nut, Whizlock, 5/16-18 x 3/4
C
B
D
A
Figure 5. Carriage Bolt Removal
A. Nut, Lock, 1/4-20
B. Washer, 1/4
C. Carriage Bolt, 1/4-20 x 1
Figure 6. Carriage Bolt Installation
A. Nuts, Lock, 1/4-20
B. Washer, 1/4
C. Carriage Bolt, 1/4-20 x 1-1/2
C
B
A
C
B
A
A


