


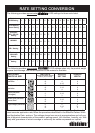
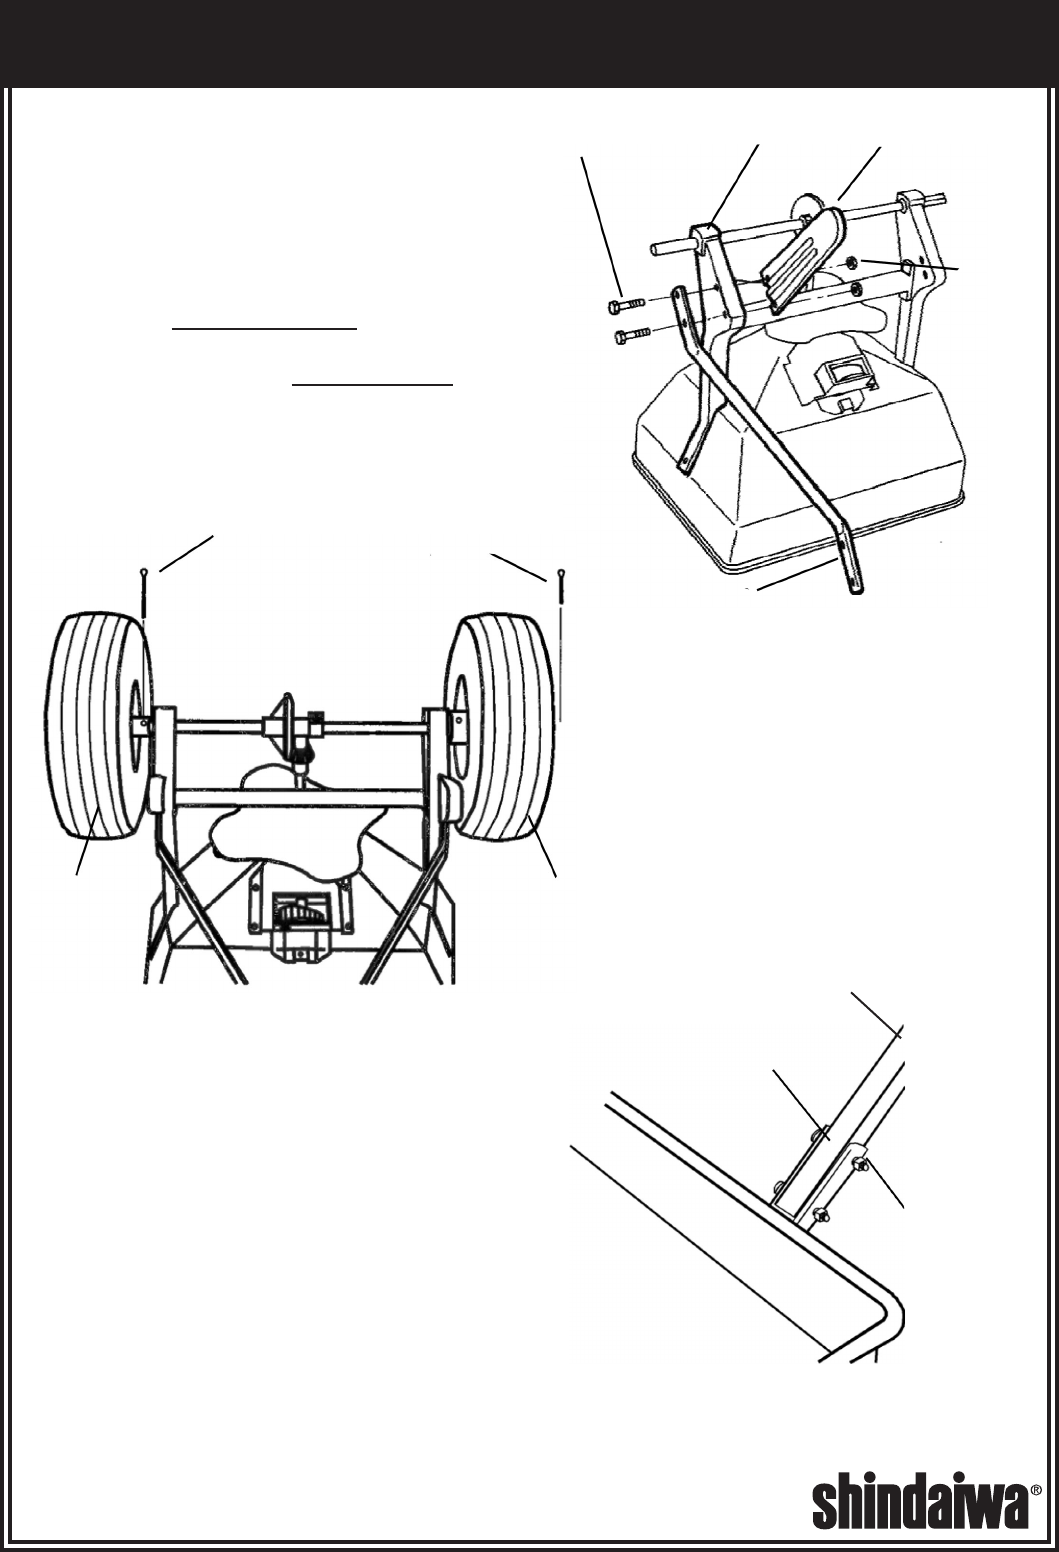
ASSEMBLY
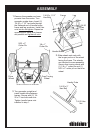
Remove the spreader and com-1.
ponents from the carton. Turn
spreader upside down. Insert (2)
1/4-20 x 1 1/2” hex bolts through
the attened end of handle brace,
frame and leg as shown. Install hex
nuts but do not tighten. Repeat on
opposite side. Make sure braces
are parallel and tighten all nuts.
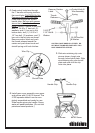
Slide wheels onto axle with 2.
the longer portion of the wheel
facing the frame. The wheels
are identical to ease assembly.
Secure free turning wheel with
(1) 1/8 x 1” cotter pin and (1)
5/32 x 2” cotter pin on the drive
wheel.
Turn spreader upright and 3.
install handle tube between
braces. Secure with (2) 1/4-
20 x 2” hex bolts and nuts.
Tighten handle brace nuts
installed in step 1.
VIEWED FROM REAR OF SPREADER
1/4-20 x 1 1/2”
Hex Bolt
Frame
Leg
Handle Brace
5/32 x 2”
Cotter Pin
1/8 x 1”
Cotter Pin
Free Turning
Wheel
Drive
Wheel
1/4-20 x 2”
Hex Bolt
Handle Tube
1/4-20 Hex
Nut
1/4-20
Hex
Nut