AH231_18
AH231_18
Adjusting the Hedge Trimmer
Cutter Assembly for Desired
Cutting Angles
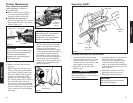
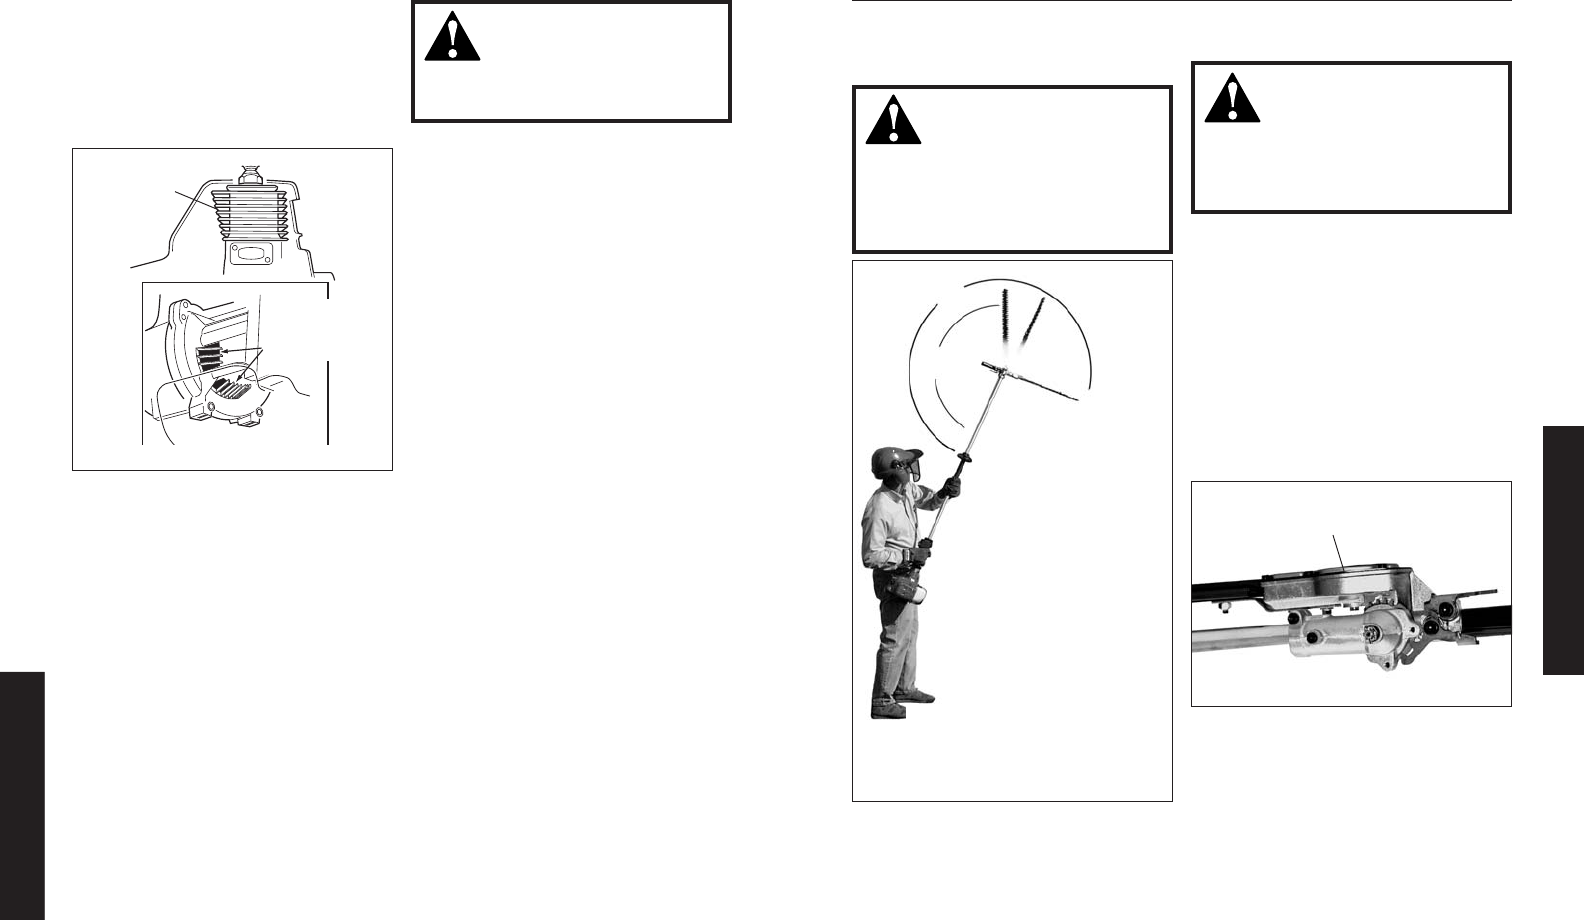
Figure 14
Figure 15
Various blade
positions
possible
Gearcase rotated to the
storage/transportation position
270
°
120
°
14
Adjusting the Cutter Assembly
for Storage or Transportation
WARNING!
Do not touch the cutter blades
when the engine is running. The
blades can oscillate even if the
engine is idling.
The cutter assembly
can be adjusted to 10
different positions
ranging from 120° to
270° from the outer
tube as shown in
Figure 14. Refer to the
steps on the previous
page for adjustment
procedures. Always
make sure the lock
latch is securely
locked after each
adjustment.
WARNING!
Never run the engine when
adjusting the cutter assembly to
the storage position.
1. With the engine off, install the
scabbard onto the blade.
2. Using the procedures described on
the previous page, rotate the cutter
assembly so it is parallel to the
tube. Make sure the latch lock and
the latch release return securely to
a locking position. See Figure 15.
3. Make sure the scabbard is in place
on the cutters before storing or
transporting.
OPERATION
AH231_29
Prior to each work day, perform the
following:
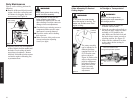
■ Remove all dirt and debris from the
engine, check the cooling fins and
air cleaner for clogging, and clean
as necessary. See Figure 24.
Daily Maintenance
■ Carefully remove any accumulations
of dirt or debris from the muffler and
fuel tank. Check cooling air intake
area at base of crankcase. Remove
all debris. Dirt build-up in these areas
can lead to engine overheating, fire,
or premature wear.
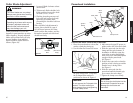
Figure 24
Keep cooling
fins clean
Keep air
passages
clean
WARNING!
Always wear gloves when working
around the cutter assembly.
■ Clean any debris or dirt from the
hedge trimmer cutter blades.
Lubricate the blades before use and
after refueling. Check the cutters for
damage or incorrect adjustment.
■ Check for loose or missing screws or
components. Make sure the cutter
attachment is securely fastened.
■ Check the entire unit for leaking
fuel or grease.
■ Make sure nuts, bolts, and screws
(except carburetor adjusting
screws) are tight.
21
MAINTENANCE


