21
English
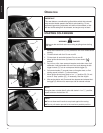
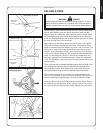
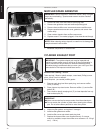
Mufer Side
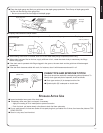
Remove air lter cover and remove spark plug lead. 1.
Remove two guide bar nuts and remove sprocket guard. 2.
Remove three mufer cover screws and remove mufer cover. 3.
Using a stiff bristle cleaning brush (do not use a metal brush), 4.
remove debris from cylinder ns in mufer area.
Assemble components in reverse order
5.
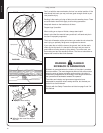
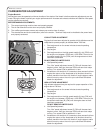
Starter Side
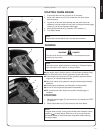
Remove air lter cover and remove spark plug lead.
1.
Remove plastic plug in side handle mount (D), and remove side 2.
handle mounting screw.
Remove four starter cover screws and remove starter cover.
3.
Using a stiff bristle cleaning brush (do not use a metal brush), 4.
remove debris from ywheel and ignition coil area.
Assemble components in reverse order.
5.
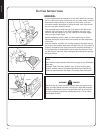
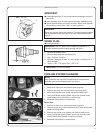
SPROCKET
A damaged sprocket (C) will cause premature damage or wear of ■
saw chain.
Clean sprocket, clutch and bar mount area before installation of bar. ■
Check sprocket when you install new chain. When outer diameter ■
of sprocket is worn 0.5mm (.020”) or more, replace it.
Worn : 0.5 mm
D
C
IMPORTANT
Some tree sap and resins are corrosive. Thoroughly wash the guide
bar and sprocket areas after each use, then coat metal parts with
light oil.
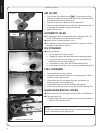
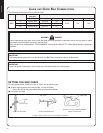
SPARK PLUG
Check periodically. ■
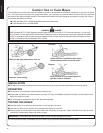
IMPORTANT: Use only NGK BPM-8Y spark plug (BPMR-8Y in
Canada) otherwise severe engine damage may occur.
IMPORTANT Do not over-torque
Remove air cleaner cover.1.
Remove spark plug lead and spark plug.2.
Gap = 0.65 mm (0.026 in)3.
Replace if electrode is worn, or if the insulator is fouled by oil or 4.
other deposits
Torque = 150 – 170 kg/cm (130 – 150 in. lb.)
5.
COOLING SYSTEM CLEANING
NOTE
See “Guide Bar and Saw Chain-Install/Remove Instructions for
sprocket guard removal/replacement instructions.
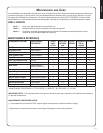
Maintenance, continued


