


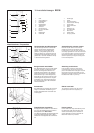

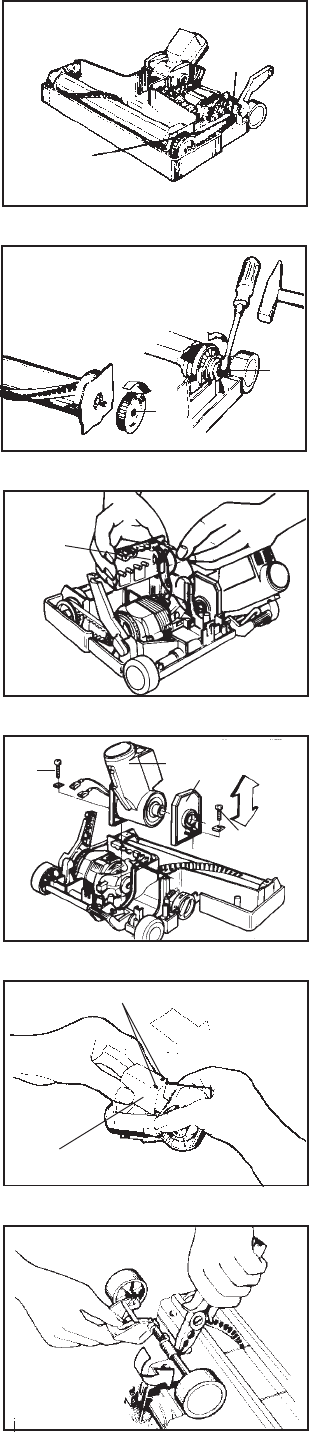
Beim Einsetzen der Achse die Öse der
Drehfeder im Stift der Achse einhängen, den
geraden Schenkel der Feder mit Zange greifen
und Feder in Pfeilrichtung spannen. Die Feder
so lange festhalten, bis die Achse richtig im
Unterteil eingesetzt ist.
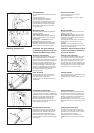
Zum Herausnehmen des Gelenkes (32) die
beiden Schrauben (34) an den Gelenklagern
(33) lösen und Gelenk mit Gelenklagern aus
den Gehäuseschlitzen ziehen.
Beim Einbau des Gelenkes darauf achten, daß
die Leitungen nicht gequetscht werden
können, auch nicht durch die anschließende
Montage des ET-Oberteiles.
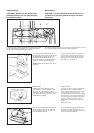
Öffnen des Gelenkes:
Die Schraube (36) lösen und den Deckel (35)
in Pfeilrichtung schieben, dann herausheben.
Beim Zusammenbau darauf achten, daß die
Leitungen nicht gequetscht werden.
Auswechseln der Elektronik (31):
Die zum Motor führenden Leitungen aus der
Anschlußklemme lösen. Leiterplatte aus den
Führungsschlitzen ziehen und die vom Gelenk
kommenden Leitungen von den Steckern
abziehen.
To remove the axle assembly unscrew the
three screws and take off the axle clamps.
Before replacing, lightly grease the axle. To
replace, hook one end of the spring on the
axle then grip the other end with a pair of
pliers and turn about a quarter of a turn.
Keeping the wheels at the ends of the axle
press the axle assembly back into place.
To remove the swivel neck (32) take out the
two small screws (34) from the swivel neck
supports(33) then lift the swivel neck
assembly from the chassis. On re-assembly
check that the leads from the swivel neck do
not become trapped when the power head
cover is replaced.
To remove the swivel neck cover
take out the retaining screw and slide the
cover (35) downwards then lift out. On re-
assembly check that the leads do not become
trapped.
Changing the Electronic Controller (31):
Disconnect the lead from the motor. Lift the
controller upwards from its location and then
disconnect the lead from the swivel neck.
32
33
34
31
34
36
35
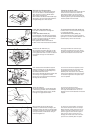
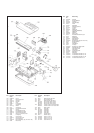
Wechseln der Bürstenwalze:
Zahnriemen (28) vom Motorritzel (29) schie-
ben, vier Schrauben an den Bürstenlagern
lösen. Bürste von unten an beiden Seiten
gleichmäßig herausdrücken.
Beim Einsetzen der Bürstenwalze beide Lager
gleichzeitig in die Führungsschlitze einsetzen
und gleichmäßig nach unten drücken.
Changing the brush roller:
Push the belt (28 off the motor pulley (29) and
remove the four screws which hold in the
brush bearing blocks. Lift out the bearing
blocks evenly. When replacing the roller with
the bearing blocks, push downwards keeping
the roller parallel with the chassis.
29
28
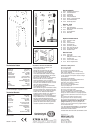
Lösen des Antriebsrades (30):
Zum Lösen Antriebsrad im Uhrzeigersinn
abdrehen.
Lösen des Motorritzels (29):
Schraubendreher mit breiter Klinge entgegen
dem Uhrzeigersinn an eine Zahnflanke setzen
und durch leichten Schlag mit dem Hammer
Ritzel von der Motorwelle lösen.
Bei ausgebautem Motor Motorwelle am
anderen Ende mit Schraubendreher festhalten.
To remove the brush roller pulley (30)
hold the roller in one hand and turn the pulley
in a clockwise direction.
To remove the motor pulley (29)
insert a screwdriver into a groove and give a
light tap in an counter clockwise direction. The
loosened pulley can then be removed.
29
30