


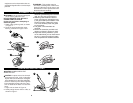

3. To convert for maintenance edging
(Figure 8) unplug from power source,
depress conversion button and rotate
the motor housing.
4. When the button snaps back into
place the tool is locked in the edger
position.
5. Return to trimming position by
unplugging the tool, depressing the
button and rotating back.
6. To operate as a maintenance edger,
position tool above sidewalk, as
shown in Figure 9. Rest edge guide
as shown.
CUTTING LINE
Your trimmer uses only .065” (1.65 mm)
diameter, ROUND nylon line to cut grass
and weeds quickly and easily. During
use, the tip of the nylon line will become
frayed and worn and the special self
feeding line hub will automatically feed
and trim a fresh length of line. Cutting
line will wear faster and require more
feeding if the cutting or edging is done
along sidewalks or other abrasive
surfaces or heavier weeds are being cut.
The advanced automatic line feeding
mechanism senses when more cutting
line is needed and feeds and trims the
correct length of line whenever its
required. DO NOT BUMP unit on ground
in attempt to feed line or for any other
purposes.
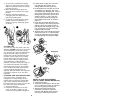
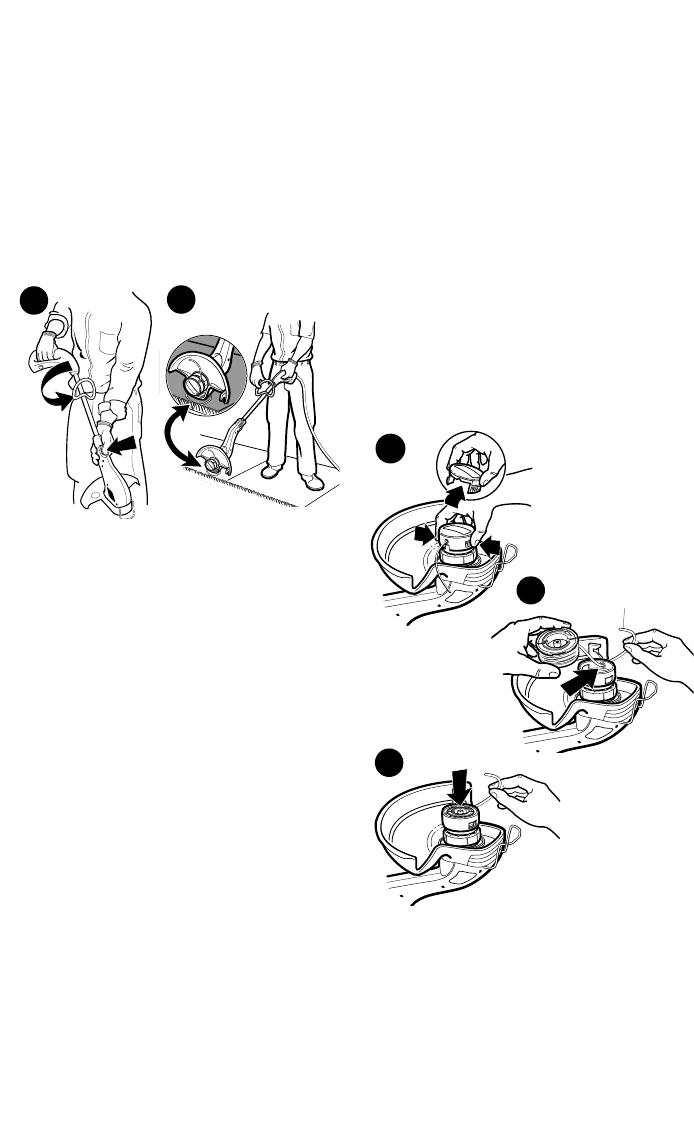
CLEARING JAMS AND TANGLED LINES
From time to time, especially when
cutting thick or stalky weeds, the line
feeding hub may become clogged with
sap or other material and the line will
become jammed as a result. To clear the
jam, follow the steps listed below.
1. Unplug the trimmer.
2. Press the release tabs on the hub
cover, as shown in Figure 10 and
remove the cap by pulling it straight off.
6
8
9
11
Cutting Line
10
12
3. Lift the spool of nylon line out of the
hub and clear any broken line or
cutting debris from the spool area.
4. Unwrap about one foot (30 cm) of line
and inspect it for damage. Cut away
and discard any damaged line. If line is
okay rewind it and insert the line end
through the eyelet in the spool hub as
shown in Figure 11. Pull on the line
end to keep it taut while placing the
spool down into the hub, as shown in
Figure 11.
5. Press the spool down GENTLY and
rotate it until you feel it drop into place.
(When in place, the spool will turn a
few degrees left and right freely). Take
care to keep the line from becoming
trapped under the spool.
6. Snap the hub cover and spring back on
and turn the tool on. In a few seconds
or less you’ll hear the nylon line being
cut automatically to the proper length.
SPOOL OR LINE REPLACEMENT
(Use only 0.065” diameter ROUND line)
1. Unplug the trimmer.
2. Press the release tabs on the line hub
cover, as shown in Figure 10. Remove
the cover by pulling it straight off.
3. Remove the spool from the tool.
Discard it if you plan to replace it.
Remove and discard all line from it if
you plan to rewind it with new line.