


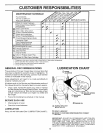
OPERATION
The operation of any lawn mower can result in foreign objects thrown into the eyes, which can
result in severe eye damage. Always wear safety glasses or eye shields while operating your
lawn mower or performing any adjustments or repairs. We recommend a wide vision safety
mask over the spectacles or standard safety glasses.
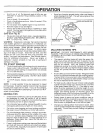
HOW TO USE YOUR LAWN MOWER TO ADJUST CUTTING HEIGHT (See Fig. 4)
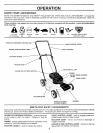
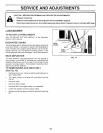
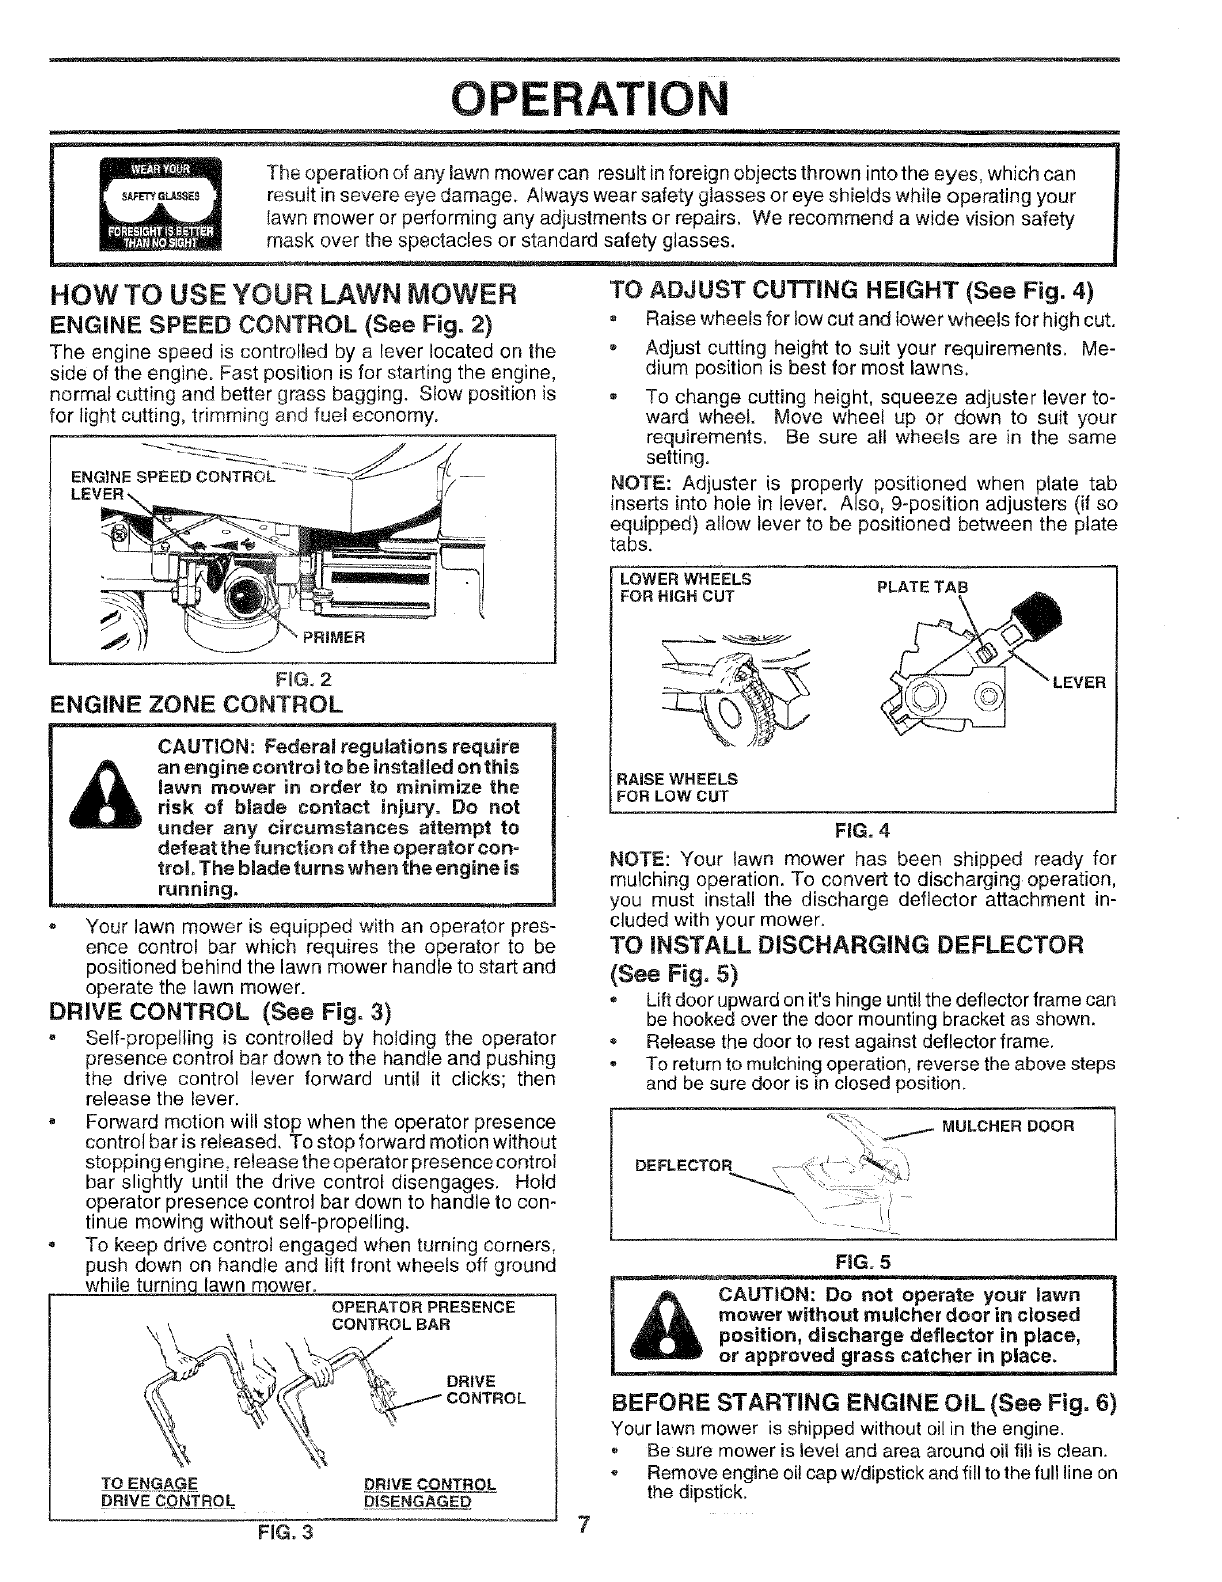
ENGINE SPEED CONTROL (See Fig. 2)
The engine speed is controlled by a lever located on the
side of the engine. Fast position is for starting the engine,
normal cutting and better grass bagging. Stow position is
for light cutting, trimming and fuel economy.
ENGINE SPEED CONTROL
FiG. 2
ENGINE ZONE CONTROL
CAUTION: Federal regulations require
an engine control to be installed enth s
lawn mower in order to minimize the
risk of blade contact injury. Do not
under any circumstances attempt to
defeat the function of the operator con=
trol, The blade turns when the engine is
running.
Your lawn mower is equipped with an operator pres-
ence control bar which requires the operator to be
positioned behind the lawn mower handle to start and
operate the lawn mower.
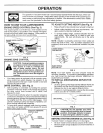
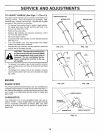
DRIVE CONTROL (See Fig. 3)
- Self-propelling is controlled by holding the operator
presence control bar down to the handle and pushing
the drive control lever forward until it clicks; then
release the lever.
, Forward motion will stop when the operator presence
control bar is released. To stop forward motion without
stopping engine, release the operator presence control
bar slightly until the drive control disengages. Hold
operator presence control bar down to handle to con-
tinue mowing without self-propelling.
* To keep drive control engaged when turning corners,
push down on handle and lift front wheels off ground
while turninq lawn mower.
OPERATOR PRESENCE
CONTROL BAR
TOENGAGE
DRIVE C_ONTROL
DRIVE
CONTROL
FIG. 3
DRIVE CONTROL
DISENGAGE_
= Raise wheels for low cut and lower wheels for high cut.
Adjust cutting height to suit your requirements. Me-
dium position is best for most lawns,
To change cutting height, squeeze adjuster lever to-
ward wheel. Move wheel up or down to suit your
requirements. Be sure all wheels are in the same
setting.
NOTE: Adjuster is properly positioned when plate tab
inserts into hole in lever. Also, 9-position adjusters (if so
equipped) allow lever to be positioned between the plate
tabs.
LOWER WHEELS PLATETAB
FORHIGHCUT
RAISE WHEELS
FOR LOW CUT _=._ _
FiG. 4
NOTE: Your lawn mower has been shipped ready for
mulching operation. To convert to discharging operation,
you must install the discharge deflector attachment in-
cluded with your mower.
TO INSTALL DISCHARGING DEFLECTOR
(See Fig. 5)
• Lift door upward on it's hinge until the deflector frame can
be hooked over the door mounting bracket as shown.
, Release the door to rest against deflector frame.
To return to mulching operation, reverse the above steps
and be sure door is in closed position.
.< . ._.4._ MULCHER DOOR
DEFLECTOR _- << _ -- :'-.s_
, t
FiG. 5
BEFORE STARTING ENGINE OIL (See Fig. 6)
Your lawn mower is shipped without oi! in the engine.
Be sure mower is level and area around oil fill is clean.
Remove engine oil cap w!dipstick and fill to the full line on
the dipstick.