


25
SAFE-T-TIP
®
NOSE GUARD MAINTENANCE
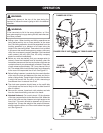
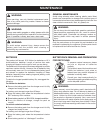
See Figures 41 - 42.
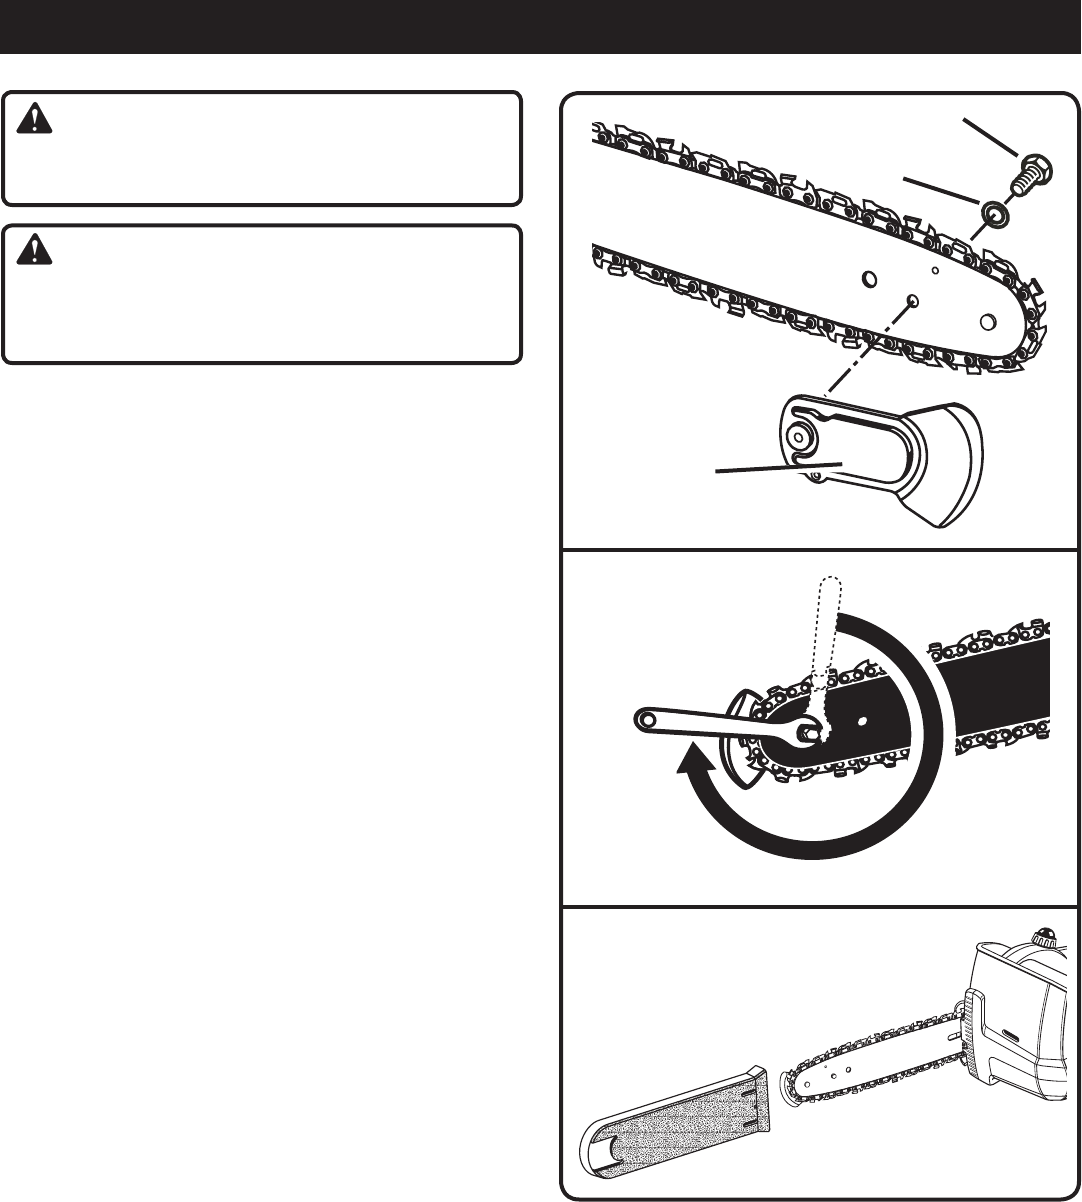
Tighten the mounting screw of the nose guard as instructed
below. These are specially hardened screws. If the screw
cannot be installed tightly, replace both the screw and the
SAFE-T-TIP
®
before further operation. Do not replace with
an ordinary screw.
In addition to preventing chain contact with solid objects at
the nose of the bar, the SAFE-T-TIP
®
also helps keep the
chain away from abrasive surfaces such as the ground. Keep
it on the right hand side of the bar, where it will be between
the chain and the ground during flush with ground cutting.
The mounting screw requires a 5/16 in. wrench (or adjust-
able wrench) to achieve the recommended tightness of 35
to 45 in. lb. (4-5 Nm). A tightness within this range can be
achieved by the following method.
Tighten the screw with your finger.
From the finger-tight position, tighten the screw an ad-
ditional 3/4 of a turn using a wrench.
MOUNTING SAFE-T-TIP
®
NOSE GUARD
See Figures 41 - 42.
Mount the SAFE-T-TIP
®
on the bar nose.
NOTE: The tab fits in the recessed hole in the bar.
Tighten the screw with your finger.
From the finger-tight position, tighten the screw an ad-
ditional 3/4 of a turn using a wrench.
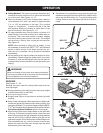
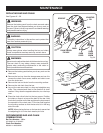
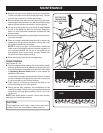
TRANSPORTING AND STORING
See Figure 43.
Do not store or transport the chain saw when it is running.
The chain saw should always be idle before storing or
transporting.
Always place the guide bar scabbard on the bar and chain
before storing or transporting the chain saw. Use caution
to avoid the sharp teeth of the chain.
Clean the chain saw thoroughly before storing. Store the
chain saw indoors, in a dry place that is locked and/or
inaccessible to children.
Keep away from corrosive agents such as garden chem-
icals and de-icing salts.
WARNING:
Although the guide bar comes with a SAFE-T-TIP
®
anti-
kickback device already installed, you need to check the
tightness of the mounting screw before each use.
TIGhTEN 3/4
Of A TuRN
MOuNTING sCREw
sAfE-T-TIp
®
LOCKING RIvET
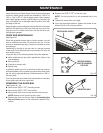
WARNING:
Remove the battery pack and make sure the chain has
stopped before you do any work on the saw.
Fig. 41
Fig. 42
MAINTENANCE
Fig. 43