


14
MAINTENANCE AND
REPAIR INSTRUCTIONS
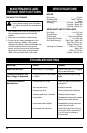
SPECIFICATIONS
MOTOR
Motor type . . . . . . . . . . . . . . . . . . . . . . . . . Electric
Operating RPM . . . . . . . . . . . . . . 7,000-7,800 rpm
Ignition Switch . . . . . . . . . . . . . . . . . . . . . . Trigger
Amperage . . . . . . . . . . . . . . 4.7 amps - Model 105r
5.2 amps - Model 132r
5.5 amps - Model 137r
DRIVE SHAFT AND CUTTING HEAD
Drive Shaft . . . . . . . . . . . . . . . . . . . 1/4 in (6.5 mm)
Shoulder Strap . . . . . . . . . . . . . . . . . . . . . Optional
Cutting Head . . . . . . . . . . . . . Bump Line Releaser
Cutting Path Diameter . . . . . . . . . . 15 in (381 mm)
Drive Shaft Housing . . . . . Steel Tube - Model 105r
Steel Tube, Click-Link,
Models 132r and 137r
Trimming Line Diameter . . . . . . 0.060 in (1.52 mm),
Model 105r
0.080 in (2.03 mm),
Models 132r and 137r
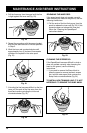
CLEANING THE TRIMMER
WARNING: To avoid serious personal
injury, always unplug your unit before
you clean or perform any maintenance
on it.
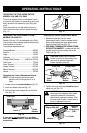
1. Use a small brush or the air discharge of a
vacuum cleaner brush to clean the fan
blades.
2. Keep the air vents free of obstructions.
3. Do not use any strong detergents on the
plastic housing or handle. They can be
damaged by certain household cleaners that
contain aromatic oils such as pine and
lemon, and by solvents such as kerosene.
Moisture can also cause a shock hazard.
Wipe off any moisture with a soft cloth.
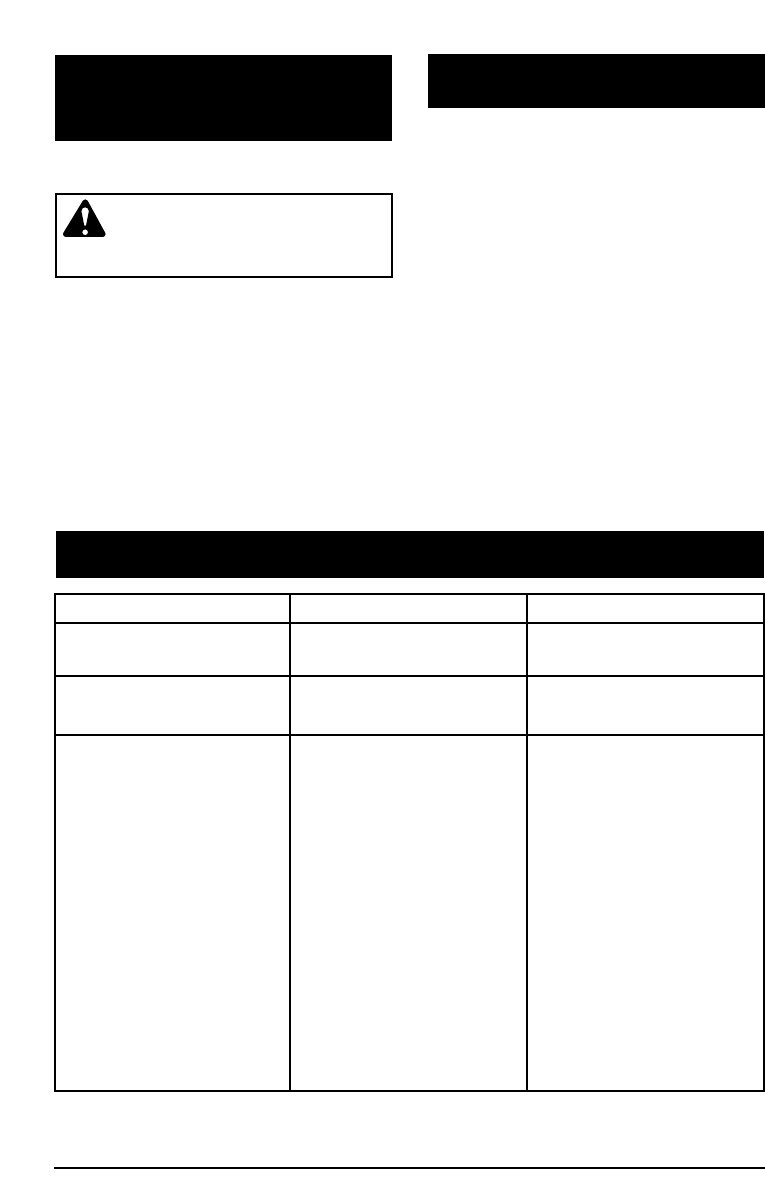
TROUBLESHOOTING
PROBLEM
Motor Will Not Start
C
utting Head Will Not Turn
When Trigger is Squeezed
C
utting Head Will Not
Advance Line
CAUSE
Motor stops, unit unplugged
Cutting head bound with grass
or debris
Cutting head out of line
Inner reel bound up
Cutting head dirty
Indexing teeth worn or burred
Line welded
Line twisted when refilled
Not enough line exposed
REMEDY
Check cord to see if it is plugged
into an electrical outlet
Stop motor and clean cutting
head
Refill with genuine replacement
cutting line
Replace inner reel
Clean cutting head reel/spool
Replace reel and spool
Disassemble, remove the welded
section, and rewind the line
Disassemble cutting head and
rewind the inner reel
Push the Bump Knob and pull
out the line until a minimum of
4 in (102 mm) is outside of
cutting head