


9
www.remingtonpowertools.com
ENGLISH
Note: For pre-assembled models, the saw chain
tension is properly set at factory. A new chain will
stretch. Check new chain after fi rst few minutes of
operation. Allow chain to cool down. Follow steps
below to readjust saw chain tension.
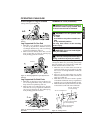
1. Before adjusting chain, make sure guide bar nuts
are only finger tight (see Figure 2, page 8). Also
make sure adjusting block is in oval adjusting hole
on guide bar (see Figures 2 and 3, page 8).
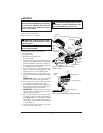
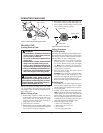
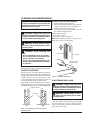
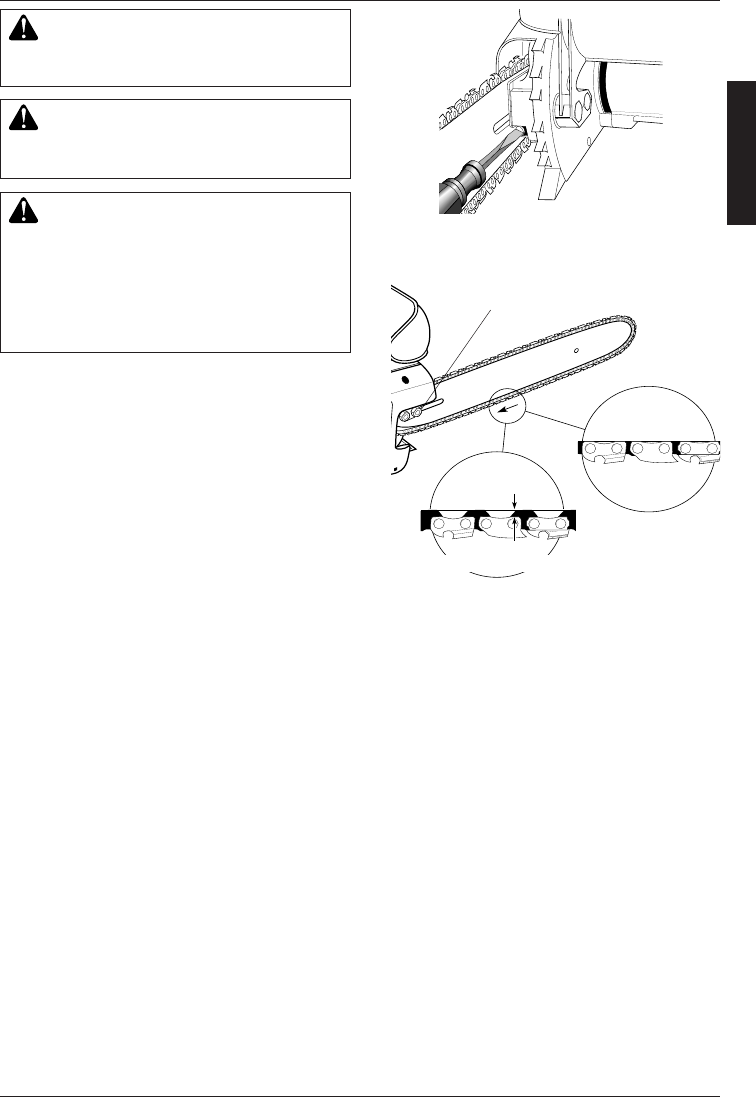
2. Turn adjusting screw clockwise until all slack is
out of chain (see Figure 4). Note: There should
be no gap between side links of chain and bottom
of guide bar (see Figure 5).
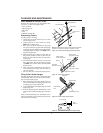
3. Wearing protective gloves, move chain around
guide bar. Chain should move freely. If chain
does not move freely, loosen chain by turning
adjusting screw counterclockwise.
4. After chain tension is correct, tighten guide
bar nuts firmly. If not, guide bar will move and
loosen chain tension. This will increase the risk
of kickback. This can also damage saw. Note:
A new chain will stretch. Check new chain after
first few minutes of operation. Allow chain to
cool down. Readjust chain tension.
SAW CHAIN TENSION ADJUSTMENT
WARNING: Unplug chain saw from
power source before adjusting saw
chain tension.
WARNING: Cutting edges on chain
are sharp. Use protective gloves when
handling chain.
WARNING: Maintain proper chain
tension always. A loose chain will in-
crease the risk of kickback. A loose chain
may jump out of guide bar groove. This
may injure operator and damage chain.
A loose chain will cause chain, guide bar,
and sprocket to wear rapidly.
Figure 4 - Turning Adjusting Screw
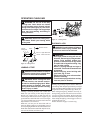
Guide Bar
Correct Tension
Guide Bar
Guide Bar Nuts
Gap
Figure 5- Saw Chain Adjustment
Incorrect Tension