8
www.remingtonpowertools.com
TRIMMER ASSEMBLY
ASSEMBLING TRIMMER/
EDGER
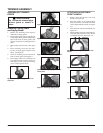
Figure 4 - Placing cutting guard over cut-
ting head
Figure 5 - Slide cutting guard forward
Attaching Cutting Guard
and Edging Wheel
1. Remove fi ve mounting screws taped to
underside of cutting guard.
2. Place cutting guard over spool housing at
a slight angle. Push guard back depressing
tabs toward front of cutting guard. (See
fi gure 4). Drop back of cutting guard into
place.
3. Slide cutting guard forward. (See fi gure
5)
4. Insert mounting screw into hole near-
est tabs in cutting guard. Tighten screw
fi rmly. (See Figure 6)
5. Insert two mounting screws into holes at
back of cutting guard. (See Figure 7)
6. Place edging wheel over remaining two
screw holes at front of cutting guard. At-
tach edging wheel using two mounting
screws. (See Figures 8 and 9)
FPO
Figure 7 - Insert two mounting screws
FPO
Figure 6 - Insert mounting screw
Figure 8 - Placing edging wheel over
screw holes
Figure 9 - Attaching edging wheel
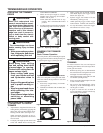
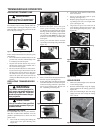
Figure 10 - Removing knob and bolt from
handle
Figure 11 - Placing handle onto shaft
Figure 12 - Inserting bolt into handle
Figure 13 - Tighten the knob
1. Remove the knob and bolt from front
handle (see Figure 10).
2. Place the handle on the trimmer/edger
shaft between the rear handle and shaft
collar. Snap handle onto shaft (see Figure
11).
3. Insert bolt back into the front handle (see
Figure 12).
3. Adjust handle to the most comfortable po-
sition and tighten the knob fi rmly. Do not
overtighten the knob. (See Figure 13).
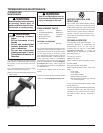
Do not operate trimmer/edger
without guard or handle in
place.
WARNING:
ATTACHING ADJUSTABLE
FRONT HANDLE


