


US-25
EXZ2450S-PH
U
S
9. Maintenance
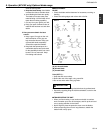
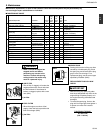
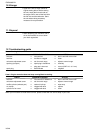
BC-EX2 MA2
LRT-EX MA1
LRT-EX MA2
BC-EX2 MA1
(BC-EX2 only)
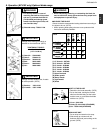
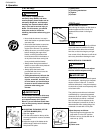
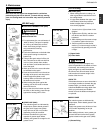
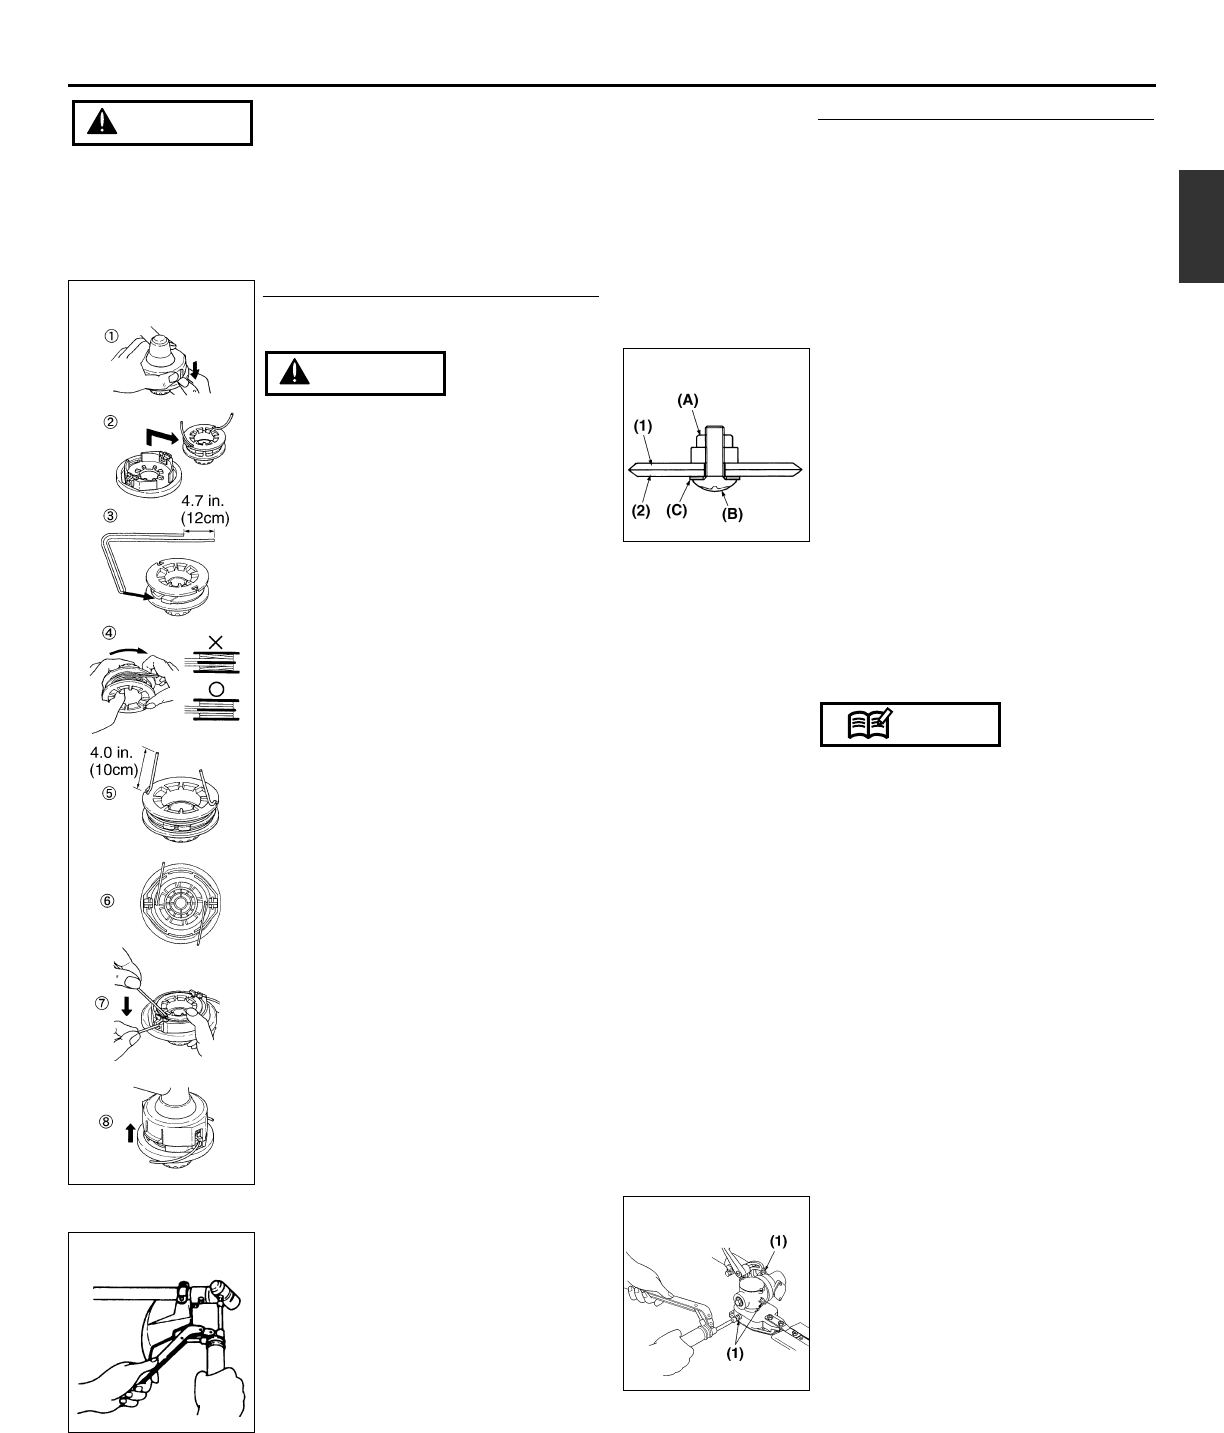
■ REFILLING TRIMMING LINE (MA1)
For safety reasons, do not use
metalreinforced line.
1. For replacement line, use a diameter of
.095in (2.4mm). The spool is capable
for a line up to 20feet (6m) on the 4”
head. Avoid using a larger line as it
may cut down the trimming
performance.
2. Pinch the slotted area on the both sides
of the spool housing to unhook the
bottom cap.
3. Take out the spool and pull off the old
line. Fold new line so that one half line
is 4.7in.(12cm) shorter than another
half. And then, hook bended end in the
slot of the spool.
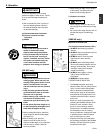
4. Wind up the line in the correct direction
as indicated on the spool.
5. Hook each end of the line in the slot on
the edge of the spool, and then put the
ends through the eyelets on the
housing. Make sure that the spring and
the washers are in place.
6. While holding the spool against the
housing, pull the line ends to release
them from the slot.
7. Line up the slot on the bottom cap with
the hook on the housing, press the cap
against the housing until it clicks.
■ GEAR CASE (MA2)
• The reduction gears are lubricated by
multipurpose, lithium-based grease in
the gear case. Supply new grease
every 25 hours of use or more often
depending on the job condition.
• Remove the side bolt in gear case
opposite of grease nipple before
installing new grease to arrange for old
grease to exit.
WARNING
Make sure that the engine has stopped and is cool before
performing any service to the unit. Contact with any moving
parts, the cutting head or a hot muffler may result in personal
injury.
WARNING
(LRT-EX only)
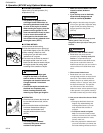
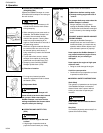
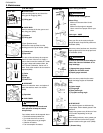
■ BLADES (MA1)
• When refilling the tank or resting, it is
often a good idea to use the time to oil
the cutting blades.
• If a gap exists between the upper and
lower blades, follow the procedure
below to adjust them so that they fit
more closely together.
1. Loosen lock nut (A) as shown in the
diagram.
2. Tighten screw (B) fully, and then turn
one-third to one-half of a rotation
backward.
3. While holding onto the screw to keep
it in position, tighten the lock nut.
4. Check to make sure that the flat
washer (C) is loose enough so that it
may be turned by pressing on it with
a finger.
(1) Upper blade
(2) Lower blade
Screwing in the screw too tightly may
make it impossible for the blades to move.
Conversely, not screwing in the screw
tightly enough may make the blades of
the trimmer feel dull and cause leaves
and branches to become caught in the
blades of the trimmer.
QUICK TIP
If the blades become so worn down that it
is no longer possible to eliminate the gap
between them, you should contact the
authorized RedMax servicing dealer from
which you purchased your RedMax
trimmer to have the blades resharpened
or replaced.
■ GEAR CASE
The reduction gears are lubricated by
multipurpose, lithium-based grease in the
gearcase.
Supply new grease every 25 hours of use
or more often depending on the job
condition.
When adding lubricant, use a grease gun
to insert lubricant into the three grease
nipples located on the gear case. (MA2)
(1) Grease fitting
NOTE