


US-15
BCZ3050S/T/SW
U
S
9. Maintenance
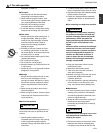
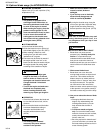
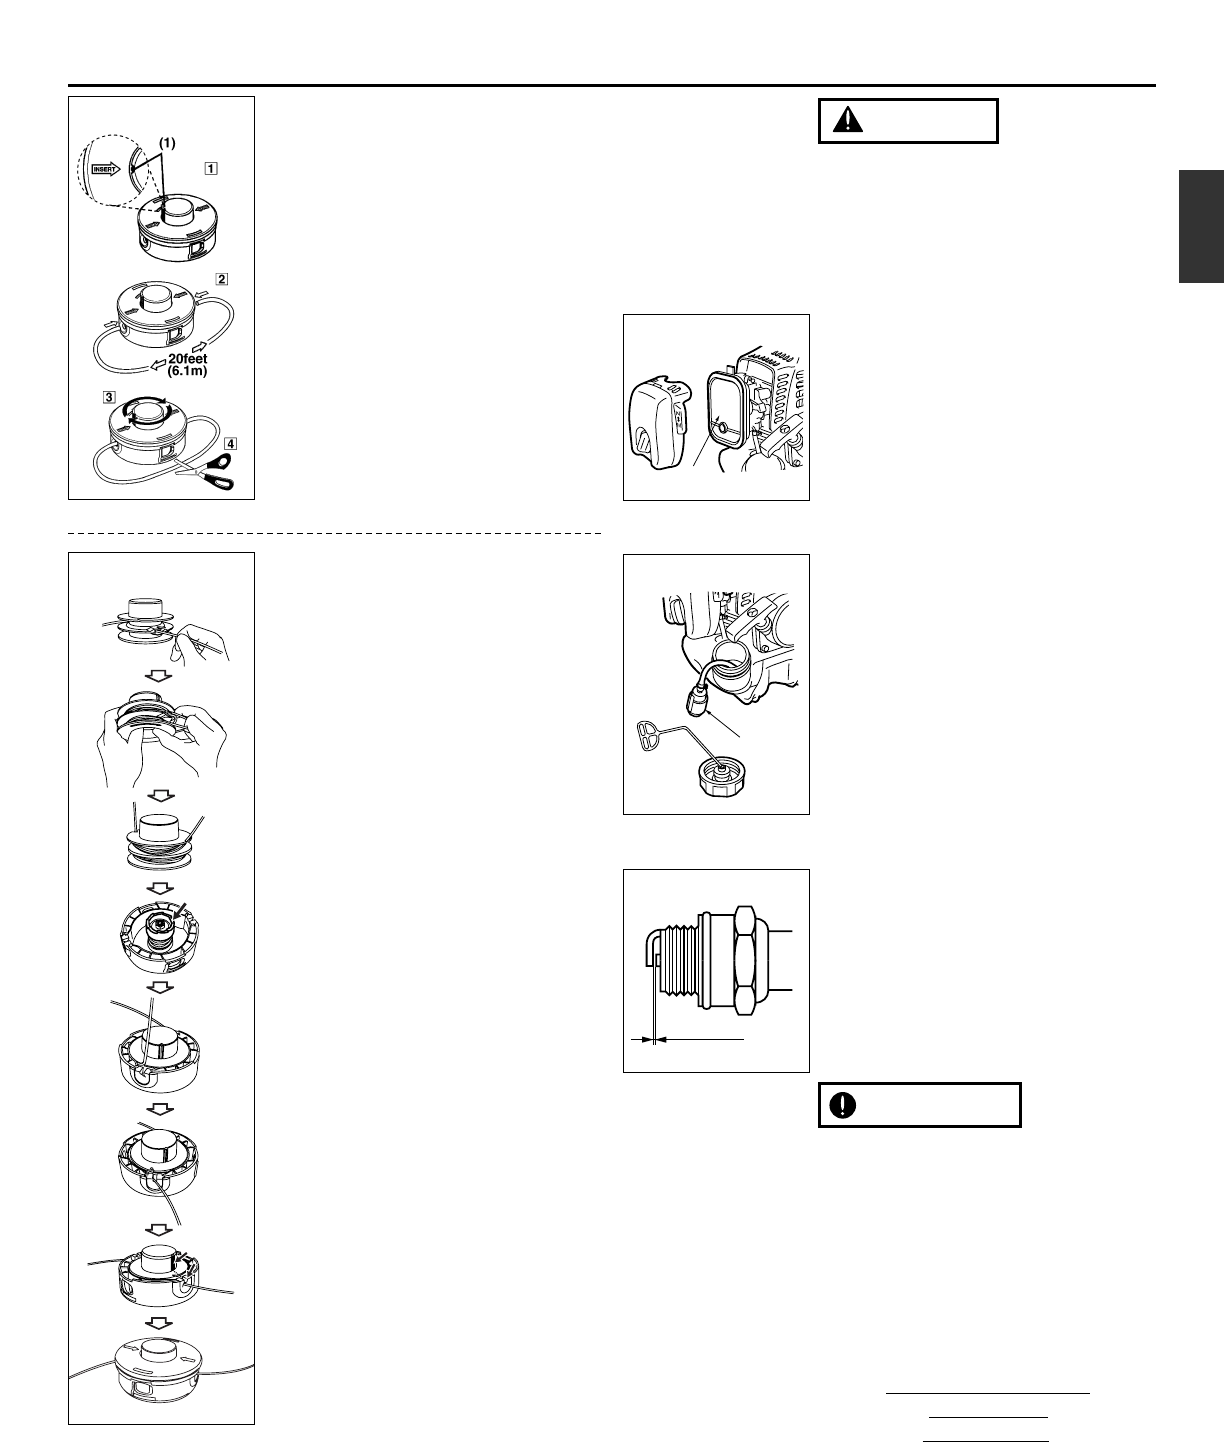
.038 in
1.00mm
MA4
(1)
MA2
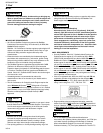
MA1-d
(1)
MA3
• Make sure that the engine has
stopped and is cool before
performing any service to the
machine. Contact with moving
cutting head or hot muffler may
result in a personal injury.
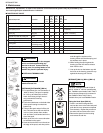
■ AIR FILTER
• The air filter, if clogged, will reduce the
engine performance. Check and clean
the filter element. If the element is
broken or clogged, replace with a new
one. (MA2)
(1) air filter
■ FUEL FILTER
• When the engine runs short of fuel
supply, check the fuel cap and the fuel
filter for blockage. (MA3)
(1) fuel filter
■ SPARK PLUG
• Starting failure and mis-firing are often
caused by a fouled spark plug. Clean
the spark plug and check that the plug
gap is in the correct range. For a
replacement plug, use the correct type
specified by RedMax. (MA4)
• REPLACEMENT PLUG IS A NGK
CMR7H-10.
• Note that using any spark plug other
than those designated may result in the
engine failing to operate properly or in
the engine becoming overheated and
damaged.
• To install the spark plug, first turn the
plug until it is finger tight, then tighten it
a quarter turn more with a socket
wrench.
TIGHTENING TORQUE:
87~104 in-lbs
(9.8~11.8 N.m.)
IMPORTANT
WARNING
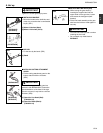
MA1-c
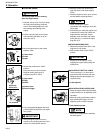
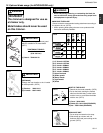
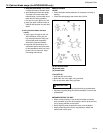
Twist and load installation (MA1-c)
1. Align notch on bump knob with either
insert arrow.
2. Insert the two ends of a 20 feet piece of
trimmer line into each eyelet. Pushing
line into the channel of the spool
approximately 2 inches.
3. Hold housing of trimmer head and turn
bump knob clockwise.
4. Cut remaining trimmer line to separate
into two pieces.
(1) Notch
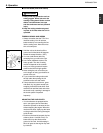
Manual installation (MA1-d)
1. Take a 20 foot length of .095 Cable
Twist line and cut in half and insert
each end of the line into both line
holding holes located in the center
separation rib. (Note: the line needs to
be pushed into each hole 2.5 inches or
55mm until it stops.)
2. Hold the spool opening toward you and
bump button away from you. Wind the
line in the direction or arrow on the
spool body, by placing your index finger
between the two strands and wind line
tightly and evenly in the clockwise
direction.
3. Stop when approximately 15-20cm (6-8
inches) of line remains and place the
ends of the line firmly in the notches in
the top ring of the spool.
4. Insert the spool over the drive cam
(white) with notches lining up with
aluminum line guide eyelets.
5. Pull each end of the line from the
holding notches and place the line
inside of the aluminum line guide
eyelets.
6. Align the locking tabs of the cover with
the locking holes in the head.
7. Push the cover down and make sure
the cover tabs snap into the locking
slots securely.