


This generator model is provided with both electric start
and recoil start capabilities. Avoid prolonged cranking, as it
can damage the engine.
The supplied charger is capable of 4A at 12 Volts when
plugged into a 120 Volt AC outlet receptacle. This can be
either from the generator output or from a standard wall outlet
receptacle. It can be used as a floating charger for constant
charging or as a bulk charger. The indicator status tells the
charge with either a Green (float) or Red (bulk) LED light.
Please see the supplied Specification for further information on
the charger.
The battery provided is a nominal 12 volt sealed
rechargeable lead-acid battery and can be operated in any
position without leakage. It complies with non-spillable battery
regulations. Its convenient size offers a 30% reduction over
conventional batteries.
Length = 7.14 inches, Width = 3.03 inches,
Height = 6.59 inches, Weight = 12.56 lbs
18AH Rating
UL Recognized
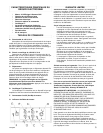
Battery Kit Parts List
Item Description Qty
A*Bolt, M5 x M122
B.*Nut 5MM2
C.*Washer Flat M52
* These are standard parts available at your local hardware
store.
Note: Brand New Generators are shipped with the Battery
Connections disconnected. The Positive and Negative
Terminals must be connected to the Battery before the
Electric Start Feature will work.
Initial Battery Connection - Refer to the Installation Instructions
Below.
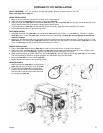
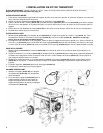
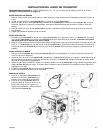
Battery Removal & Installation:
Removal: Remove the nut and bolt from the negative and
positive post, being careful not to short across the terminals.
(Shorting the terminals together can cause sparks, damage to
the battery or generator or even burns or explosions.)
Always abide by the safety warnings provided with the
battery. Remove the battery and re-cycle and dispose of
properly.
Installation:
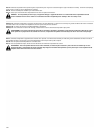
Hook up the new battery, or re-install the new battery, as
follows: Place the battery in the position provided. Connect
the Red 10 Gauge wire to the positive (+) terminal and the
Black 10 Gauge wire to the negative (-) terminal with the bolt,
nut, and washer provided. Make sure all connections are tight.
Your battery is now connected and ready for use. Turn the
start rocker switch to the on position and push the start button
to crank the engine.
Note: Be sure Oil has been added to the engine as
specified in the Owner's Manual.
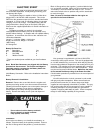
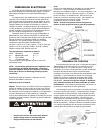
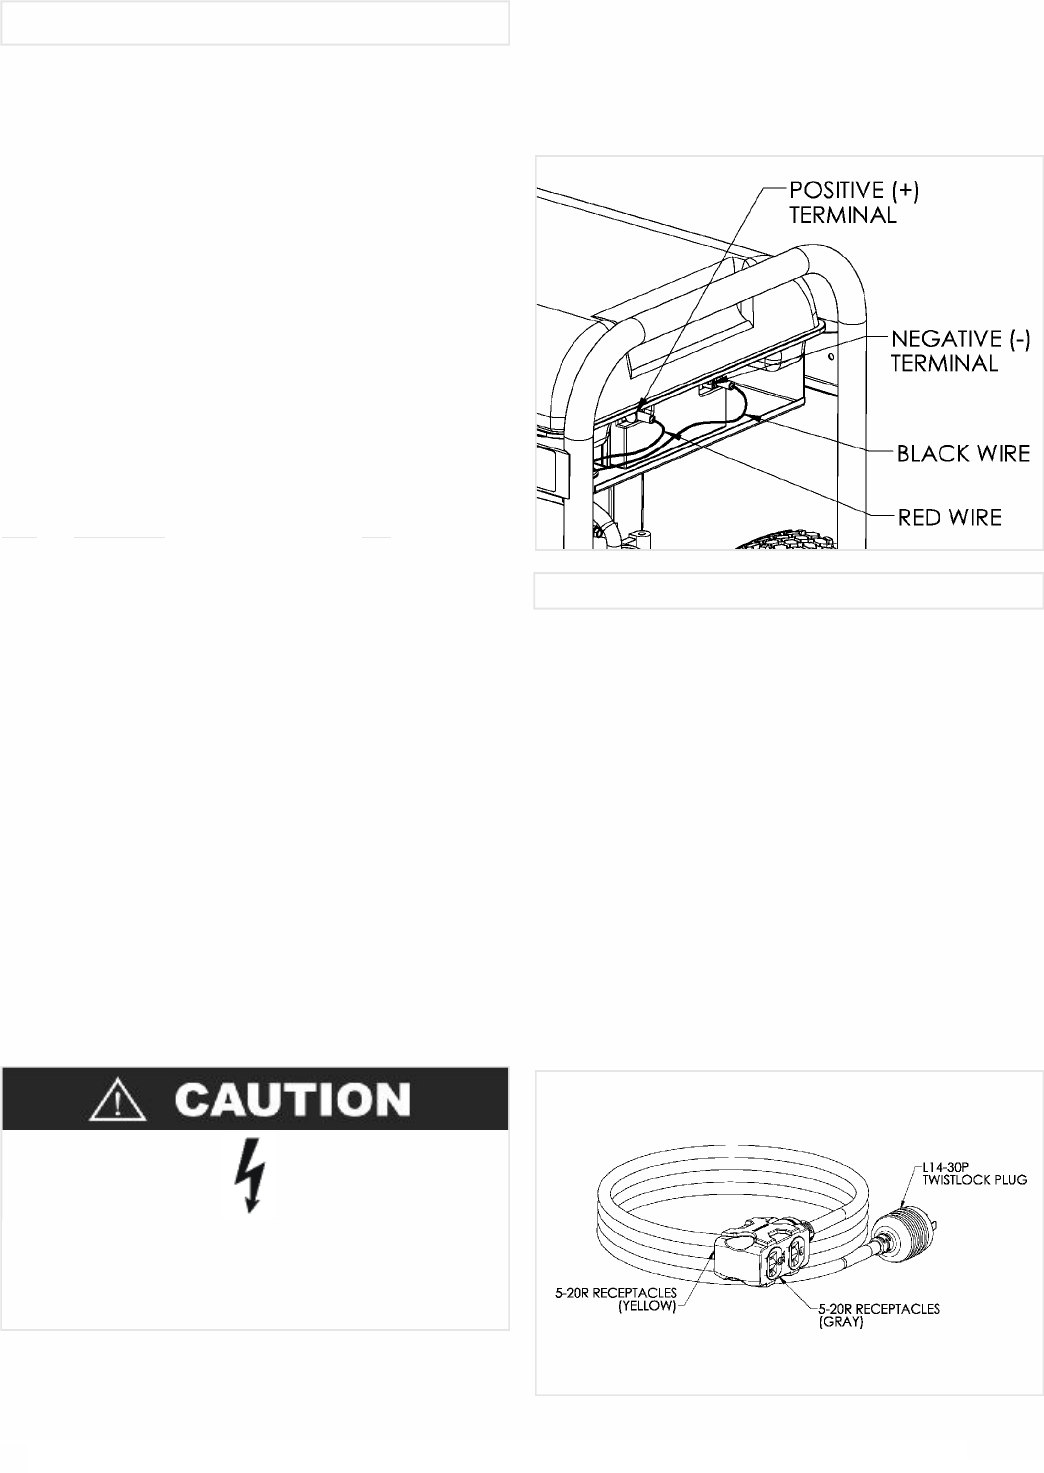
Your generator is supplied with a 25 foot 10 GA SJTW
4-conductor 105ºC power cord set. This cord is equipped with
an L14-30P twistlock Plug, on one end, which will plug directly
into the mating twistlock receptacle on the control panel of your
generator. The opposite end comes equipped with a special 4
circuit connector comprised of four 5-20R receptacles. These
may be used to power individual loads. Make sure the loads
do not exceed the 20 amp rating of the Power Cord Set.
Circuit breaker protection is provided for on the control panel of
your generator.
You will notice that the 4-circuit connector is color coded
with gray and yellow receptacles. When several loads are
powered at the same time, it is best to keep equal loads
supplied to each separately colored half, if possible. The gray
half and the yellow half of the connector are each capable of
sustaining 20 amps of current provided your generator is
capable of supplying 4800 watts of power. Check nameplate
ratings for total wattage capability of the generator.
ELECTRIC START
•Do not short-circuit the battery terminals.
•Do not charge in a sealed container.
•Keep sparks, flame away.
4
English
CORD SET