


14
INSPECT AND CLEAN UNIT AND
LABELS
S After each use, inspect complete unit for
looseor damagedparts. Clean theunit and
labels using adamp cloth with a milddeter-
gent.
S Wipe off unit with a clean dry cloth.
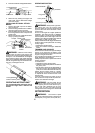
CLEAN AIR FILTER
A dirty air filter decreases engine perform-
ance and increases fuel consumption and
harmful emissions. Always clean after e very
5 hours of operation.
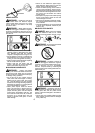
1. Cleanthe cover and the area around itto
keep dirt from falling into the carburetor
chamber when the cover is removed.
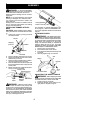
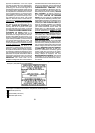
2. Loosen bolt with a5/16 inch (8 mm)socket
wrench. Removeairfilter coverand airfilter .
NOTE: To avoid creating a fire hazard or
producingharmful evaporative em issions,do
not clean filter in gasoline or other flammable
solvent.
3. Wash the filter in soap and water.
4. Allow filter to dry .
5. Replace parts.
Bolt
Air filter cover
Air filter
MUFFLER AND SPARK ARREST-
ING SCREEN
WARNING: The muf fler on this prod-
uct contains chemicals known to the State of
California to cause cancer.
As your unitis used, carbon deposits buildup
on the muf fler and spark arresting screen.
For normal homeowner use, however , the
mufflerand spark arresting screen will not re-
quire any service. After 50 hours of use, we
recommend that your muffler be serviced or
replaced by your authorized service dealer.
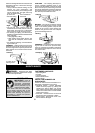
REPLACE SPARK PLUG
Replacethesparkplugeachyeartoens ure
the engine starts easier andr uns better.
Inspec ts parkplugever y25hoursofus age.
Cleanand/orreplaceasnecessary.Setspark
plug gap at 0.025 inch (0.6 mm). Ignition tim-
ing is fixed and nonadjustable.
NOTE: This spark igni tion system compli es
with the Canadian standard ICES--002.
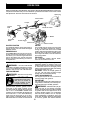
1. Twist, then pull off spark plug boot.
2. Remove spark plug from cylinder and
discard.
3. Replace with Champion RCJ-6Y spark
plug and tighten securely with a 3/4 inch
(19 mm) socket wrench.
4. Reinstall the spark plug boot.
SERVICE AND ADJUSTMENTS
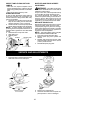
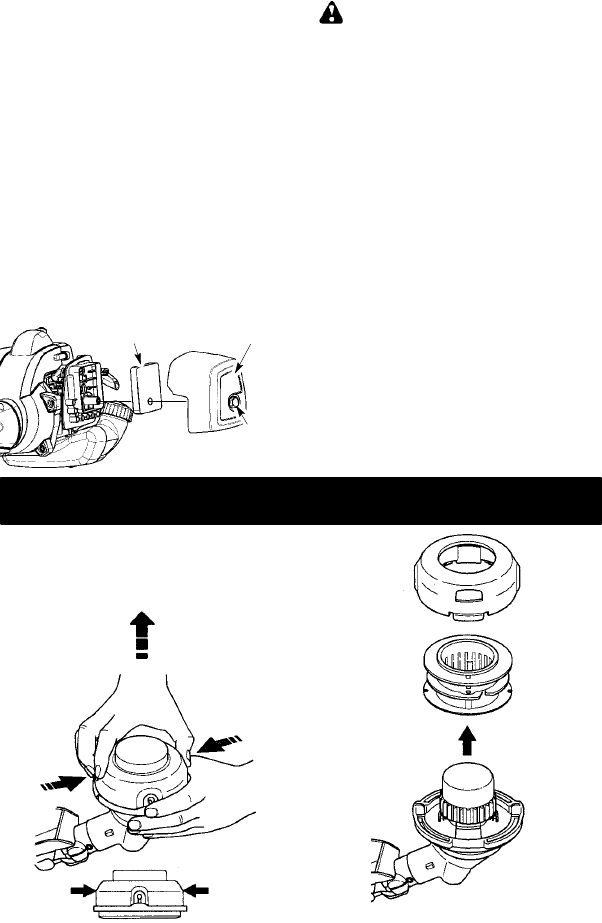
REPLACING THE LINE
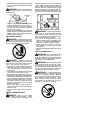
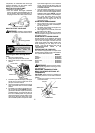
1. Press the tabs on the side of thetrimmer
head and remove cover and spool.
Tab
Tab
Cover
Spool
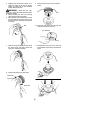
2. Remove any remaining line.
3. Clean dirt and debris from all parts. Re-
place spool if it is worn or damaged.