10
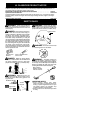
If the unit still doesn’t start, refer to
TROUBLESHOOTING TABLE or call
1-800-554-6723.
OPERATING THE COUPLER
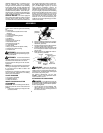
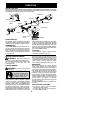
This model is equipped with a coupler which
enables optional attachments to be installed.
The optional attachments are:
MODEL:
Edger PPB1000E.....................
Cultivator PPB2000T..................
Blower PPB3000B....................
Pruner PP5000P....................
W ARNING:
Always stopunitanddis-
connect sparkplug beforeremoving orinstal-
ling attachments.
REMOVING TRIMMER ATTACH-
MENT (OR OTHER OPTIONAL
ATTACHMENTS)
CAUTION:
When removingor installing at-
tachments, place the unit on aflat surface for
stability.
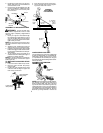
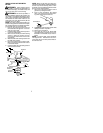
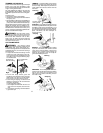
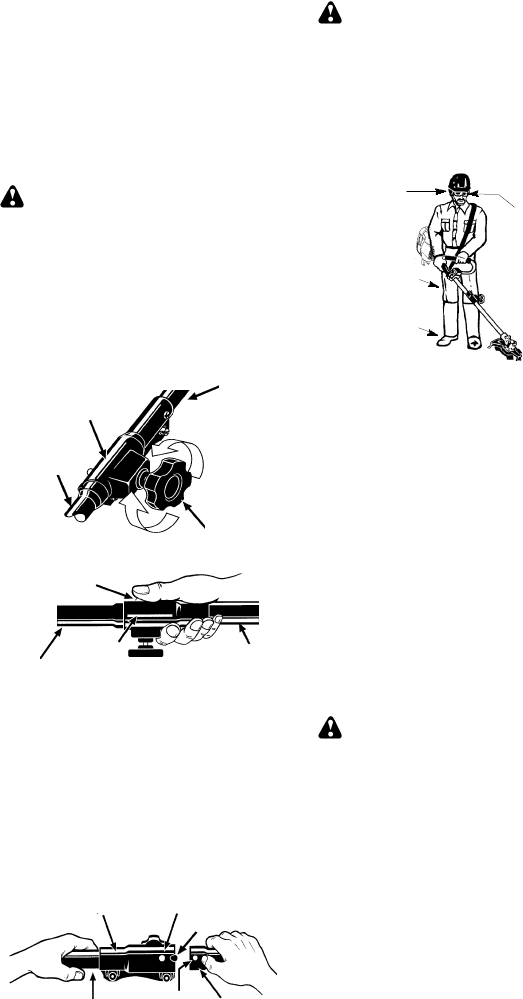
1. Loosen the coupler by turning the knob
counterclockwise.
Coupler
Knob
LOOSEN
TIGHTEN
Upper Shaft
Lower
Attachment
2. Press a nd hold the locking/release button.
Locking/Release
Button
Coupler
Upper Shaft
Lower Attachment
3. While securely holding the engine and
upper shaft, pull the attachment straight
out of the coupler.
INSTALLING OPTIONAL ATTACH-
MENTS
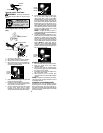
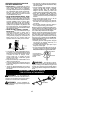
1. Remove the shaft cap from the attach-
ment (if present).
2. Position locking/release buttonofattach-
ment into guide recess of coupler.
3. Push theattachmentintothecoupleruntil
the locking/release button snaps into the
primary hole.
4. Beforeusingtheunit, tightentheknobse -
curely by turning clockwise.
Coupler Primary Hole
Upper
Shaft
Locking/
Release
Button
Attachment
Guide Recess
W ARNING:
Make sure the locking/
release button is locked in the primary hole
andthe knob is securely tightened beforeop-
erating the unit.
OPERATING INSTRUCTIONS
It is recommended that the engine not be
operated f or longer than 1 minute at full
throttle.
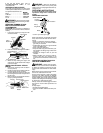
OPERATING POSITION
Boots
Heavy ,
Long Pants
Eye Protection
ALWA YS WEAR:
Cut from your left to your right.
Hearing
Protection
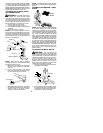
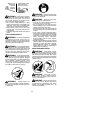
When operatingunit, clip shoulder strap onto
clamp, stand as shown and c heck for the fol-
lowing:
S
Wear eye protection and heavy clothing.
S
Extend y our left arm and hold handlebar
grip with your left hand.
S
Hold throttle grip with your right hand with
finger on throttle trigger.
S
Keep unit below waist level.
S
Keep shoulder strap pad centered on your
left shoulder and danger sign centered on
your back.
S
Maintain full weight of tool on your left
shoulder.
S
Without bending over, keep the blade or
trimmer head near and parallel to the
groundandnot crowdedinto material being
cut.
OPERATING INSTRUCTIONSFOR
USE WITH TRIMMER HEAD
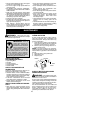
W ARNING:
Always wear eye protec-
tion. Never lean over th e trimmer head. Rocks
or debris can r icochet or be t hrown into eyes
and face and ca use blindness or other serious
in jur y.
Beforetrimming,bringenginetoaspeedsuffi-
cient to cut material to be trimmed.
Do not run the engine at a higher speed than
n ecessary. Th e cutt ing lin e will cut efficie ntly
when the engine is run at less tha n full throttle.
At lower speeds, there is less engine noise and
vibration. Th e cutting line will last long er andwill
b e less likely to “weld” on t o th e sp oo l.
Always release the throttle trigger and allow
the engine to return to idle speed when not
cutting.
To stop engine:
S
Release the throttle trigger.
S
Move the ON/OFF switch to the OFF posi-
tion.


