16
8. Pullguide bar forward until the chain
is s nug in the guide bar groove. En-
sure all drive links are in the bar
groove.
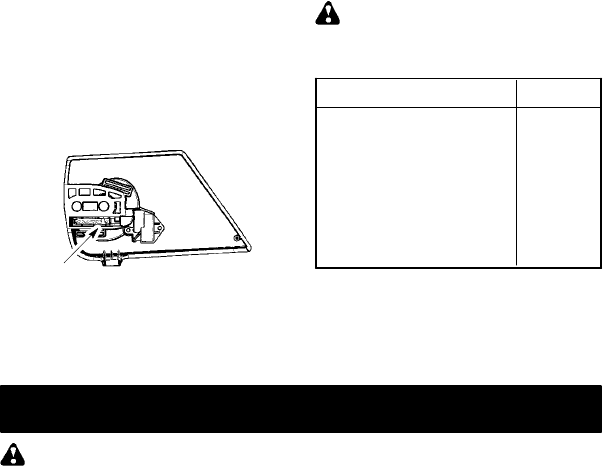
9. Install bar clamp. Be s ure adjusting
pin is in the adjusting pin hole in the
guide bar.
CAUTION : I t is very im po rt an t when i n s-
talling the bar clamp that the adjusting pin
aligns i nt o t headjusti ng pi n hole i n the bar.
Failure to install t he bar clamp correctly
may r esult in permanent damage to your
chain saw.
Back
view of
bar
clamp
Adjusting pin
10. Install bar knob; finger tighten only.
Do n ot tighten any further at this
point. Proceed to
CHAIN ADJUST-
MENT.
CHAIN ADJUSTMENT
See
CHECK CHA IN T ENS ION in the MAIN-
TENA NCE
section.
CUSTOMER SERVICEABLE PARTS
WARNING: Use of any other ac-
cessory or attachment might present a
risk of injury to the operator.
REPLACEMENT PART PART NO.
Oil Cap 530053072
Chain Catcher 530029850
Screw 530016269
File (5/32″ dia.) Twin Pak 9520 55085
Chain --18″ 952051338
Guide Bar -- 18″ 9520 44418
Bar & Chain Lubricant --1 qt. 952030203
Bar & Chain Lubricant --1 gal. 9520 30204
STORAGE
WARNING: Perform the following
steps after each use:
S Allow mot or t o cool before storing or
transporting.
S St ore chain sawand extensio ncord ina
well ventilated area
S St ore c ha in s aw wit h all guar ds i n place
and posit i on chain saw so t hat
any sharp object cannot accidentall y
cause inj ur y.
S Store chain saw unplugged, well out of
the reach of children.
SEASONAL STORAGE
Prepare your unit for storage at t he end of
the season or if it wil l not be used for 30
days or more.
If your chai n saw is to be st ored for a
peri od of time:
S Clean it t hor oughly before lengthy stor-
age.
S Stor e in a clean dry area.
S Lig htl y oi l exte rnal m etal su rf ace s and
guid e bar.
S Oil the chai n and wrap i t in heavy
paperorcloth.


