


6 Pelco Manual C1495M-B (10/03)
BLOWER KIT INSTALLATION
The following items are supplied:
Assembly, including blower and bracket.
Hardware to attach the blower, bracket, and PC board (24 VAC only) to the enclosure:
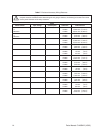
BKX4000 BKX4024 BKX6000/220
3/8-inch screws 2 2 2
Internal tooth lock washers 2 2 2
Nuts 0 0 2
Butt splices 2 2 2
Blower kits are partially assembled. If you are installing both heater and blower kits, see the
instructions in
Heater Kit and Blower Kit Installation
section. Do the following to install any
blower kit:
1. Disconnect all sources of power from the enclosure.
2. Remove the enclosure’s rear plate with a 5 mm Allen wrench.
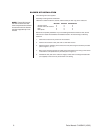
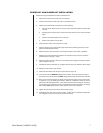
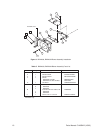
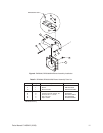
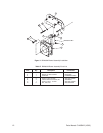
3. Attach the blower assembly to the enclosure’s rear plate using the hardware provided
(refer to Figure 5, 6, or 7).
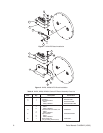
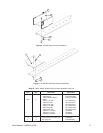
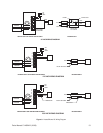
4. Bring power wires through the rear plate and connect the AC input wiring to the blower
wires with the butt splices that are provided (refer to Figure 8).
5. Reinstall the rear plate of the enclosure. Apply Loctite
®
222 low-strength thread locker
(not supplied) to the screws to prevent them from seizing.
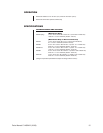
NOTE:
The 24 VAC and the
230 VAC versions use addi-
tional components that should
be secured to the fan bracket
with the integrated clip in the
bracket.