


Page
of 18
8
TOOL USE AND CARE
Do not use the splitter if the switch does not turn it on and off. Any power tool that cannot
be controlled with the switch is dangerous and must be repaired by an authorized service
representative.
Disconnect the power from tool and place the switch in the locked or off position before
making any adjustments, changing accessories, or storing power tools. Such preventive
safety measures reduce the risk of starting the power tool accidentally.
Store idle power tools out of the reach of children and do not allow persons unfamiliar
with the power tool or these instructions to operate the power tool. Power tools are
dangerous in the hands of untrained users.
Maintain power tools. Check for misalignment or binding of moving parts, breakage of parts
and any other condition that may affect the power tools operation. If damaged, have the power
tool repaired before use. Many accidents are caused by poorly maintained power tools.
Keep the blade sharp and clean. Properly maintained cutting tools with sharp cutting edges
are less likely to bind and are easier to control. Keep handles dry, clean, and free from oil and
grease.
Use only accessories that are recommended by the manufacturer for your model.
Accessories that may be suitable for one tool may create a risk of injury when used on another
tool.
Keep proper oil level.
Follow instructions for lubrication and oil change.
Keep cart dry, clean and free from oil and grease.
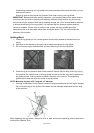
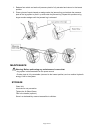
Sharpening the Wedge
Sharpen the splitting wedge as needed, using a fine-toothed file to remove any burrs, nicks or flat
spots from the wedge.
Transport
Disconnect the cord from power source before moving or repositioning the splitter.
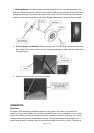
Log splitter is equipped with two 10" dia. wheels to make it easy to move around.
If you’d like to move your log splitter to different locations, secure the unit during transport to
prevent damage or injury. Always tighten the bleed screw to prevent oil spillage.
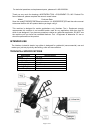
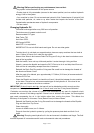
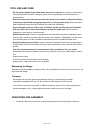
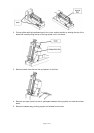
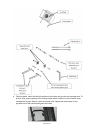
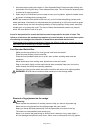
UNPACKING AND ASSEMBLY
1. Cut bands; remove cover and two inserts supporting the top and the bottom of the unit.