


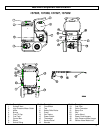
9
V.) Getting Started
IMPORTANT: Proper initial installation of equipment
will assure more satisfactory performance, longer
service life, and lower maintenance cost.
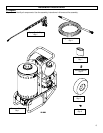
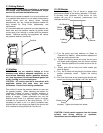
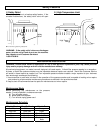
Make sure the pressure washer is on a level surface and
in a protected area where it is not readily influenced by
outside forces such as strong winds, freezing
temperatures, rain, etc. Locate the pressure washer for
easy access for filling fluids, adjustments, and
maintenance.
It is recommended that a partition be made between the
wash area and the pressure washer to prevent direct
nozzle spray from coming in contact with the pressure
washer. Moisture reaching the equipment will reduce
the pressure washer’s service life.
V.) Venting
DANGER: Do not run machine indoors or in an
enclosed area without adequate ventilation, or in
areas where flammable vapors, (gasoline, solvents,
etc.) may be present. Do not vent exhaust gases into
a wall, a ceiling, or a concealed space.
CAUTION: All venting must be in accordance with
applicable federal and state laws, and local
ordinances. Consult local heating contractors.
Poor draft will cause the pressure washer to soot and
not operate properly. When selecting the location for
installation, beware of poorly ventilated locations or
areas where exhaust fans may cause an insufficient
supply of oxygen. Proper combustion can only be
obtained when there is a sufficient supply of oxygen
available for the amount of fuel being burned. If it is
necessary to install a unit in a poorly ventilated area,
outside fresh air may have to be piped to the burner and
a fan installed to bring sufficient air into the unit
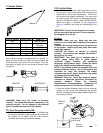
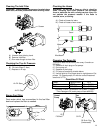
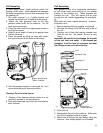
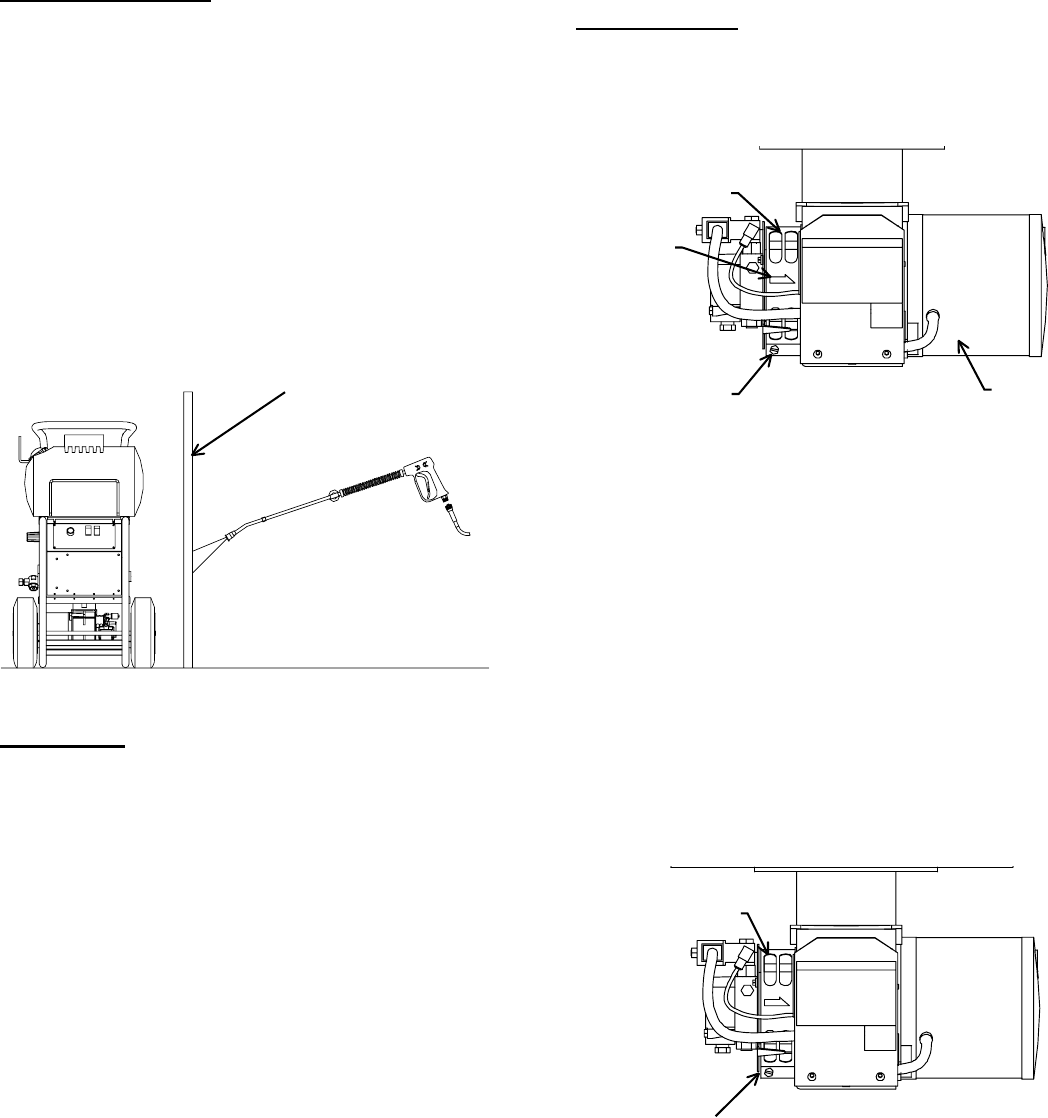
VI.) Oil Burner
Burner Air Adjustment: The oil burner is preset and
performance tested at the factory (elevation 1100 feet).
A one-time initial correction of the burner for your
location will pay off in economy, performance, and
extended service life.
1.) Turn the pump and heat switches on (Refer to
“Operation” for details). Have someone operate the
spray gun so the burner fires.
2.) Loosen the locking screw and close the air band
until black smoke appears from the burner exhaust
vent. Note the position of the white arrow on the air
band.
3.) Slowly open the air band until white smoke just
starts to appear.
4.) Turn the air band half way back to the black smoke
position previously noted. Tighten the locking
screw.
5.) Fine tune the burner air by loosening the shutter lock
screw and turning the shutter until the exhaust is
cleanest. Tighten the shutter lock screw.
CAUTION: If white smoke appears from the burner
exhaust vent during start-up or operation,
discontinue use and readjust air bands.
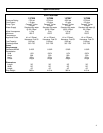
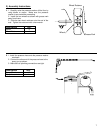
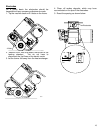
Partition
Locking
Screw
A
ir Band
Burner
White
Arrow
Shutter Lock
Screw
Shutte
r