


MAINTENANCE
21
F-040411L
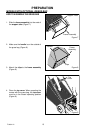
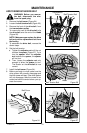
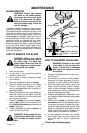
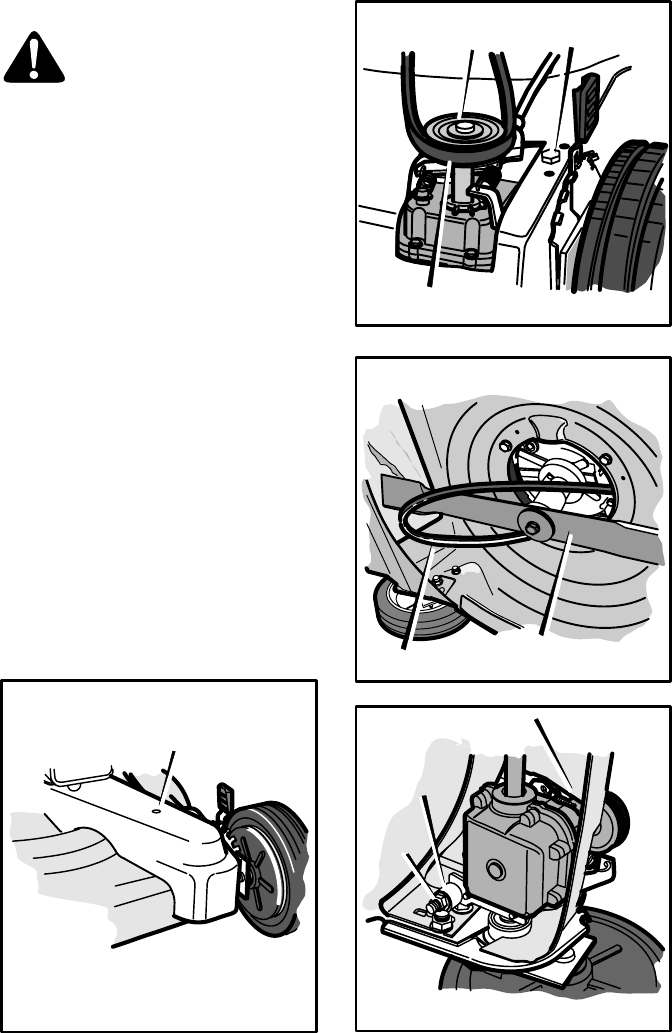
HOW TO REMOVE THE DRIVE BELT
WARNING: Before you remove
the belt, disconnect the wire
from the spark plug.
1. Remove the belt cover (Figure 24).
2. Loosen the belt tension bolt (Figure 25).
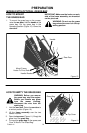
3. Remove the front of the drive belt from
the transmission pulley.
4. To remove the rear of the drive belt, slip
the drive belt over the end of the blade
(Figure 26).
NOTE: Make sure you replace the drive
belt only with a replacement belt from
the factory.
5. To assemble the drive belt, reverse the
above steps.
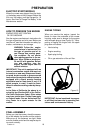
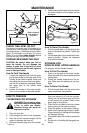
6. Set the belt tension.
a. Tighten the adjuster nut until the nut
touches the spacer (Figure 27). Try to
turn the spacer. When the adjuster
nut touches the spacer, the spacer
will not turn.
b. Then, loosen the adjuster nut only
enough to allow the spacer to turn.
The tension on the drive belt is now
correct.
7. Install the belt cover (Figure 24).
8. Before you begin to mow, make sure the
drive system will correctly disengage and
that the mower will stop. If the drive system
will not disengage, take the mower to an
authorized service center before you op-
erate the mower.
Figure 24
Belt Cover
Figure 25
Belt Tension Bolt
Transmission
Pulley
Drive Belt
Figure 26
Belt Tension Bolt
Blade
Figure 27
Adjuster
Nut
Spacer