


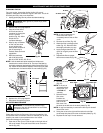
8
MAINTENANCE AND REPAIR INSTRUCTIONS
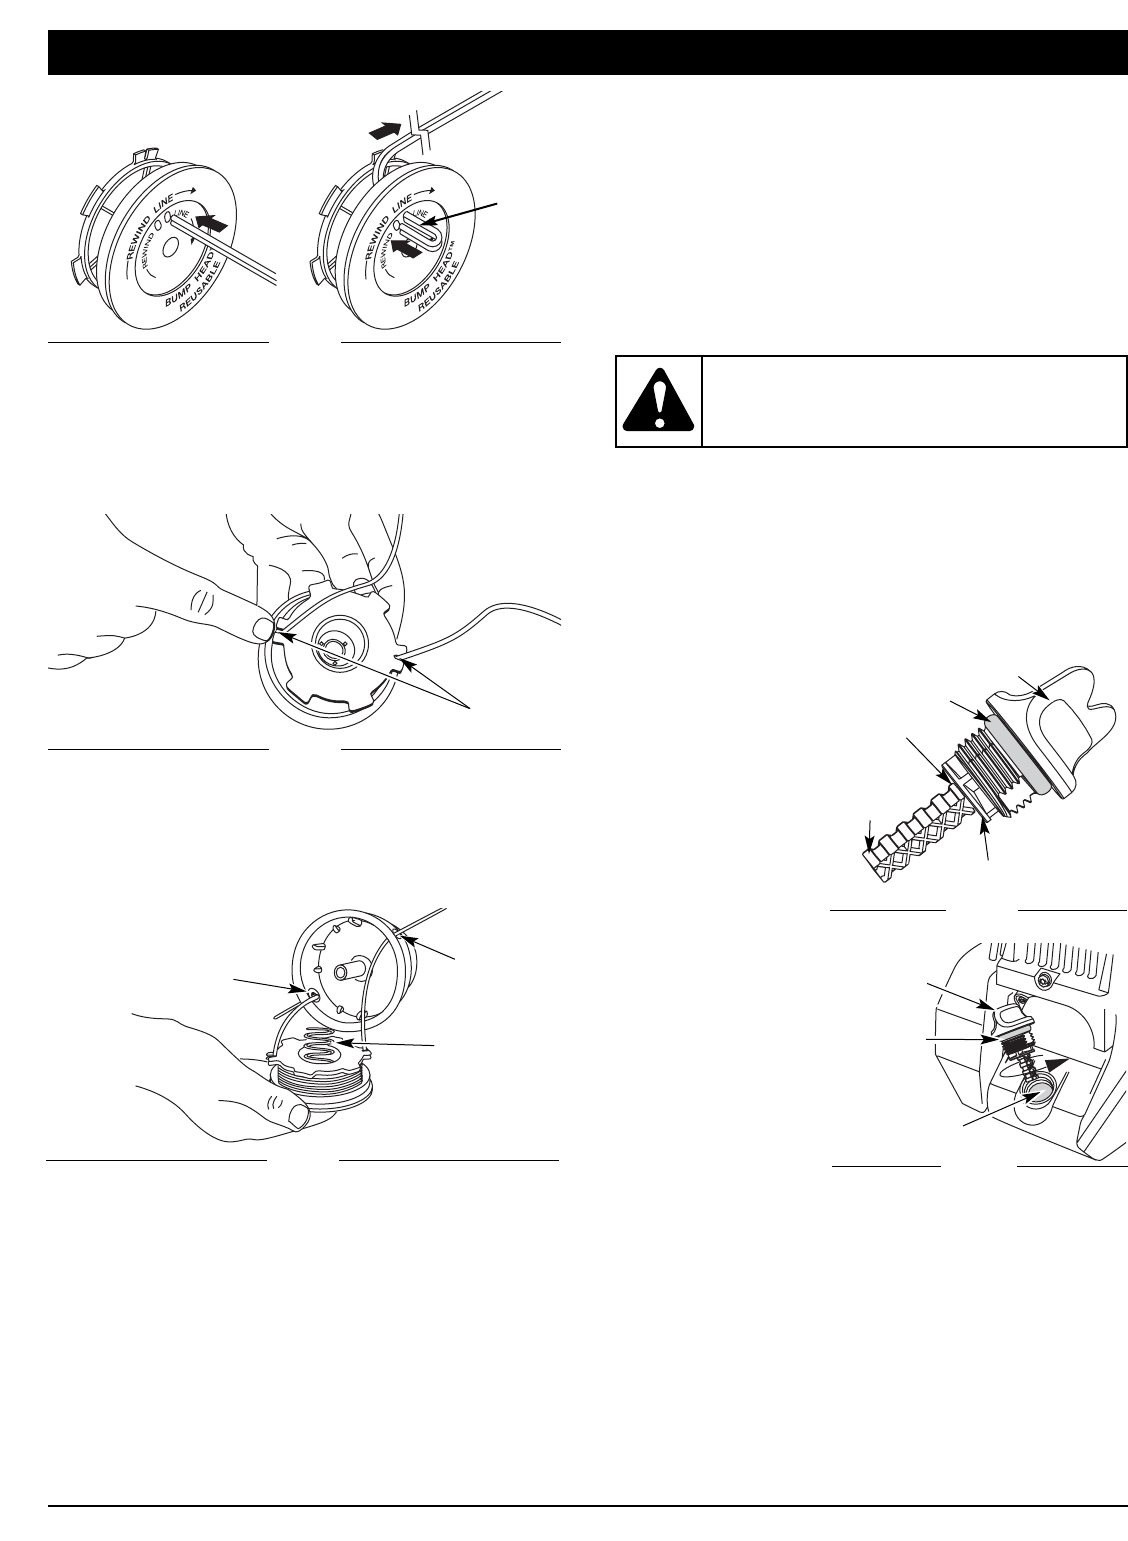
10. Before winding, split the line back about 6 inches.
11. Wind the line in tight even layers in the direction indicated
on the inner reel.
NOTE: Failure to wind the line in the direction indicated will cause
the cutting attachment to operate incorrectly.
12. Insert the ends of the line into the two holding slots (Fig. 20).
13. Insert the ends of the line through the eyelets in the outer
spool and place inner reel with spring inside the outer spool
(Fig. 21). Push the inner reel and outer spool together.
While holding the inner reel and outer spool, grasp the
ends and pull firmly to release the line from the holding
slots in the reel.
NOTE: The spring must be assembled on the inner reel before
reassembling the cutting attachment.
14. Hold the inner reel in place and install the bump knob by
turning clockwise. Tighten securely.
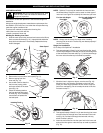
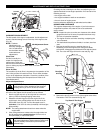
Installing a Prewound Wheel
1. Hold the outer spool with one hand and unscrew the bump
knob counterclockwise. Inspect the bolt inside the bump
knob to make sure it moves freely. Replace the bump knob if
damaged (Fig. 13).
2. Remove the old inner reel from the outer spool (Fig. 13).
3. Remove the spring from the old inner reel (Fig. 13).
4. Place the spring in the new inner reel.
Loop
Fig. 19
Holding Slots
Fig. 20
Spring
Eyelet
Eyelet
Fig. 21
NOTE: The spring must be assembled on the inner reel before
reassembling the cutting attachment.
5. Insert the ends of the line through the eyelets in the outer
spool (Fig. 21).
6. Place the new inner reel inside the outer spool. Push the inner
reel and outer spool together. While holding the inner reel and
outer spool, grasp the ends and pull firmly to release the line
from the holding slots in the spool.
7. Hold the inner reel in place and install the bump knob by
turning clockwise. Tighten securely.
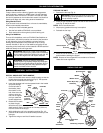
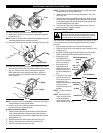
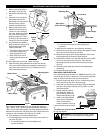
CHECKING THE OIL LEVEL
The importance of checking and maintaining the proper oil level
in the crankcase cannot be overemphasized. Check oil before
each use:
1. Stop the engine and allow oil to drain into the crankcase.
2. Place the unit on a flat, level surface to get a proper oil level
reading (Fig. 2).
3. Keep dirt, grass clippings and other debris out of the engine.
Clean the area around the dipstick before removing it.
4. Remove the oil fill
plug/dipstick and
wipe off oil. Reinsert it
all the way back in.
5. Remove the oil fill
plug/ dipstick and
check the oil level. Oil
should be up to the
top of the dipstick (Fig.
22).
6. If the level is low, add
a small amount of oil
to the oil fill hole and
recheck (Fig. 23).
Repeat this procedure
until the oil level
reaches the top of the
dipstick.
NOTE: Do not overfill the
unit.
NOTE: Make sure the O-
ring is in place on the
oil fill plug/dipstick
when checking and
changing the oil (Fig. 23).
CAUTION: To prevent extensive engine wear and
damage to the unit, always maintain the proper oil
level in the crankcase. Never operate the unit with
the oil level below the bottom of the dipstick.
Top of Dipstick
O-Ring
Oil Fill Plug/Dipstick
Fig. 22
Full
Add 1.4-
1.5 Oz.
(41-44 ml)
Fig. 23
Oil Fill Plug/
Dipstick
Oil Fill Hole
O-Ring