4
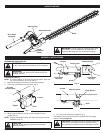
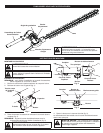
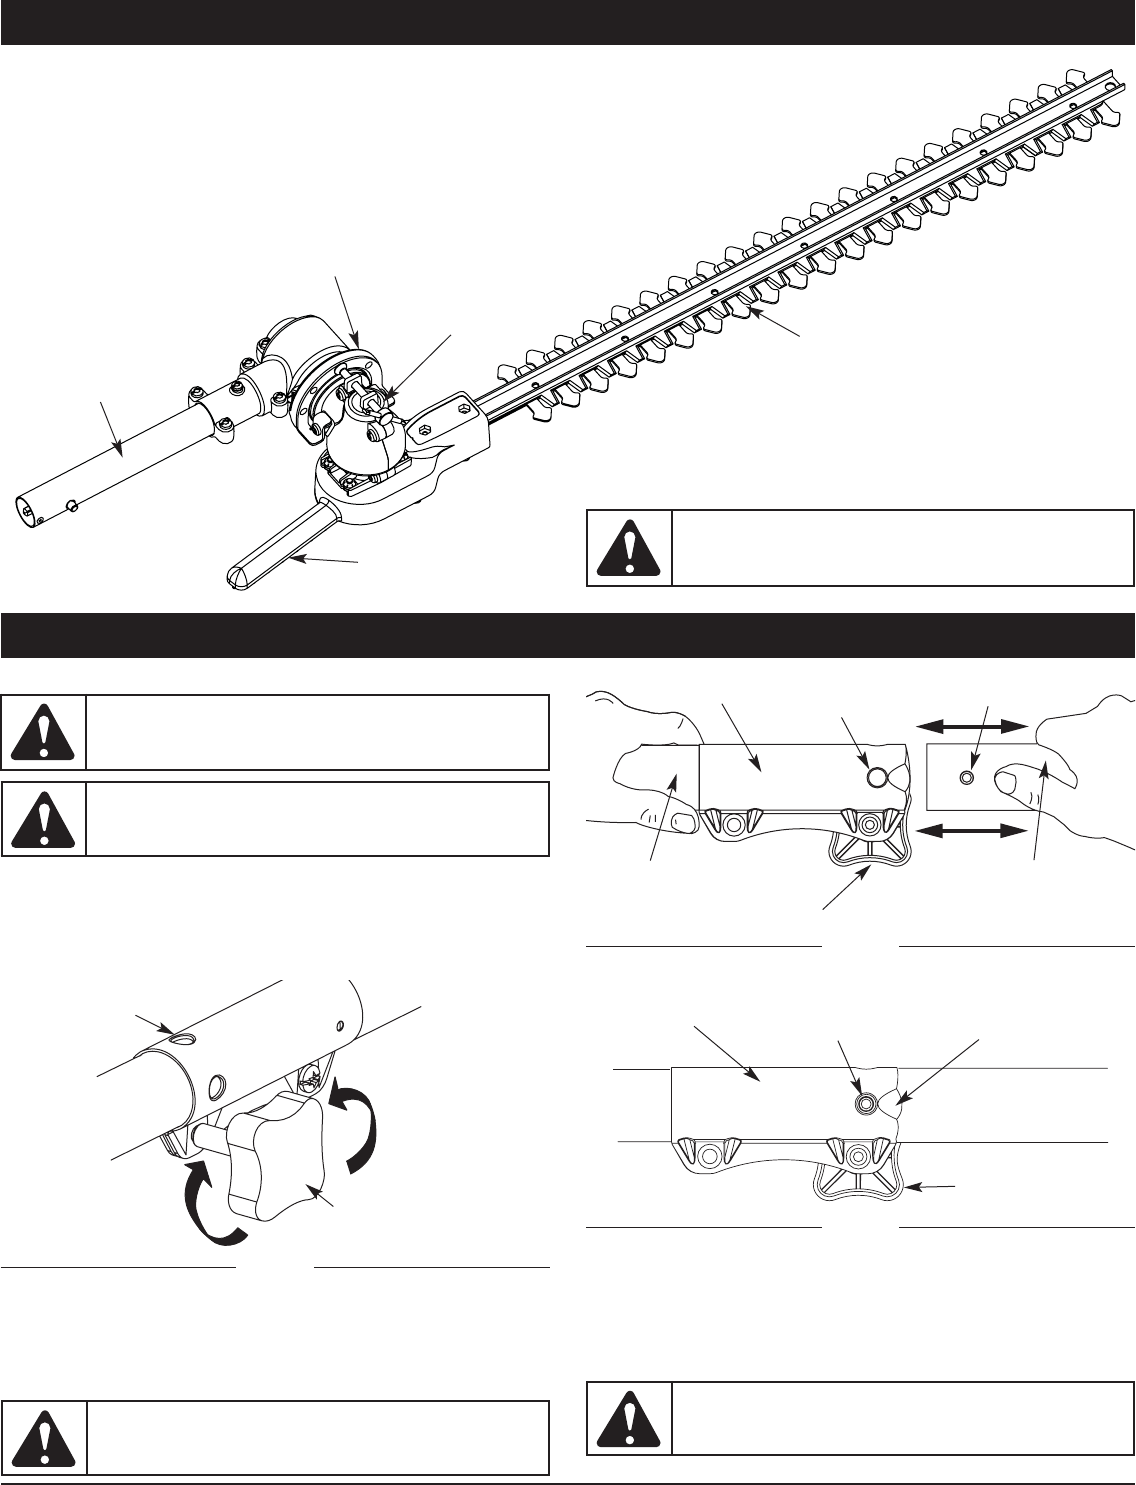
KNOW YOUR UNIT
ASSEMBLING THE COUPLER
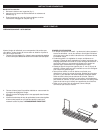
Installing the add-on:
NOTE: To make installing or removing the add-on easier, place the
unit on the ground or on a work bench.
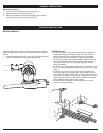
1. Remove the hanger from the top of the shaft housing.
2. Turn knob counterclockwise to loosen (Fig. 1).
3. While firmly holding the add-on, push it straight into the
coupler (Fig. 2).
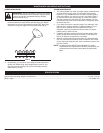
NOTE: Aligning the release button with the guide recess will help
installation (Fig. 3).
WARNING:
Read and understand operator’s manual
for unit to be used with this add-on prior to operation.
WARNING:
To avoid serious personal injury and
damage to the unit, shut unit off before removing or
installing add-ons.
Primary Hole
Upper Shaft
Housing
Coupler
Fig. 2
Lower Shaft
Housing
Release Button
Knob
4. Turn the knob clockwise to tighten (Fig. 1).
The hedge trimmer add-on should be installed with the release
button in the primary hole.
CAUTION:
Lock the release button in the primary
hole (Fig. 2) and securely tighten the knob before
operating this unit.
CAUTION:
The add-ons with the coupler system are
to be used in the primary hole only. Using the wrong
hole could lead to personal injury or damage to the unit.
Fig. 1
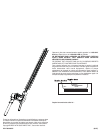
Knob
90˚ Edge
Trimming Hole
Adjustment Bolt
Drive Shaft
Assembly
Angle
Adjustment
Handle
Blade
Indexing Ring
Tighten
Loosen
ASSEMBLY INSTRUCTIONS
Coupler
Release Button
Guide Recess
Knob
Fig. 3
WARNING:
DO NOT USE an extension boom with
this product. It is not designed to be used with an
extension and using one may cause serious injury.


