


17
6
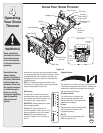
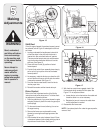
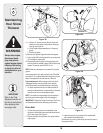
Maintaining
Your Snow
Thrower
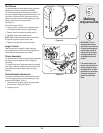
Replacing Belts
To remove and replace either the auger belt or the drive
belt, follow the steps below and then proceed to the
specific steps listed under respective sub-headings.
1. Disconnect the chute crank assembly at the discharge
chute end by removing the hairpin clip and the flat
washer. See Figure 19.
IMPORTANT
NEVER replace the
auger shear pins with
standard pins. Any
damage to the auger
gearbox or other com-
ponents, as a result of
doing so, will NOT be
covered by your snow
thrower’s warranty.
Check the condition
of both auger belt and
drive belt every 25
hours of snow thrower
operation. Replace if
either shows signs of
wear and tear.
Specifications are
subject to change
without notification or
obligation. Images may
not reflect your exact
model and are for refer-
ence purposes only.
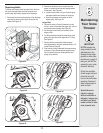
Figure 24
Figure 26
Figure 27
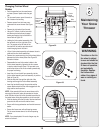
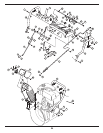
2. Remove the plastic belt cover, located near the
engine, by removing the three self-tapping screws
that secure it. See Figure 23.
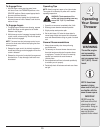
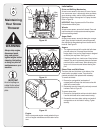
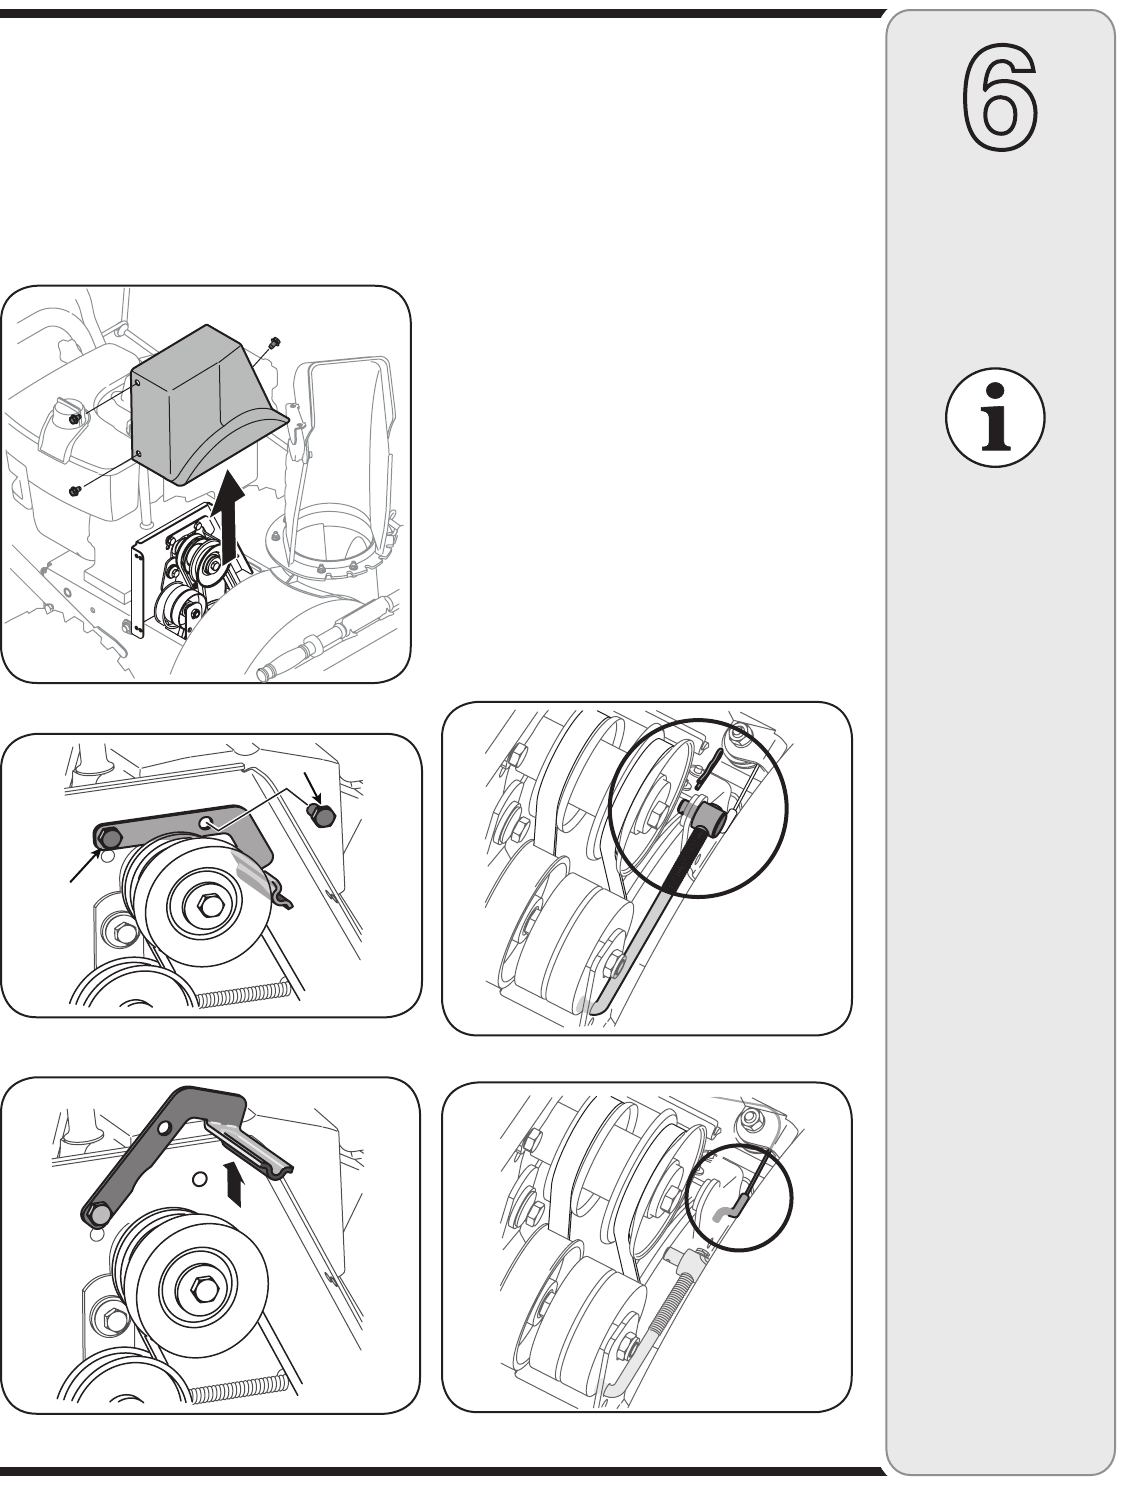
3. a. Loosen the bolt shown in Figure 24 securing the
belt keeper bracket and remove the other bolt.
b. Push the belt keeper and bracket up off the
engine pulley. See Figure 25.
Auger Belt
4. Remove the hairpin clip and flat washer from the
ferrule in order to disconnect the auger idler rod from
the brake bracket assembly. See Figure 26.
5. Slip the auger control belt (the front belt) off the
engine pulley.
6. Pull the brake bracket assembly towards the cable
guide roller and unhook the auger cable “Z” fitting.
See Figure 27.
7. Remove the hex screws which attach the auger
housing assembly to the frame assembly using a 1/2”
wrench. Refer to Figure 28.
8. Place a block of wood underneath the auger housing
as shown in Figure 29 and separate auger housing
from the frame by tilting the housing forward and
pulling up the handles.
Loosen
Remove
Figure 23
Figure 25