


4
WARNING: OVERFILLING OIL CRANKCASE
MAY CAUSE SERIOUS PERSONAL INJURY. Check
and maintain the proper oil level in the crank case; it
is important and cannot be overemphasized. Check
the oil before each use and change it as needed.
See Changing the Oil.
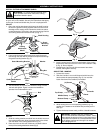
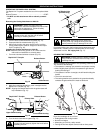
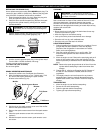
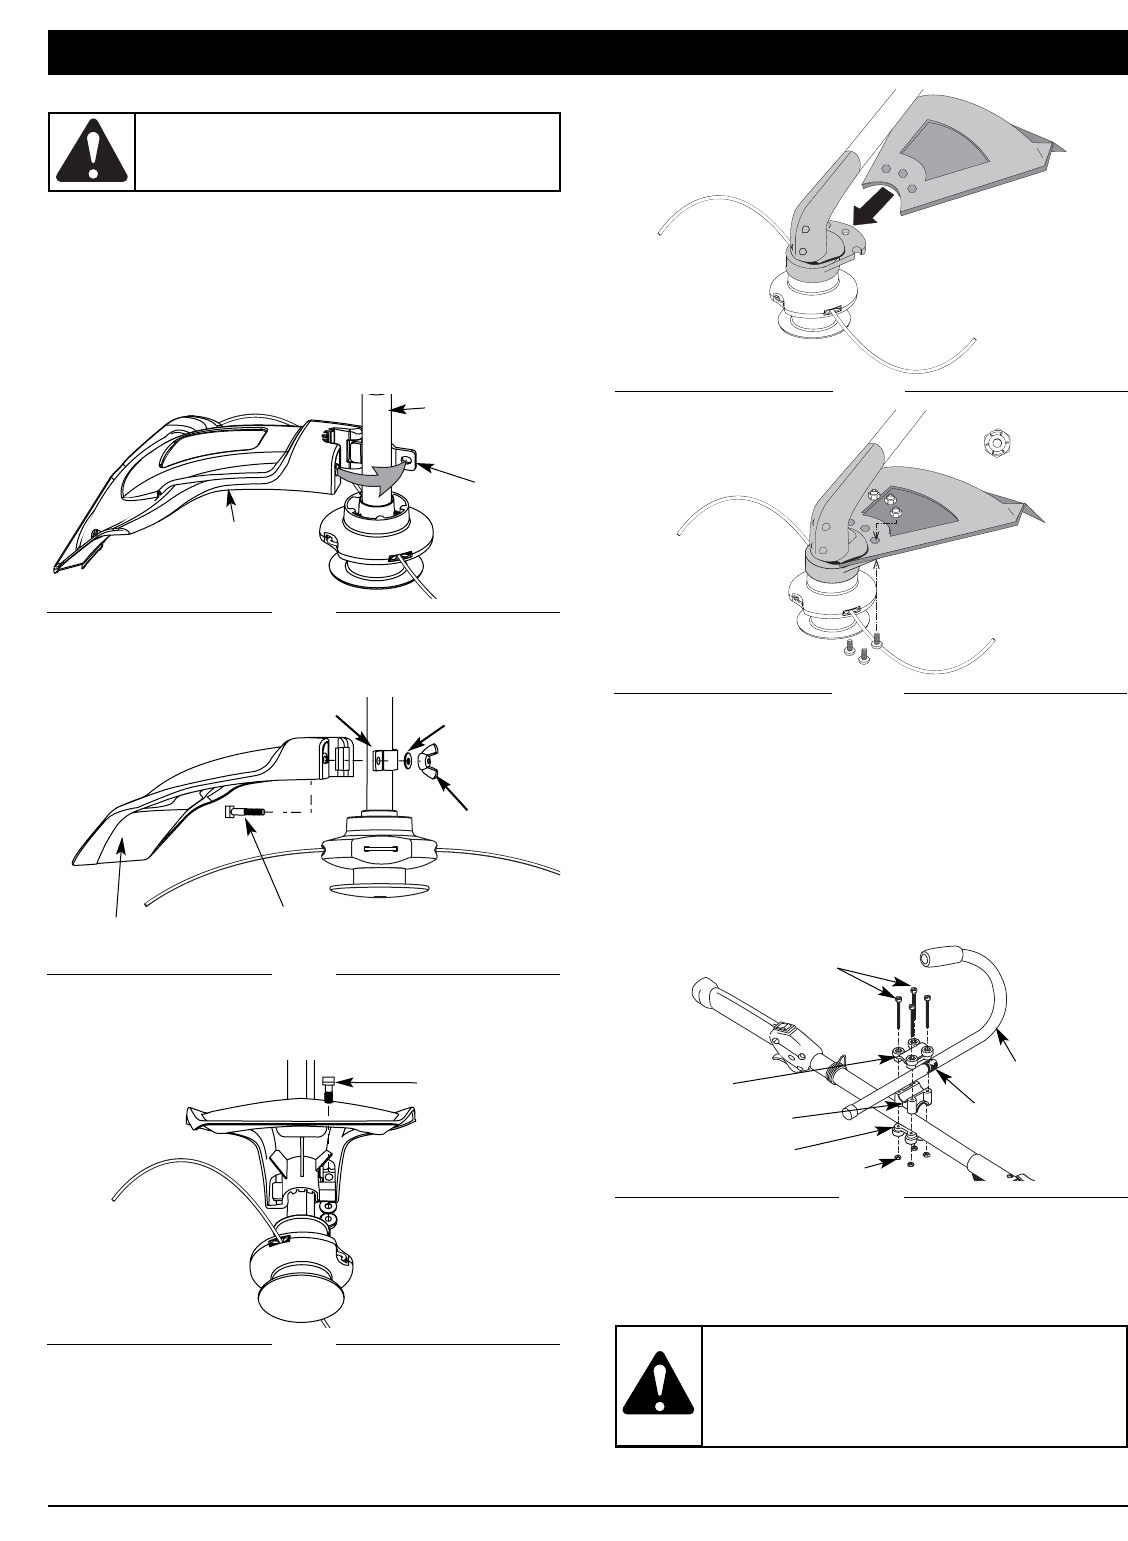
ADJUST THE J-HANDLE
1. Loosen the screws.
2.
Slide the J-handle in or out until the arrow/white line on the
decal touches the clamp assembly (Fig. 6). You must first
loosen the screws if the handle is pre-installed.
3. While holding the unit in the operating position (Fig. 18),
position the J-handle to the location that provides you the
best grip.
4. Tighten the clamp screws evenly, until the J-handle is secure.
ASSEMBLY INSTRUCTIONS
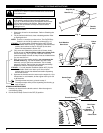
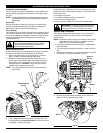
CC4175
1. Slide the cutting attachment shield into the shield mount on
the cutting attachment. Align the screw holes in the shield
with the holes in the cutting attachment (Fig. 4).
2. Place a hex lock nut into one of the three recessed holes on
the top of the cutting attachment shield (Fig 5).
Fig. 4
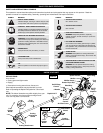
INSTALL CUTTING ATTACHMENT SHIELD
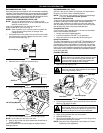
Use the following instructions if the cutting attachment shield
on your unit is not installed. Use only the instructions that apply
to the type of shaft and shield that your unit is equipped with.
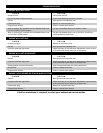
CC4125
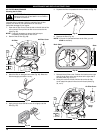
1. Place the cutting attachment shield onto the shaft housing.
Be sure the guard mounting bracket slides into the slot on
the edge of the cutting shield. Rotate the shield into place,
counterclockwise. The holes in the guard mounting bracket
and cutting attachment shield will line up (Fig. 1).
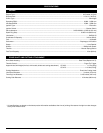
3. Put the washer on the bolt, then screw the wing nut onto
the bolt and tighten. Figure 3 shows the installation
process from underneath the unit.
Fig. 1
Fig. 2
Shaft Housing
Fig. 3
Bolt
Guard
Mounting
Bracket
Cutting
Attachment
Shield
Cutting Attachment
Shield
Square
Blot
Fig. 5
3. Install a screw into the hole from the bottom of the cutting
attachment shield and screw it into the nut installed in step
2 (Fig. 5). Do not tighten.
4. Repeat steps 2 and 3 until all three screws have been
started, then tighten securely.
WARNING: To prevent serious personal injury,
never operate the trimmer without the cutting
attachment shield in place.
Wing Nut
Washer
Guard Mounting Bracket
Fig. 6
Decal
(4) Screws
Top Clamp
J-Handle
Middle Clamp
Bottom Clamp
Nuts
2. From inside the cutting attachment shield, push the square
bolt through the hole until the threaded end protrudes through
the guard mounting bracket (Fig. 2).