


8
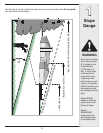
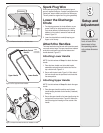
The blade control
cable is attached to the
engine from the factory.
You will need to attach
the free end of the cable
to the upper handle.
3
Setup and
Adjustment
IMPORTANT:
This unit is shipped
without gasoline or
oil in the engine. Fill
up gasoline and oil
as instructed in the
accompanying engine
manual BEFORE
operating your mower.
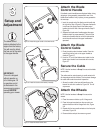
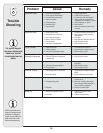
Attach the Blade
Control Handle
If the blade control handle became displaced either during
shipping or during assembly, reassemble it now. If the
blade control handle is firmly in place, you may proceed to
the next step.
1. Insert the curved end of the blade control handle into
the right hole, Step A Figure 3-6. Squeeze the handle
in and insert the straight end of the blade control
handle into the left hole of the upper handle, Step B
Figure 3-6.
2. Squeeze the blade control handle against the upper
handle to check for proper assembly. The hole in the
blade control handle must be on the left side and the
control handle must touch the upper handle when
squeezed.
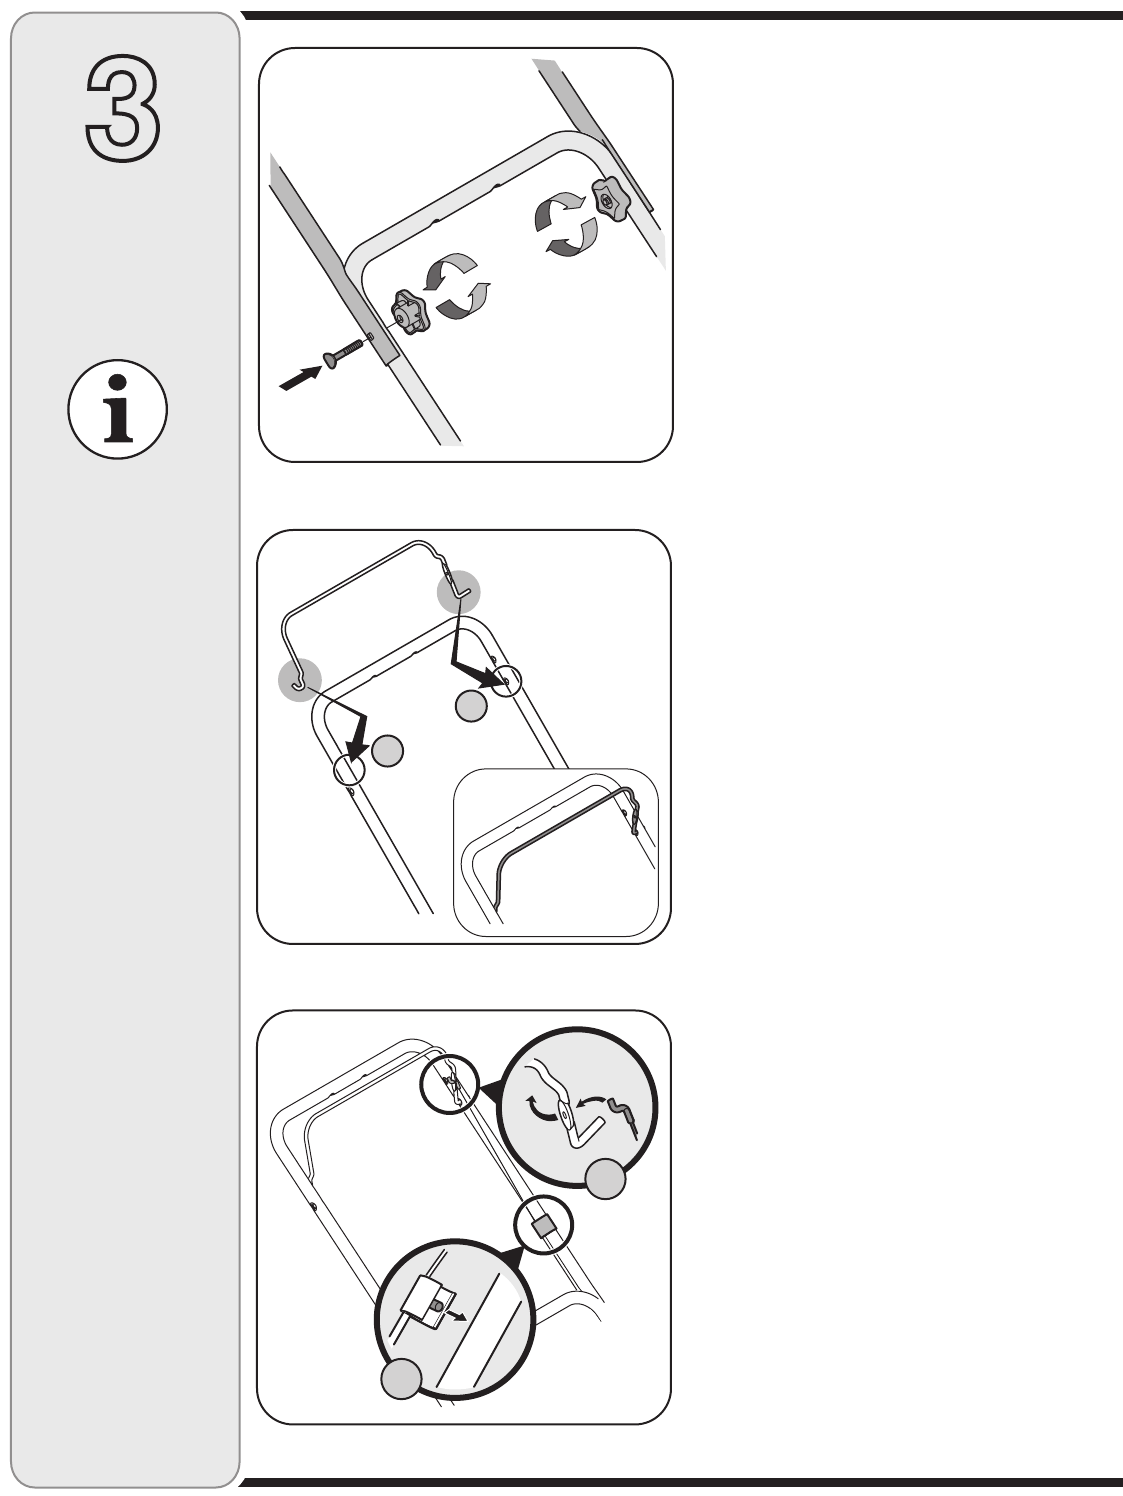
Attach the Blade
Control Cable
1. Route the cable under the lower handle. Press the
snap fitting into the hole on the upper handle as
shown in Figure 3-7.
2. Hook the “Z” end of the blade control cable into the
blade control handle from the outside to the inside,
Figure 3-7.
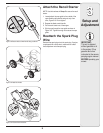
Secure the Cable
NOTE: Use the hardware in Group 3 to secure the blade
control cable.
The cable must be routed properly to avoid contact with
all sharp edges and hot surfaces. Such contacts damage
the cable and render the controls inoperative.
1. Secure the cable to the lower left handle near the
base of the unit with a cable tie, Figure 3-8. Trim off
any excess.
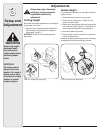
Attach the Wheels
NOTE: Use the hardware in Group 4 to secure the
wheels.
1. Place the mower on blocks up off of the ground.
2. Place the larger two wheels on the rear pivot arm
axles and secure with the flanged lock nuts, Figure
3-9.
3. Repeat with the two smaller wheels on the front pivot
arm axles, Figure 3-9.
4. Remove blocks and put the mower on ground.
Curved End
Straight End
A
B
Figure 3-6: Install the blade control handle (if needed).
1
2
Figure 3-7: Attach the blade control cable.
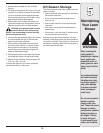
Figure 3-5: Attach the upper handle to the lower handle.