98
OPERATION
WARNING!
To reduce the risk of injury, wear
safety goggles or glasses with
side shields. Unplug the tool be-
fore changing accessories or
making adjustments.
WARNING!
TOOL ASSEMBLY
To reduce the risk of injury,
always unplug tool before attach-
ing or removing accessories
or making adjustments. Use only
specifically recommended acces-
sories. Others may be hazardous.
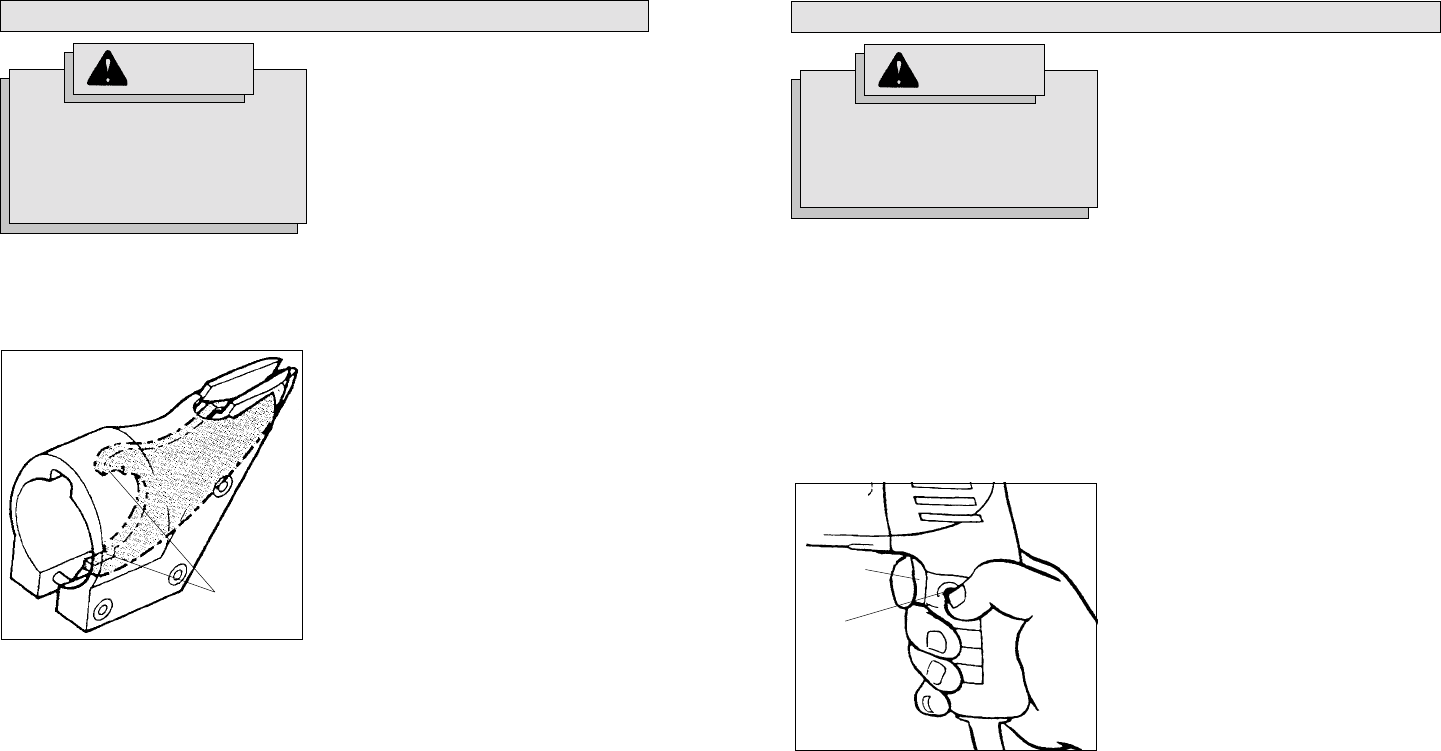
Applying Lubricant (Fig. 1)
Before assembling, apply a small amount
of MILWAUKEE type "E" grease to the
flats in the U-shaped area of the center
blade (Fig. 1).
Attaching the Shear Head to the
Power Unit
1. Remove the cardboard tube from the
spindle of the power unit.
2. Place the small washer and the large
washer on the spindle (see "Functional
Description").
3. Insert the eccentric bushing into the
bearing and then onto the spindle and
tighten.
4. Place the shear head assembly on the
gear case collar of the power unit.
5. Align the shear head and power unit to
the desired angle.
6. Tighten the three cap screws with the
wrench provided. Be sure the screws
are securely tightened before using the
tool.
7. To remove, loosen the cap screws and
firmly pull the shear head forward,
twisting slightly.
Starting, Stopping, and Controlling
Speed
1. To start the tool, pull the trigger.
2. To vary the cutting speed, increase or
decrease pressure on the trigger. The
further the trigger is pulled, the greater
the speed.
3. To stop the tool, release the trigger.
Locking the Trigger (Fig. 2)
The lock button holds the trigger in the ON
position for continuous full speed use.
1. To lock the trigger, hold in the lock but-
ton while pulling the trigger. Then, re-
lease the trigger.
2. To unlock the trigger, pull the trigger
and release, the lock button will pop
out.
Trigger
Lock
button
Fig. 2
Flats
Fig. 1
Preparing the Material
Always lubricate the material to be cut.
Use standard machine oil on steel and min-
eral spirits for aluminum.
Cutting
When cutting, hold the tool so that the blades
are in firm contact with the material for the
fastest cutting. Apply even pressure. Too
much pressure will tend to jam the tool or
cause a rough cut.
