comfortable. Should pain or discomfort
result, discontinue use and consult your
physician.
• Don’t add bath oil etc into it as it may hold
back the bubble function.
WARNING
If the power cord is damaged, it must be
replaced by the manufacturer in order to avoid
a hazard.
How to Use Your Foot Spa
• Ensure that the appliance is unplugged
before filling it with water.
• Insert the plug into a wall socket and switch
on.
• Sit down and place your feet in the spa.
• Turn the function dial to indicate the mas-
sage of your choice and obtain the following
functions:
0--Off
1—Vibration& Infrared
2—Bubble &Keep warming
3-- Bubble & Vibration & Infrared & Keep warm-
ing
Enjoy the deep-penetrating massage while
moving your feet forward and backward over
the reflex zone. The bulgy point is designed
according to the point of foot, can active the
cells and eliminate your fatigue. Also you can
massage on the roller massager. Choose each
function massage as you like.
To Empty
First, turn the control dial to the ‘OFF’ position,
then unplug the appliance. Tip the appliance
allowing the water to spill out along the drain
spout. Never pour water over the control dial.
Maintenance
To Clean
Unplug the appliance and allow it to cool be-
fore undertaking any cleaning task. Clean the
appliance with a soft, damp cloth.
• Never allow water or any other liquid to
come into contact with the control dial.
• After cleaning, wipe surfaces the appliance
with a dry cloth.
• Never use abrasives, detergents or cleaning
agents.
• Periodically straighten the power cord if it
becomes twisted.
To Store
Unplug the appliance from the wall socket and
allow it to cool completely before storing.
• Store the appliance in its box or in a clean,
dry place.
• To avoid breakage, do not wrap the power
cord around the appliance.
• Do not hang the appliance by its power cord.
• This appliance is designed for household
use only.
Technical data : 230V 50HZ 60W
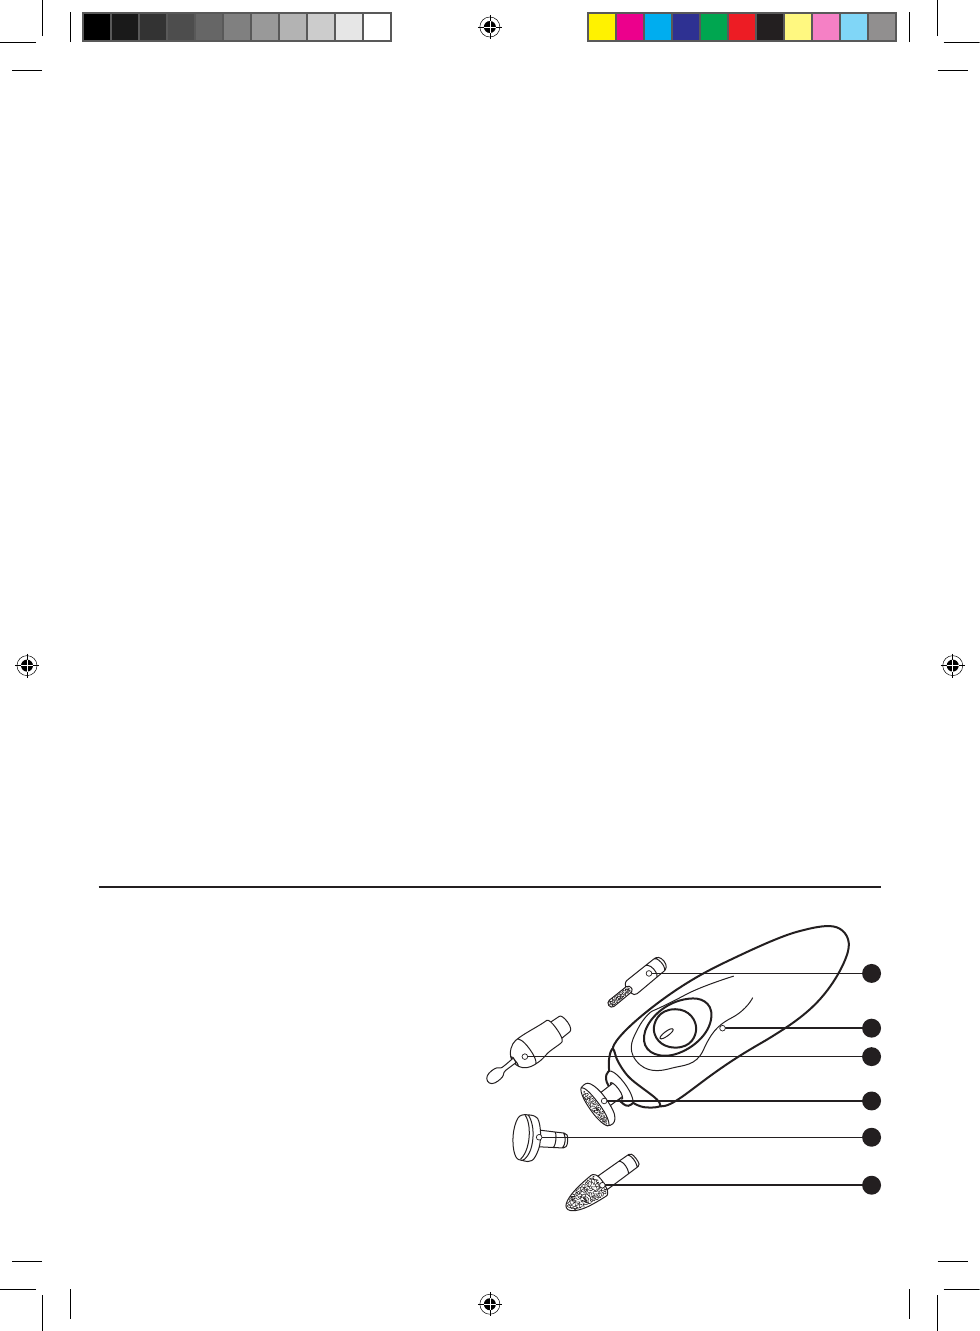
Manicure/pedicure set
Components:
1. Appliance
2. Disc to file and shorten nails
3. Polishing disc
4. Precision head
5. Wide head for manicures
6. Slim polishing (and callus removal) head
How to use the appliance
•Insert the batteries into the specific compart-
ment, taking care to position the polarities as
shown (2 x 1.5V AA- Batteries not included)
•The manicure/pedicure set is now ready for
use.
•Attach the desired accessory (depending
1
6
4
5
3
2
46001_IM.indd 3 2013/07/15 12:35:52 PM


