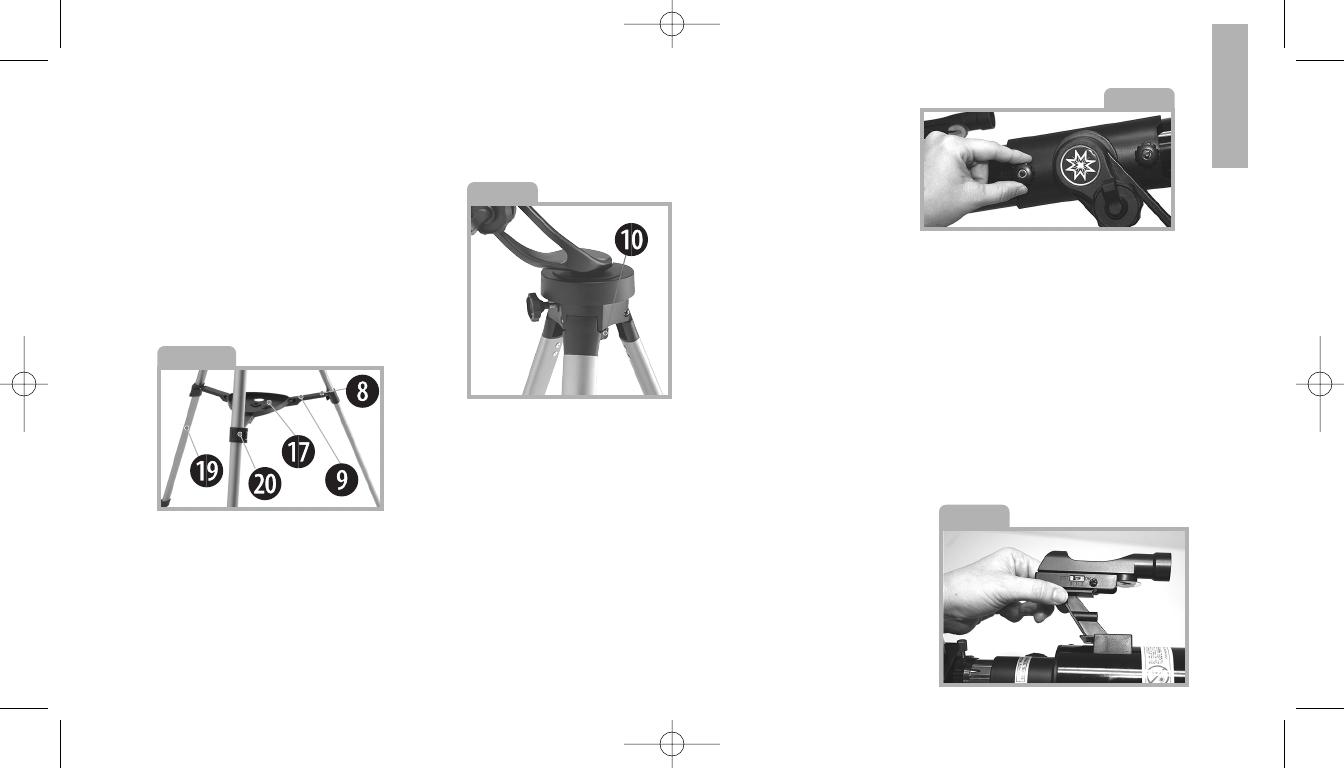
ASSEMBLE YOUR TRIPOD
The tripod is the basic support for your
telescope. Adjust the height of the tripod so
that you can view comfortably.
1. Unlock the leg lock (20).
2. Slide the leg in or out to the desired
length.
3. Tighten the leg lock to secure the leg
in place.
4. Repeat for the other two legs.
5. Next, spread the legs out evenly apart.
ATTACH THE ACCESSORY TRAY
The tray (17) helps stabilize the tripod and
is also a convenient holder of eyepiece and
other Meade accessories, such as the
Barlow lens.
1. Place the accessory tray over the center
hub of the leg brace supports.
2. Rotate the tray, until the corners of the
tray "click" into place.
ATTACH THE MOUNT TO THE TRIPOD
1. Slide the center
post of the mount into
the center hole on top
of the tripod.
2. Tighten the lock
knob (10) underneath
the top of the tripod
to firm feel. Notice
that the lock knob is
already attached to
the tripod.
ATTACH THE OPTICAL TUBE TO THE MOUNT
The optical tube gathers distant light which
is focused in the eyepiece.
1. Remove the two lock knobs from the
optical tube. (Fig. 3)
2. Slide the two bolts through the holes in
the mounting bracket.
3. Thread a lock knob onto each of the
mounting screws and tighten to a
firm feel.
ATTACH THE RED DOT VIEWFINDER
It can be difficult locating objects in the
sky using the eyepiece. The red dot
viewfinder has a red dot "bullseye" to help
you more easily locate and line up with a
celestial target.
Slide the red dot viewfinder into the
mounting bracket until it clicks into place.
N
N
o
o
t
t
e
e
that the red dot viewfinder has a quick
release control. To detach from the bracket,
press the bracket quick release button and
slide the bracket out.
3
Inset B
Fig. 3
Fig. 4
Fig. 2
Telestar RB-60.qxd 4/11/06 2:04 PM Page 5


