


30
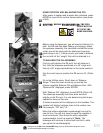
Looking at or near the
Sun
will cause
irreversible
damage to your eye. Do not point this telescope at or near the
Sun. Do not look through the telescope as it is moving.
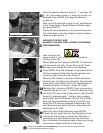
Follow these steps for collimation of the optical system:
The only adjustments possible, or necessary, on the MAX-ACF models is performed
with the AutoStar handbox.No adjustment screws are necessary (or provided), as with
traditional telescopes. A high-powered eyepiece, such as a 9mm eyepiece, or a 9mm
eyepiece with a 2x barlow, is required for collimation. A good rule of thumb to follow is
to select the highest power eyepiece you will use with your telescope, and double it (a
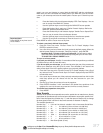
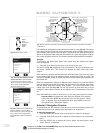
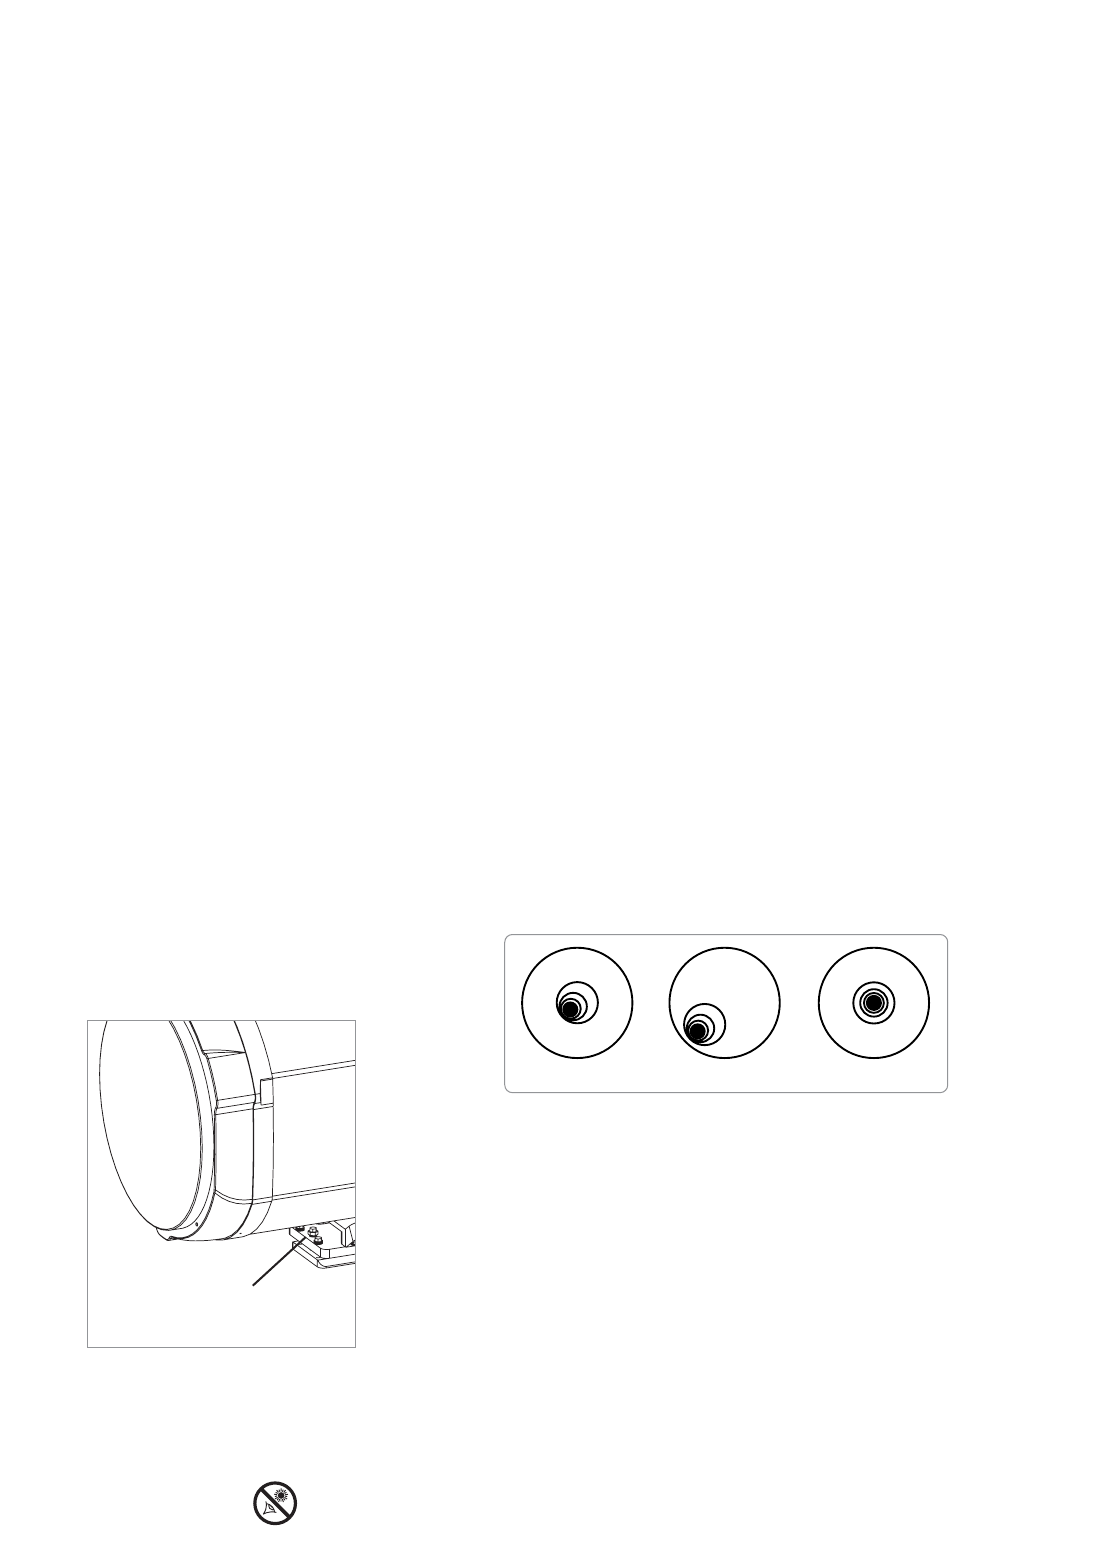
2x barlow is ideal for doubling). See Fig. 42a below, to see images of an aligned and
misaligned image.
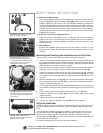
a. Select the “Collimation” option in the Setup/Telescope menu. Once this option is
selected, you will be able to use Autostar’s Arrow keys to adjust the image of the
star you have selected.
b. While looking through the eyepiece, Use Autostar II's Arrow keys at the slowest
slew speed, begin to move the defocused center ring so that the rings become
more concentric. You will most likely need to press more than one Arrow key.
c. You will notice that the star image will move across the field of view of the eye-
piece. If while using the Arrow key, the defocused star image moves out of the
eyepiece field, press MODE to temporarily leave the collimation menu.
d. When you have left the “Collimation” menu, use the Arrow keys to bring the image
back to the center of the eyepiece field.
e. Press ENTER to select the “Collimation” option again.
f. Use the Arrow keys to continue to adjust the image until it becomes concentric. If
the image moves out of the eyepiece field, perform steps c through e as many
times as necessary.
g. Carefully examine the concentricity of the diffraction rings. Always double check
the image in the center of the field of the eyepiece. The star point should appear
as a small central dot (commonly referred to as an “Airy disc”) with a diffraction
ring surrounding it. You now have the best alignment of the optics possible with
this telescope.
Set Default and Restore Default Options: The factory has collimated your telescope
and saved the settings in the Restore Default option. You may retain this setting and
recall it if the telescope needs collimation. Or you may overwrite this setting using the
Set Default option after performing precise collimation and recall it again when need-
ed with the Restore Default option.
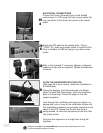
Align (Squaring) the OTA: If you are using a non-MAX-ACF telescope or if you have
changed your MAX-ACF collimation or mounting significantly from the factory defaults,
you must align the OTA. When you select this menu, Autostar will ask you to center
two stars in the telescope that are on opposite sides of the sky.
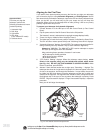
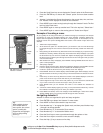
Once you have centered them, the telescope will slew back to the first star. You will
then be asked to center the star using the OTA align bolt. These are two bolts, with
one in the center of the other. Using a 9/16 flat wrench, loosen the center bolt and hold
this one so it doesn't move. Then place 13/16 open ended or combination spanner
wrenches on the outer bolt. Turn the outer bolt until the star is centered in the vertical
direction (perpendicular to the plane of the saddle). Note: The vertical direction is
when the 90° diagonal is positioned as shown in image #30 on page 22. The OTA
alignment bolt will only move the OTA in this direction. The horizontal direction cannot
be adjusted using the alignment bolts and is compensated for during the electronic
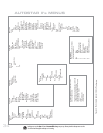
Fig. 42a: Defocused star images. Misaligned (1, 2), Aligned (3).
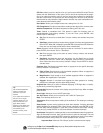
Fig. 42b: The OTA align bolt.
Misaligned (1, 2), Aligned (3).
12 3
OTA Alignment
Bolts