


8
D
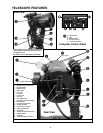
. Auxiliary (AUX) Port (2)
:
Pro
vides connection for the SmartFinder LNT module,
and also current and future Meade accessories, such as the Meade Accessory Port
Module
. See
OPTIONAL ACCESSORIES, page 43.
E.
12v Power Connector
:
Provides connection so that the telescope assembly may
be powered from either a 12v DC auto cigarette light plug or from a standard
115v AC home outlet using optionally available 25' power cords.
ƹ AutoStar: See page 9 for a description of AutoStar’s features.
ƺ Dust Co
ver
:
Gently pry the dust cover from the front lens of the telescope.
NO
TE:
The dust co
ver should be replaced after each observing session and the
power turned off to the telescope. Verify that any dew that might have collected
during the observing session has evaporated prior to replacing the dust cover.
ƻ Battery Compartments: Insert four (user-supplied) C-cell batteries in each compartment
(eight batteries total).
Ƽ SmartFinder: Provides an easier way to sight on objects than the main telescope’s
eyepiece which has a narrow field of view. To assemble, see the SmartFinder addendum
sheet that is included with the manual.
ƽ SmartFinder Alignment Screws: Adjust these screws to align the SmartFinder. See
pages 14 and 15 for more information.
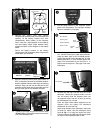
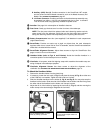
ƾ Handbox Holder (refer to Figs. A and B below): Holds the AutoStar handbox in a
convenient position on the telescope fork arm handles.
ƿ Viewfinder: A low-power, wide-field sighting scope with crosshairs that enable easy cen-
tering of objects in the telescope eyepiece.
2! Viewfinder Alignment Screws: Use these screws to adjust the alignment of the
viewfinder. See
ALIGNING THE SMARTFINDER AND THE VIEWFINDER, page 15.
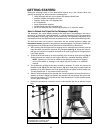
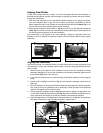
To Attach the Handbox Holder:
1. Remove the handbox holder from the plastic bag.
2. If necessary, loosen the lock knob (
1, Fig. A) and place the clamp (2, Fig. A) on either one
of the LX90 fork arm handles. Tighten the lock knob to a firm feel.
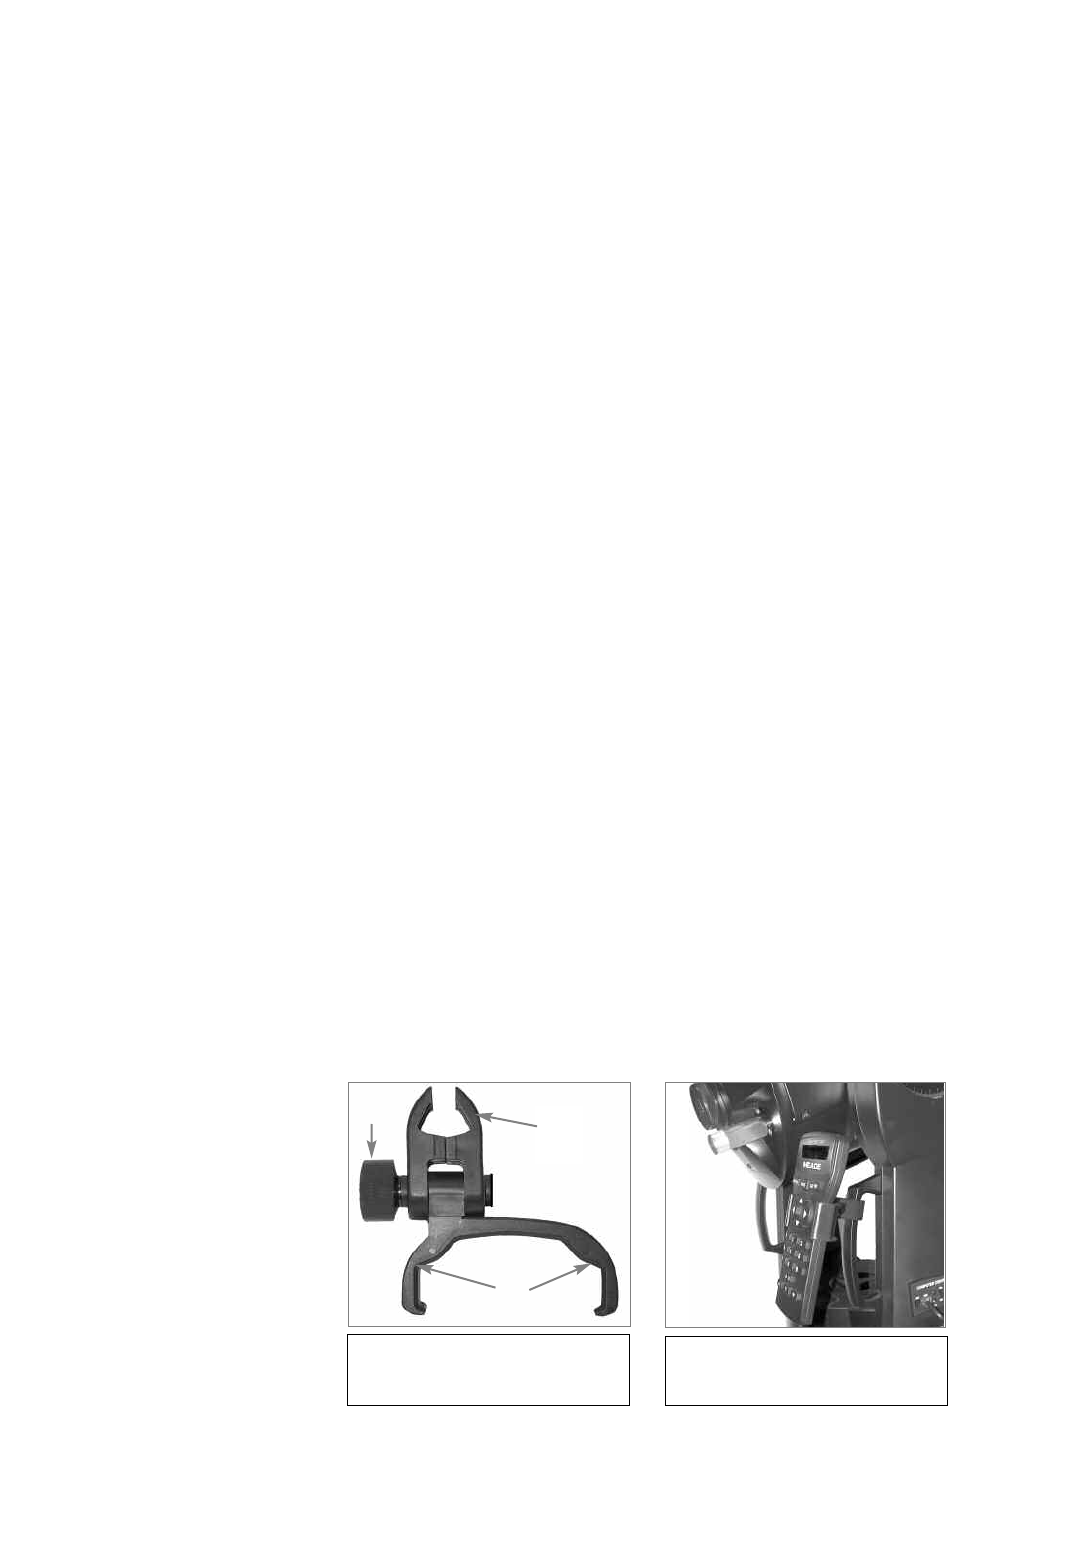
3 Slide the AutoStar handbox into the holder (
3, Fig. A and Fig B).You may also snap the
handbox into the holder: Slide one side of the handbox into the holder and then firmly press
the other side of the handbox into the holder until it snaps in place.
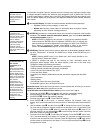
4.
Adjust the tilt of of the holder by loosening the lock knob (
1,
Fig. A
) and then mo
ving the
holder clamp to the desired angle. Retighten the lock knob.
Fig. B: Handbox holder attached to
fork arm handle. Adjust holder to a
con
venient tilt.
Fig. A: Handbox holder: (1) Lock
knob;
(2) Clamp;
(3) Holder.
ᕡ
ᕢ
ᕣ