


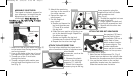

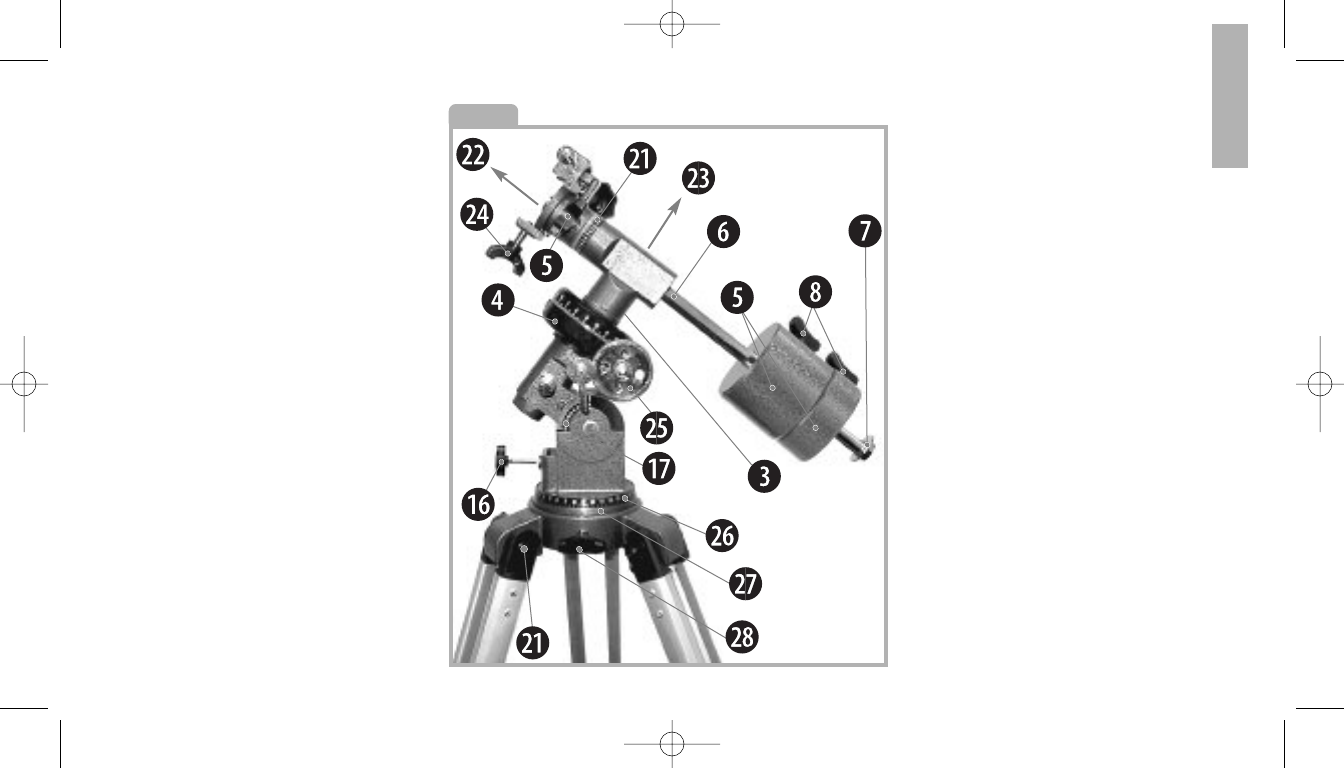
3. Replace the thumbscrews onto the bolts
and tighten to a firm feel.
INSERT THE EYEPIECE
1. Slide the MA25mm eyepiece (19) into
eyepiece holder on the focuser (17).
2. Tighten the focuser thumbscrew to hold
the eyepiece securely.
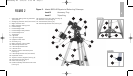
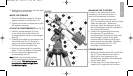
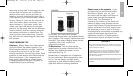
ATTACH THE COUNTERWEIGHT(see Fig. 5)
1. Hold the counterweights (5) firmly
in one hand, (one by one) slide the
counterweights onto the counterweight
shaft (6).
2. Threading the shaft into the base of the
declination axis (Fig. 5). Be sure to
support the counterweight with one
hand while performing this step.
3. Slide the counterweight to a position
about 2" from the bottom of the shaft.
4. Secure in place by tightening the
counterweight lock (7).
N
N
o
o
t
t
e
e
:
:
Make sure the safety washer
and screw (8) always remain in place
on the shaft.
T
T
h
h
i
i
s
s
s
s
a
a
f
f
e
e
t
t
y
y
f
f
e
e
a
a
t
t
u
u
r
r
e
e
p
p
r
r
e
e
v
v
e
e
n
n
t
t
s
s
t
t
h
h
e
e
c
c
o
o
u
u
n
n
t
t
e
e
r
r
w
w
e
e
i
i
g
g
h
h
t
t
f
f
r
r
o
o
m
m
a
a
c
c
c
c
i
i
d
d
e
e
n
n
t
t
l
l
y
y
s
s
l
l
i
i
p
p
p
p
i
i
n
n
g
g
.
.
BALANCING THE TELESCOPE
In order for the telescope to move
smoothly on its mechanical axes, it
must first be balanced as follows:
1. Loosen the right ascension lock
(22). The telescope mount will turn freely
about the polar axis. Rotate the
telescope about the polar axis so that
the counterweight shaft (6) is parallel to
the ground (horizontal).
2. Loosen the counterweight's locking
thumbscrew (7) and slide the
counterweights (5) along the shaft until
the telescope remains in any given
position without tending to drift up or
down around the polar axis. Retighten
the counterweight lock (31). The
telescope is now balanced.
PREPARE MOUNT
1. Attach the flexible cables (3) and (4) (See
Fig. 6). These cables are secured in
place with a firm tightening of the
thumbscrews located at the attachment
ends of each cable.
2. Tilt the polar axis of the telescope to
roughly a 45
° angle with the horizon:
5
(on reverse side)
Fig. 5
Fig. 1
Fig. 2
Fig. 2
Fig. 2
Fig. 1
Fig. 2
Fig. 2
Fig. 2
Fig. 2
Fig. 2
Fig. 2
Fig. 2
Fig. 2
Fig. 2
Fig. 2
Fig. 2
Fig. 2
Fig. 2
Meade80EQ-AR 4/28/06 9:55 AM Page 7