


2. Line up the two holes on the red dot
viewfinder bracket over the two bolts.
Slide the bracket over the bolts. See Fig.
1, inset C.
3. Replace the thumbscrews onto the bolts
and tighten to a firm feel.
ATTACH THE DIAGONAL MIRROR AND
EYEPIECE
The diagonal mirror reflects the light from
the optical tube to a more comfortable
viewing position.
1. Slide the diagonal mirror (13) into the
focuser drawtube (15).
2. Tighten the drawtube thumbscrew to hold
the diagonal mirror securely.
3. Slide the MA 25mm eyepiece (1) into
diagonal mirror.
4. Tighten the diagonal mirror thumbscrew
to hold the eyepiece securely.
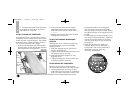
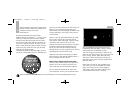
ALIGN THE RED DOT VIEWFINDER
Perform the first part of this procedure
during the daytime and the last step at night.
1. Point the telescope at an easy-to-find
land object such as the top of a telephone
pole or a distant mountain or tower. Look
through the eyepiece in the diagonal
mirror and turn the focuser knob (23)
until the image is sharply focused. Center
the object precisely in the eyepiece’s field
of view.
2. Look through the red dot viewfinder. Turn
one or more of the viewfinder’s alignment
screws (3) until the red dot is precisely
over the same object as you centered in
the eyepiece.
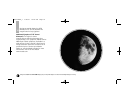
3. Check this alignment at night on a
celestial object, such as the Moon or
a bright star, and use the viewfinder’s
alignment screws to make any
necessary refinements.
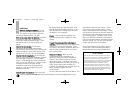
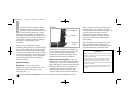
4. Thread a lock knob (5) through each
of the holes in the forks of the mount
and tighten to a firm feel.
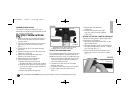
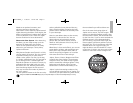
ATTACH THE RED DOT VIEWFINDER
An eyepiece (1) has a narrow field of view. A
viewfinder (2) has a wider field of view, which
makes it easier to locate objects. The red dot
viewfinder has a red dot to make it easier to
line up more precisely with a target.
1. Note the two thumbscrews (25) threaded
onto two bolts on the optical tube. Remove
the thumbscrews from the tube.
4
Looking at or near the Sunwill cause irreversibledamage to your eye. Do not point this telescope at or near the Sun. Do not look through the telescope as it is moving.
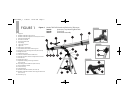
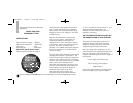
Fig. 4
slide rod
through
hole
lock
knob
lock
knob
place tube between
forks
Tel70AZAR_5 3/28/07 10:09 AM Page 6