


10
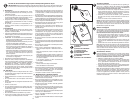
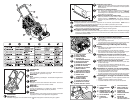
ASSEMBLING
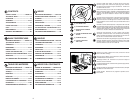
Handle
Pull up the handle in direction of the arrow. With the handle in
up-turned position, tighten the wing-nuts.
MONTAGE
Griff
Griff in Pfeilrichtung hochklappen. Anschließend Flügelmuttern
anziehen.
MONTAGE
Manche
Déployez le manche dans la direction de la fl èche. Une fois le
manche déployé, serrez les écrous à oreilles.
MONTAJE
Empuñadura
Levantar le empuãdura en el sentido de la fl echa. Cuando la
empuãdura esté levantada, apretar las palomillas.
MONTAGE
Hendel
Klap de hendel om, in de richting van de pijl. Wanneer de hendel
omgeklapt is, worden de veugelmoeren aangedraaid.
MONTAGGIO
Impugnatura
Sollevare l'impugnatura nel senso dell afreccia. Quando l'impugnatura è sollevato, stringere i galletti.
2
3
1
4
9
5
6
7
11
2
1
3
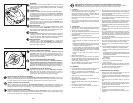
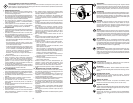
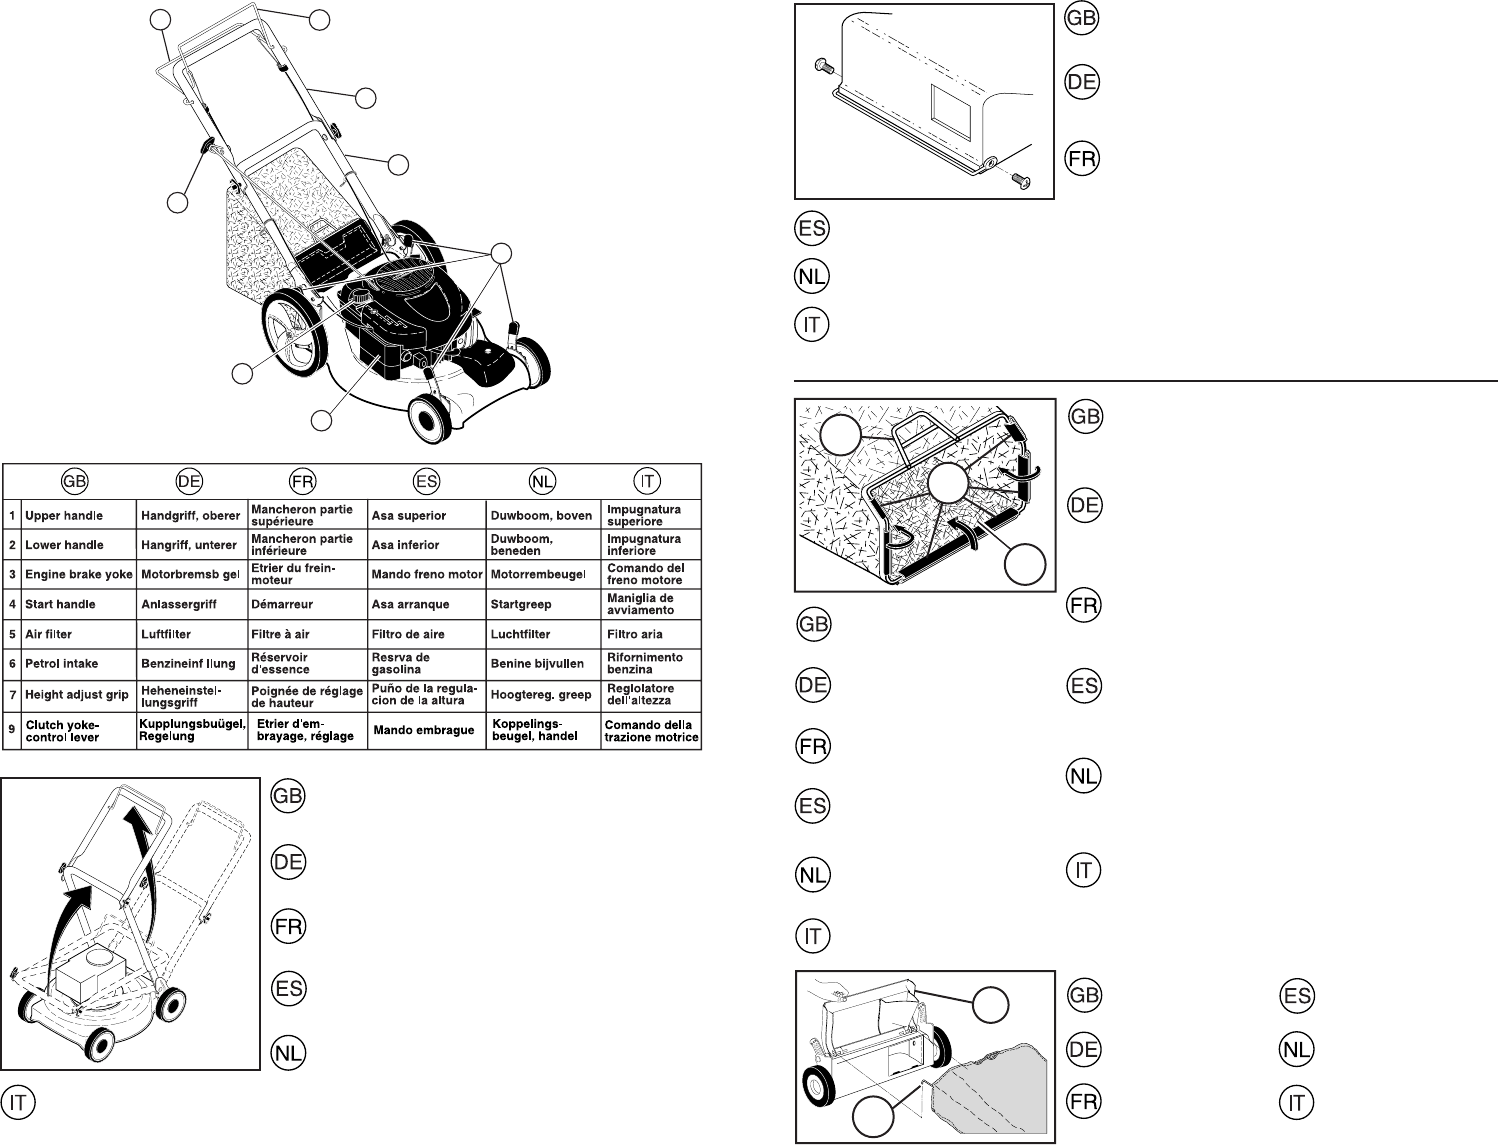
Install Rear Foot Guard
• Position guard as shown and secure with fasteners supplied.
NOTE: The foot guard must be installed for the safe operation
of this machine.
Hinteren fuss-schutz montieren
• Den Schutz der Abbildung entsprechend anbringen und
mit mitgelieferten Befestigungsteilen sichern. HINWEIS:
Die Montage des Fußschutzes ist für den sicheren Betrieb
dieser Maschine erforderlich.
Installez le protecteur de pieds arrière
• Placez le protecteur comme montré et assurez-le avec les
attaches fournies. REMARQUE: Vous devez installer le
protecteur de pieds arrière pour que l’usage de la machine
soit sûr.
Instalar la protección de pies trasera
• Ponga la protección como mostrado y asegúrela con las amarras proporcionadas. NOTA: Para el
funcionamiento en seguridad de esta máquina hay que instalar la protección para los pies.
Achterste voetbeschermer monteren
• Plaats beschermer zoals afgebeeld en zet hem met bijgeleverde bevestigers vast. N.B.: De voetbeschermer
dient te worden geïnstalleerd voordat deze machine veilig kan worden gebruikt.
Montaggio: Protezione posteriore piedi
• Posizionare la protezione come illustrato nella fi gura. Bloccare in posizione con i dispositivi di fi ssaggio
forniti con il prodotto. NOTA: A garanzia di un funzionamento sicuro della macchina, è basilare installare
la protezione posteriore piedi.
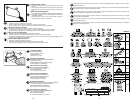
(1) CATCHER FRAME
(2) VINYL BINDING
(3) FRAME OPENING
(1) RAHMEN FÜR
DEN.GRASFANGBEUTEL
(2) KUNSTSTOFFKAPPEN
(3) RAHMENÖFFNUNG
(1) CADRE DU COLLECTEUR
(2) CRANS DE FIXATION
(3) OUVERTURE DU CADRE
(1) MARCO PARA EL
COLECTOR DE HIERBA
(2) GANCHOS DE PLASTICO
(3) ABERTURA DEL MARCO
(1) FRAME VOOR
GRASVERGAARBAK
(2) PLASTIC HAKEN
(3) FRAME-OPENING
(1) TELAIO DEL CESTELLO
(2) AGGANCI DI PLASTICA
(3) APERTURA DEL TELAIO
2
1
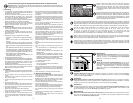
(1) REAR DOOR
(2) GRASS CATCHER
FRAME
(1) HINTERE KLAPPE
(2) RAHMEN FÜR DEN
GRASFANGBEUTEL
(1) VOLET ARRIÈRE
(2) CADRE DU
COLLECTEUR
To Assemble and Attach Grass Catcher
• Put grass catcher frame into grass bag with stiff part of bag
on the bottom.
• Slip vinyl bindings over frame.
• The grass catcher is secured to the lawn mower housing when
the rear door is low ered onto the grass catcher frame.
Zusammensetzung und Montage des Grasfang-
beutels
• Den Rahmen in den Grasfangbeutel einsetzen; der steife Teil
des Beutels nach unten.
• Die Kunststoffkappen auf den Rahmen aufsetzen.
• Der Grasfangbeutel wird durch den Druck der Klappe gegen
den Rahmen in der korrekten Stellung festgehalten.
Assemblage et montage du collecteur d'herbe
• Mettez en place le collecteur d'herbe avec sa partie dure vers
le bas.
• Passez les fi xations plastiques par dessus le cadre.
• Le collecteur se met en place en appuyant le volet au cadre.
Armado y montaje del colector de hierba
• Montar el marco en el colector de hierba con la parte dura
de éste hacia abajo.
• Poner los ganchos de plástico alrededor del marco.
• El colector de hierba se mantiene en su sitio por la presión
de la tapa sobre el marco del colector.
Assembleren en monteren van de grasvergaarbak
• Zet het frame in de grasvergaarbak met het harde gedeelte
van de grasvergaarbak naar onderen.
• Trek de plastic haken over het frame.
• De grasvergaarbak wordt op zijn plaats gehouden door de druk
die het luik uitoefent op het frame van de grasvergaarbak.
Assemblaggio e montaggio del cestello di raccolta
• Porre il telaio nel cestello, con il lato rigido del cestello verso
il basso.
• Serrare gli agganci di plastica intorno al telaio.
• Il cestello di raccolta viene tenuto a posto dal portello.
(1) TAPA POSTERIOR
(2) MARCO PARA COL-
ECTOR DE HIERBA
(1) ACHTERLUIK
(2) FRAME VOOR
GRASVERGAARBAK
(1) PORTELLO DI
SICUREZZA
(2) TELAIO DEL CES-
TELLO DI RACCOLTA