


12 13
4 - OPERATING INSTRUCTIONS
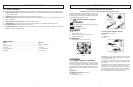
4-4. EXTENSION CORDS
When using an electric chain saw, plug it into the extension
cord only when you are ready to cut wood. Connect the
extension cord to a 110/120 voltage outlet.
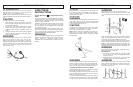
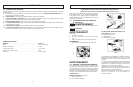
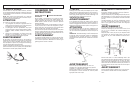
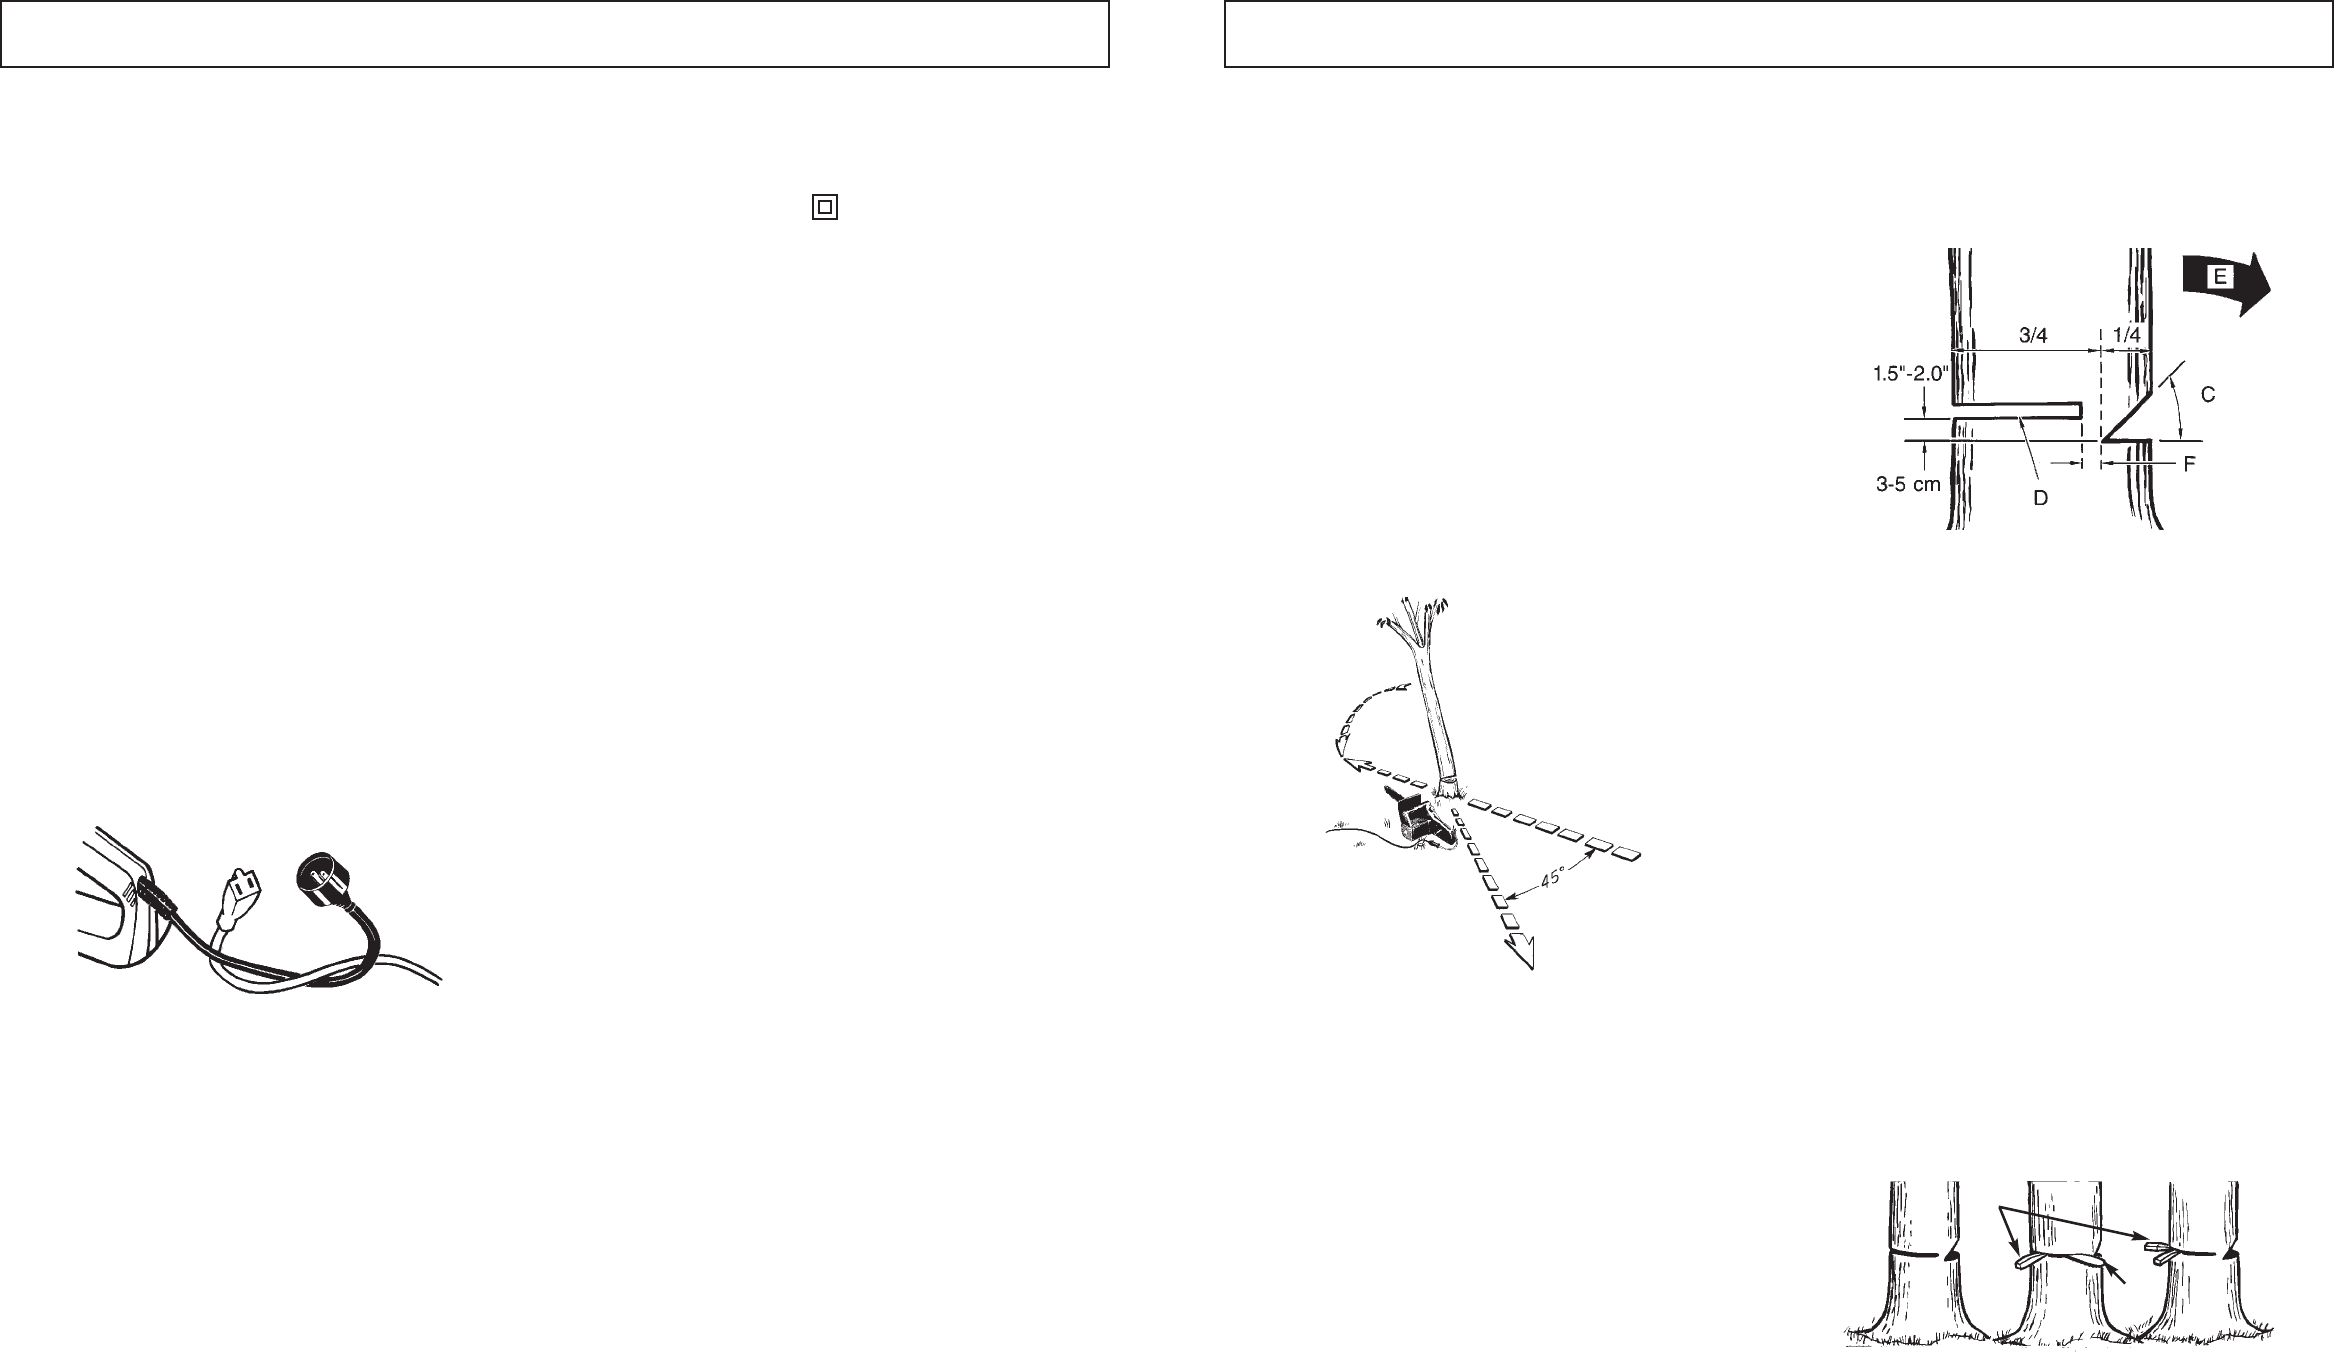
NOTE: To prevent disconnection of the extension cord, tie
a loose knot before connecting the ends together (Figure 4-
4A).
CAUTION
A cord that is hot to the touch is overloaded.
1. When using the chain saw, an extension cord of ade-
quate size must be used for safety and to prevent loss
of power and overheating.
2. The extension cord must be specifically intended for
outdoor use and marked SW-A, SOW-A, STW-A,
STOW-A, SJW-A, SJOW-A, SJTOW-A, STJW, or
SJTW.
3. Inspect the extension power cord for loose or exposed
wires and damaged insulation. If damaged, replace
before using the appliance.
WARNING
Do not operate your chain saw in a wet or damp environ-
ment. Do not expose the saw to rain, snow or sleet.
Moisture will cause short circuits. Replace or repair any
damaged or frayed extension cords before using your saw.
Keep the cord away from the cutting area and position the
cord so that it will not be caught on branches or other
objects during cutting.
SAVE THESE
INSTRUCTIONS
DOUBLE INSULATION NO SERVICEABLE PARTS
INSIDE
Do not use if the cord or plug is damaged. Your appliance
is double insulated to help protect against electric shock.
Double insulation construction consists of two (2) separate
“layers” of electrical insulation.
Appliances built with this insulation system are not intend-
ed to be grounded. As a result, the extension cord used
with your appliance can be plugged into any conventional
120 volt electrical outlet.
Normal safety precautions must be observed when operat-
ing an electrical appliance. The double insulation system is
only for added protection against injury resulting from a
possible internal electrical insulation failure.
WARNING
Your double insulated appliance has no serviceable parts
inside. Do not attempt to repair it yourself. For service infor-
mation, contact the McCulloch Product Service
Department toll-free number listed on the back cover of this
manual.
5 - GENERAL CUTTING INSTRUCTIONS
4-4A
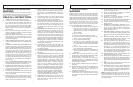
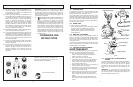
5-1. FELLING
Felling is the term for cutting down a tree. Small trees up to
6-7” (15-18cm) in diameter are usually cut in a single cut.
Larger trees require notch cuts. Notch cuts determine the
direction the tree will fall.
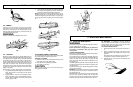
FELLING A TREE:
WARNING
A retreat path (A) should be planned and cleared as nec-
essary before cuts are started. The retreat path should
extend back and diagonally to the rear of the expected line
of fall, as illustrated in Figure 5-1A.
CAUTION
If felling a tree on sloping ground, the chain saw operator
should keep on the uphill side of the terrain, as the tree is
likely to roll or slide downhill after it is felled.
NOTE: Direction of fall (B) is controlled by the notching cut.
Before any cuts are made, consider the location of larger
branches and natural lean of the tree to determine the way
the tree will fall.
WARNING
Do not cut down a tree during high or changing winds or if
there is a danger to property. Consult a tree professional.
Do not cut down a tree if there is a danger of striking utility
wires; notify the utility company before making any cuts.
GENERAL GUIDELINES FOR FELLING TREES:
Normally felling consists of two (2) main cutting operations,
notching (C) and making the felling cut (D).
Start making the upper notch cut (C) on the side of the tree
facing the felling direction (E). Be sure you don’t make the
lower cut too deep into the trunk.
The notch (C) should be deep enough to create a hinge (F)
of sufficient width and strength. The notch should be wide
enough to direct the fall of the tree for as long as possible.
WARNING
Never walk in front of a tree that has been notched.
Make the felling cut (D) from the other side of the tree and
1.5” - 2.0” (3-5cm) above the edge of the notch (C) (Figure
5-1B).
Never saw completely through the trunk. Always leave a
hinge. The hinge guides the tree. If the trunk is completely
cut through, control over the felling direction is lost.
Insert a wedge or felling lever in the cut well before the tree
becomes unstable and starts to move. This will prevent the
guide bar from binding in the felling cut if you have mis-
judged the falling direction. Make sure no bystanders have
entered the range of the falling tree before you push it over.
WARNING
Before making the final cut, always recheck the area for
bystanders, animals or obstacles.
FELLING CUT:
1. Use wooden or plastic wedges (G) to prevent binding
the bar or chain (H) in the cut. Wedges also control
felling (Figure 5-1C).
2. When diameter of wood being cut is greater than the
bar length, make 2 cuts as shown (Figure 5-1D).
WARNING
As the felling cut gets close to the hinge, the tree should
begin to fall. When tree begins to fall, remove saw from cut,
stop engine, put chain saw down, and leave area along
retreat path (Figure 5-1A).
5-1A
A
B
5-1B
5-1C
G
H