


7
ATTACHING THE BAR & CHAIN (If
not already attached)
1. MoveON/STOPswitchtotheSTOP
position.
2. Make sure chain brake is disengaged
(seeCHAINBRAKEintheOPERATION
section).
IMPORTANT: Before proceeding to next
step,ensureunitisonaflatsurfaceandinan
upright position as shown in illustration be-
low. Chainwillnottightenproperlyif theunit
is not in anupright position.
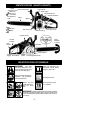
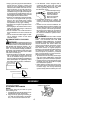
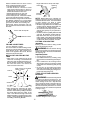
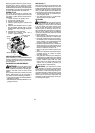
3. Lift ad justment knobhandleand turncoun-
terclockwise to loosen chain brake.
Adjustment
Knob
Handle
Tensioning Lever
LOOSEN
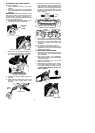
4. Align arrows by pressing tensioning le-
ver down to install position (see illustra-
tion). Remove chain brake from saw.
TENSIONING LEVER IN
INSTALL POSITION
5. Remove the plastic shipping spacer (if
present).
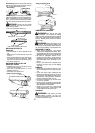
6. Slide guide bar behind clutch drum until
guide bar stops against clutch drum
spro cke t .
Clutch Drum
Chain
Brake
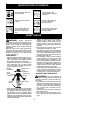
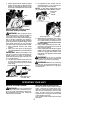
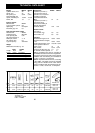
7. Carefully remove new chain from pack-
age. Prepare the chain by checking the
properdirection. Withoutfollowingtheil-
lustration,itis easytoplacethechainon
the saw in the w rong direction. Use the
illustration of the chain to determine the
proper direction.
CUTTERS MUST F ACE IN
DIRECTION OF ROT ATION
Tip of
Bar
Cutters
Depth Gauge
Drive Links
8. Place chain over and behind clutch, fitting
the drive links in theclutch drum sprocket.
9. Fit bottom of drive links between the
teeth in the sprocket in the nose of the
guide bar.
10. Fit chain drive links into bar groove.
11. Pull guidebarforwarduntil chainis snug
inguidebargroove.Ensurealldrivelinks
are in t he bargroove.
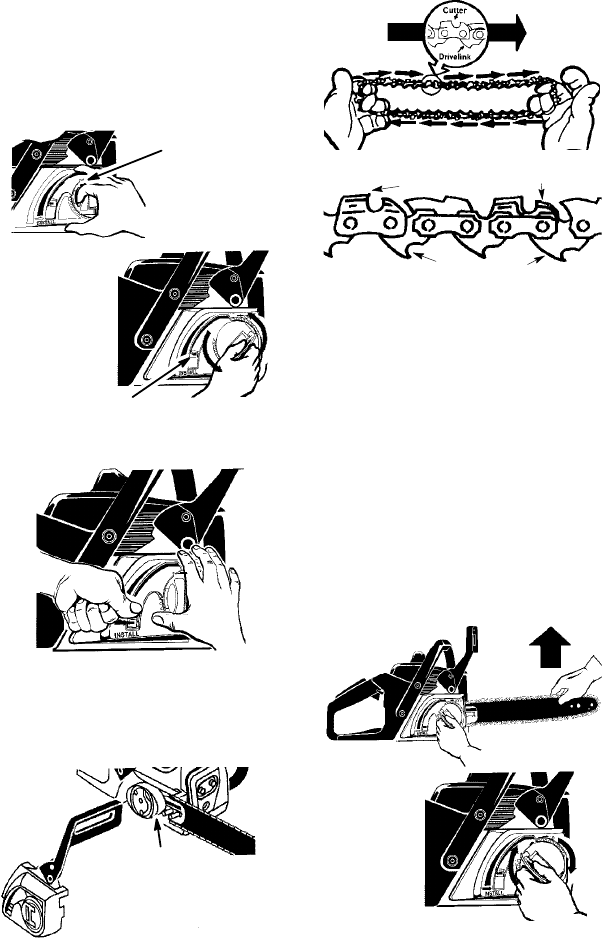
TO REPLACE CHAIN BRAKE:
1. Align arrows onchainbrake b ypressing
tensioning lever down to install position
(see illustration).
2. Install chain br ake. Turn ad justment
knob handleclockwiseuntil k nobbegins
to thread on to bolt .
3. Release tensioning lever. Chain will
tighten automatically.
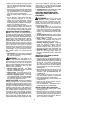
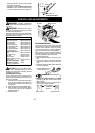
4. While lifting tip of guide bar, turn adjust-
ment knob handle clockwise to clamp
bar. Tighten untilbar isclampedsecure-
ly. Hand tighten securely; do not use
tools to tighten!
TIGHTEN