14
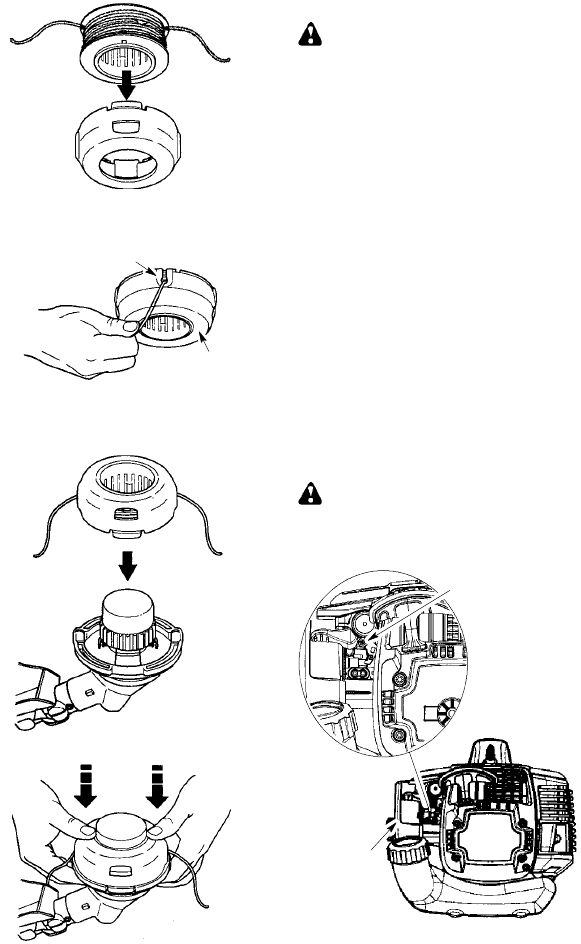
10. Insert the ends of the lines through exit
holes in the sides of the cover.
Line exit hole
Cover
11. Reinstall the spool and cover onto the
trimmerhead.Pushuntilcover snapsinto
place.
BLADE REPLACEMENT
RefertotheASSEMBLYsectionfor bladere-
placement instructions and illustrations.
CARBURETOR ADJUSTMENT
WARNING: Keep others away when
making idle speed adjustments. The trimmer
head willbe spinning during m ost of this pro-
cedure. Wearyour protective equipmentand
observe all safety precautions. After making
adjustments, the trimmer head must not
move/spin at idle speed.
The carburetor has been carefully set at the
factory.Adjustmentsmay benecessaryifyou
notice any of the following conditions:
S Engine will not idl e when the throttle is re-
leased.
S Thetrimmer head m oves/spins at idlespeed.
Make adjustments with the unitsupportedso
the cutting attachment is of f the ground and
will not make contact with any object. Hold
theunitbyhandwhilerunningandmakingad-
justments. Keep all parts of your body away
from the cutting attachment and muffler.
Idle Speed Adjustment
Allowenginetoidle.Adjustspeeduntilengine
runswithouttrimmerheadmovingorspinning
(idle speed too fast) or engine stalling (idle
speed too slow).
S Turn idle speed screw clockwise to in-
creaseenginespe edifenginestalls ordies.
S Turn idlespeed screw counterclockwise to
decrease engine speed if trimmer head
moves o r spins at idle speed.
WARNING: Recheck the idle speed
after each adjustment. The trimmer head
must not move or spin at idle speed to avoid
serious injury to the operator or others.
Air filter
cover
Id l e sp e e d scre w
Ifyourequirefurtherassistanceo rareunsure
about performing this procedure, contact an
authorized service dealer.


