


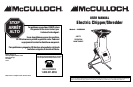


98
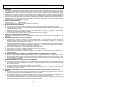
4 - OPERATING INSTRUCTIONS
4-1. OPERATION
Read and understand the safety instructions in this owners
manual before using your shredder
. Failure to comply can
result in accidents involving fire, electric shock, or serious
personal injury.
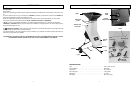
1. Connect the shredder to a suitable power outlet.
2. To start and stop the shredder, depress the switch
located at the rear of the Motor.
3. To stop the shredder, switch to the off position. (Fig .
4-1)
4-2. OVERLOAD PROTECTION AND MOTOR
JAMMING If overfeeding clogs the machine the overload
protection switch may cut out the motor. To restart, switch
the machine off and disconnect the power cord.
Loosen discharge chute access knobs and open top cover
assembly, then remove any clogged debris from the cutting
chamber. If the top cover assembly becomes jammed and
will not lift off, turn the V-cutter by pushing a piece of wood
through the back chute of the top hopper to rotate the V
-
cutter to enable the top cover assembly to be removed.
Reset motor overload protection switch. (See Fig. 4-1)
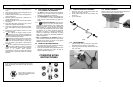
4-3. FEEDING LEAVES AND SMALL GAR-
DEN CLIPPINGS - TOP HOPPER
The sloping chute of the top hopper is designed to accept
leaves and small garden clippings.
Shredding and mulching is achieved by natural suction of
the debris through the blade chamber. Do not overfeed and
do not feed wet, soggy material into the garden shredder
as this may clog the blade chamber and the discharge
chute. (Fig. 4-3)
4-4. FEEDING TWIGS AND SMALL BRANCH-
ES - TOP HOPPER
The smaller back chute of the top Hopper accepts medium
to larger size garden clippings.
Shredding and mulching is achieved through the same
action as the front chute. If a finer type mulch is required
than is initially achieved, re-feed the mulch through again
until the desired result is obtained. (Fig. 4-4).
Do not feed solid branches through the two Top Hopper
chutes.
4-1
ON-OFF
Switch
Overload
Protection Switch
4-3
4-4
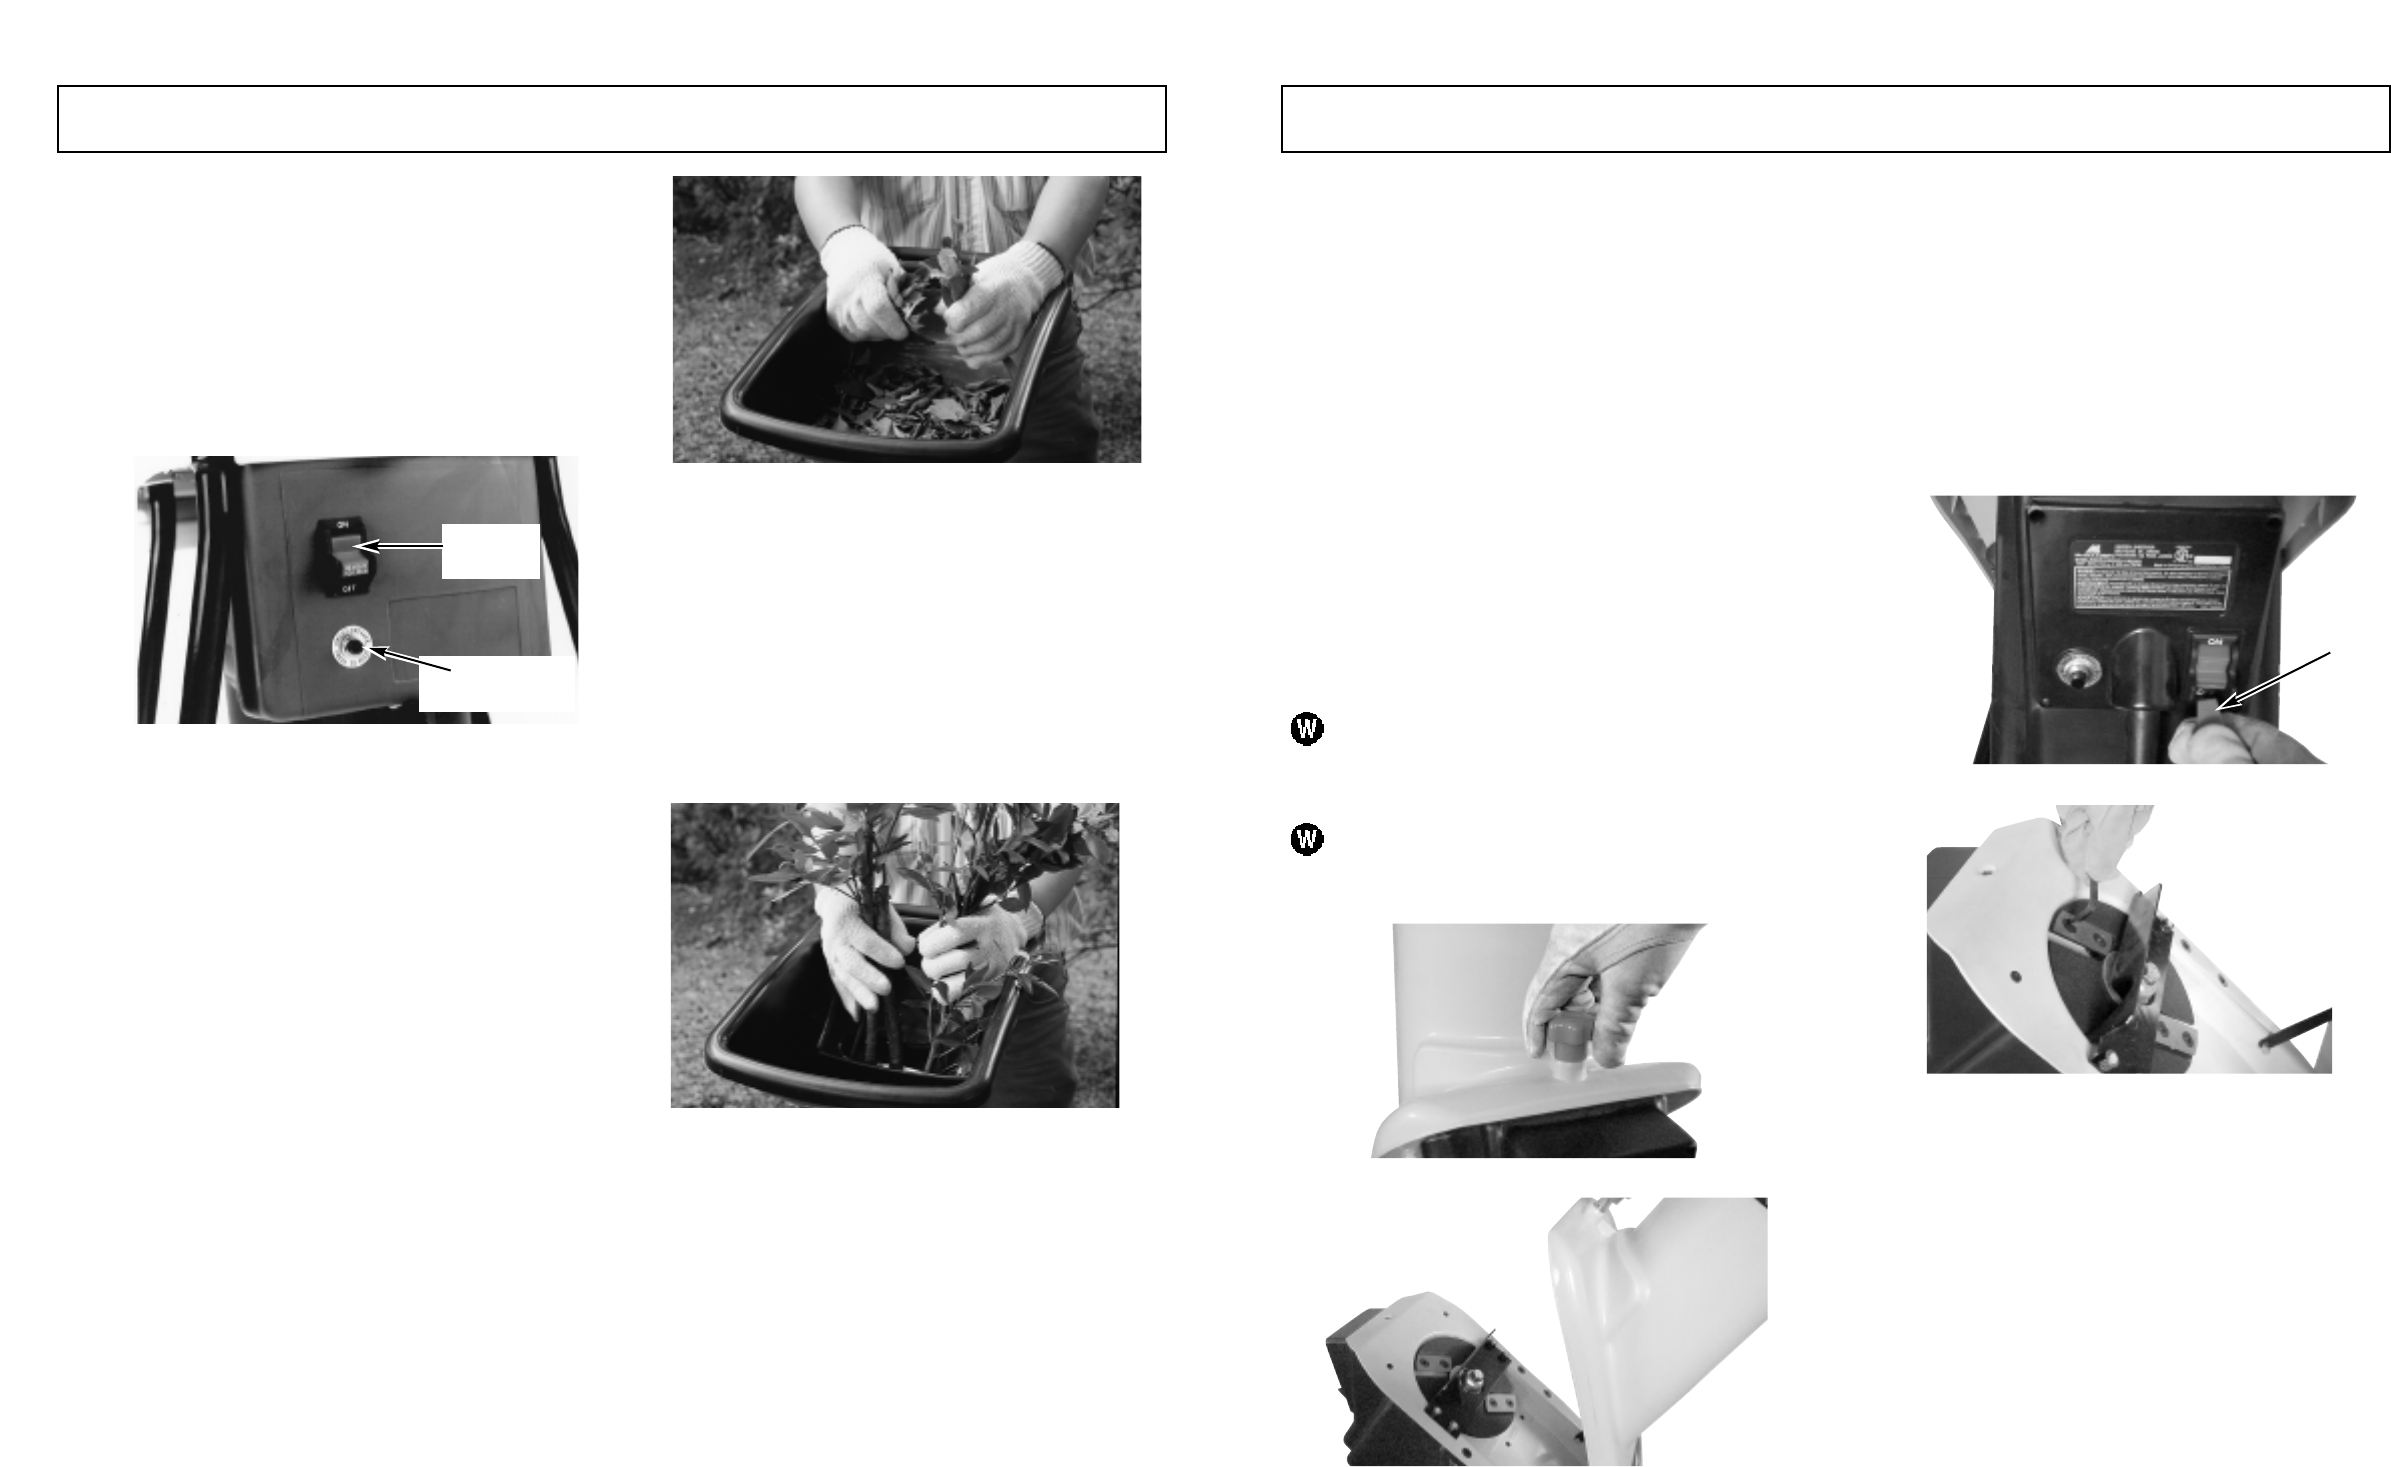
Your Shredder has been designed for a low level of main-
tenance, involving routine cleaning and inspection. The
motor of the Shredder is maintenance free and requires no
attention. For the best results the blades must be kept
sharp at all times. The blades have dramatically less cut-
ting power when blunt.
The Shredder will tear rather than cut when the blades are
blunt. When this occurs rotate the double sided blades or
replace the blades immediately.
WARNING
Before attempting any maintenance switch the machine off
and disconnect the power cord.
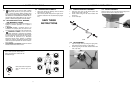
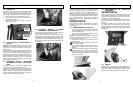
5-1. BLADE MAINTENANCE
• Switch the machine off and disconnect the power cord
ensuring all moving parts are completely stopped.
• Wear gloves when attempting any maintenance to the
cutting blades.
JAMMING if blades become jammed refer to disassembly
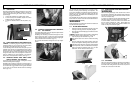
instructions and then remove obstruction. (Fig. 5-1A)
1. Open Top Hopper as illustrated in Fig. 5-1B
Take extreme care not to come in contact with cutting
blades.
2. Remove obstruction from cutting chamber. Close Top
Hopper and retighten discharge chute access knobs.
If discharge chute becomes clogged or cutting blades
become jammed, under no circumstances should you
place your hands in discharge chute to try to clear
obstruction, as this will lead to serious injury.
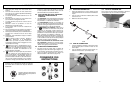
5-2. SHREDDING BLADES MAINTENANCE
WARNING
Before removing discharge chute access knobs, ensure
the machine is switched off, the red safety switch extension
lead (A) (Fig. 5-2A) is removed and wait until the machine
comes to a complete stop.
To inspect or replace the double sided shredding blades,
disconnect the power cord and open the Top Hopper.
To remove blades, remove the counter sunk screws with
the hex wrench supplied (Fig. 5-2B) . When blades are
blunt on both sides replace with McCulloch blades and
make sure they are screwed in tightly.
5-3. CLEANING
After use, always wipe clean the outside of the shredder to
remove any build up of material with a damp cloth. Clean
the inside of the cutting chamber and remove any left over
material, Do not hose down with water.
5 - MAINTENANCE INSTRUCTIONS
5-1A
5-1B
5-2A
5-2B
A