


7
117846
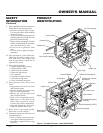
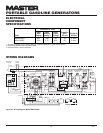
OWNER’S MANUAL
ENGINE OIL
We ship the generator without oil in the
engine crankcase. You must add oil before
starting engine. See engine owner’s manual
for specific oil type.
CHECKING OIL LEVEL AND
ADDING OIL
Follow steps below to check oil level. Make
sure engine is level and stopped.
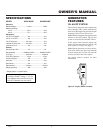
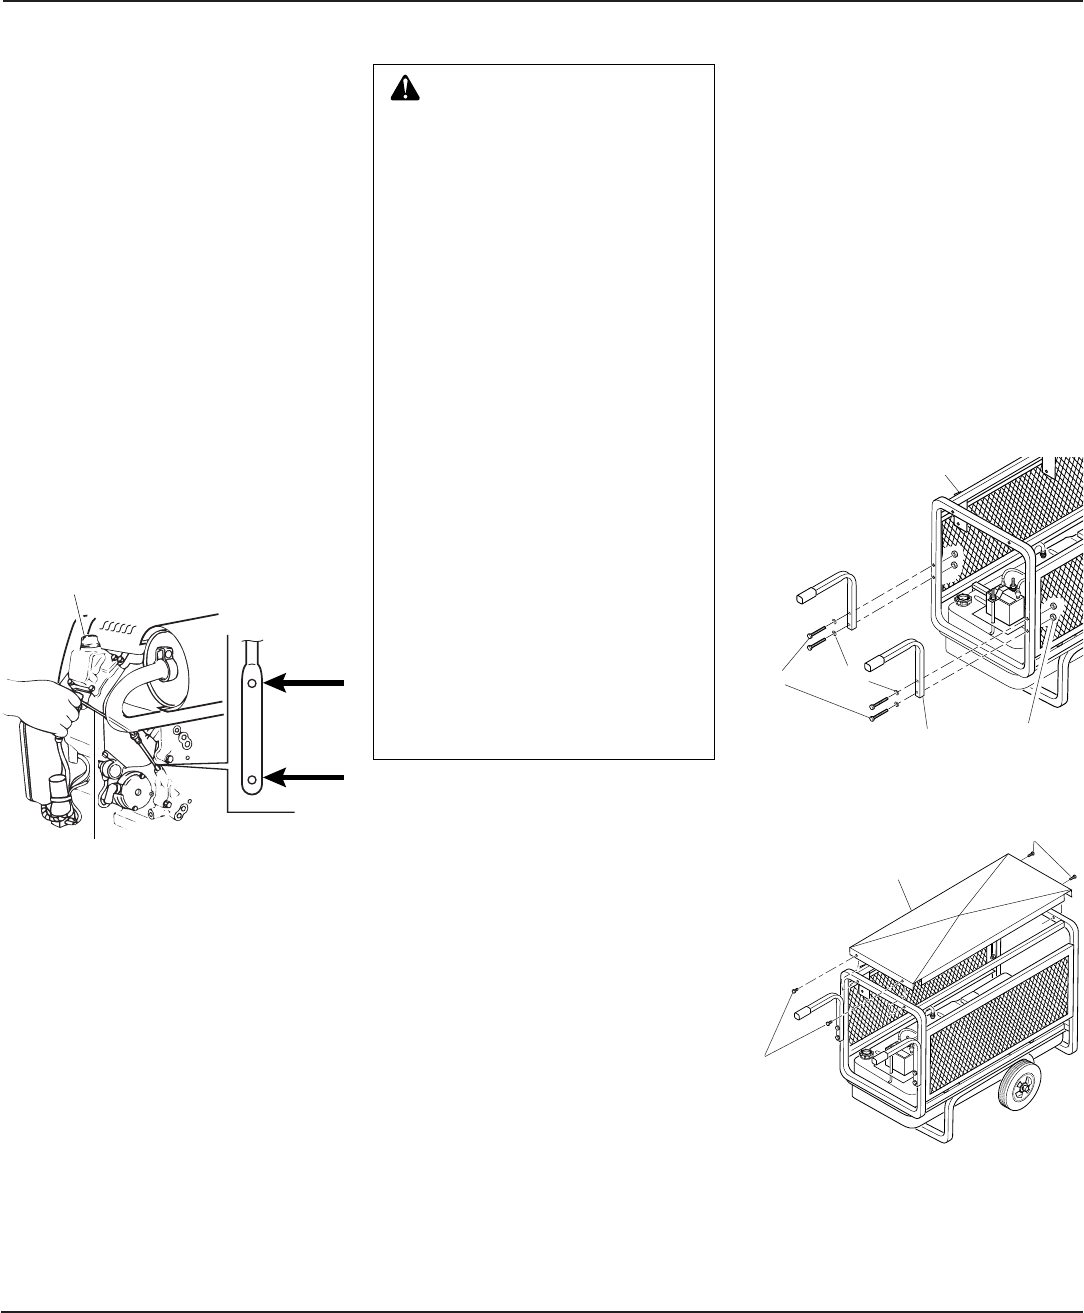
1. Remove dipstick (see Figure 6). Wipe
dipstick clean.
2. Insert dipstick into oil filler neck. Oil
level should be between the two dots
on dipstick.
3. If level is low, fill to top dot on dipstick.
Only use oil recommended in engine
owner’s manual.
Note: If oil level is too low, oil alert system
will shutdown engine and prevent engine
from restarting.
WARNING: Gasoline presents
a hazard of fire or explosion.
Gasoline is flammable. Its vapor
is explosive.
• Keep fuel out of children’s
reach.
•
Refuel generator in a well-
vented area. Do not fill fuel tank
in the dark. Do not refuel while
engine is running. Unhook all
electrical loads and shut off
engine before refueling.
• Do not overfill fuel tank. Always
allow room for fuel to expand.
If you overfill tank, fuel can
overflow onto hot engine. This
can cause fire or explosion.
After refueling, tightly close
fuel tank cap.
• Do not spill fuel. Fuel or fuel
vapor may ignite. If fuel spills,
make sure area is dry before
starting engine.
• Never smoke in refueling area.
Never allow open flames or
sparks in area.
• Store fuel in approved contain-
er. Store fuel in a well-vented
area free of open flames or
sparks.
Use clean, fresh, unleaded gasoline. Use
gasoline with octane rating of 86 or higher.
Service station gasoline pumps should dis
-
play the octane rating. Using gasoline with
lower octane level could damage engine.
Avoid getting dirt, dust, or water in fuel
tank. Do not mix oil with gasoline.
See engine owner’s manual for more
information.
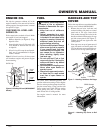
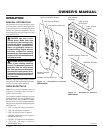
FUEL
Figure 6 - Checking Oil Level (MGH8500AIE
Shown)
Oil Fill Cap
Dip Stick
Upper
Limit
Lower
Limit
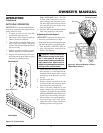
HANDLES AND TOP
COVER
Follow the steps below to attach the handles
and top cover to Model MGH10000C:
1. Remove the two bolts, lock nuts, and
washers holding side panels to control
panel end of roll cage. Insert bolts
with washers through two holes in the
handle and then back through roll cage
and side screen panels (See Figure 7).
Tighten the lock nuts against the side
screen panels.
2. Place top cover on top of generator roll
cage with notch on control panel side.
Use four #8 sems screws provided to at-
tach cover to roll cage (See Figure 8).
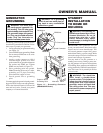
F
FUEL
Figure 7 – Attaching Handles to Roll Cage
Figure 8 – Attaching Top Cover to Roll
Cage
Top Cover
SEMS
Screws
SEMS Screws
F
FUEL
Bolts
Roll Cage
Washers
Lock Nuts
Handle