9
MOUNTING OF HANDLE
CAUTION: Before doing any work on the brush cutter, always stop the
engine and pull the spark plug connector off the spark plug.
Always wear protective gloves!
CAUTION: Start the brush cutter only after having assembled it completely.
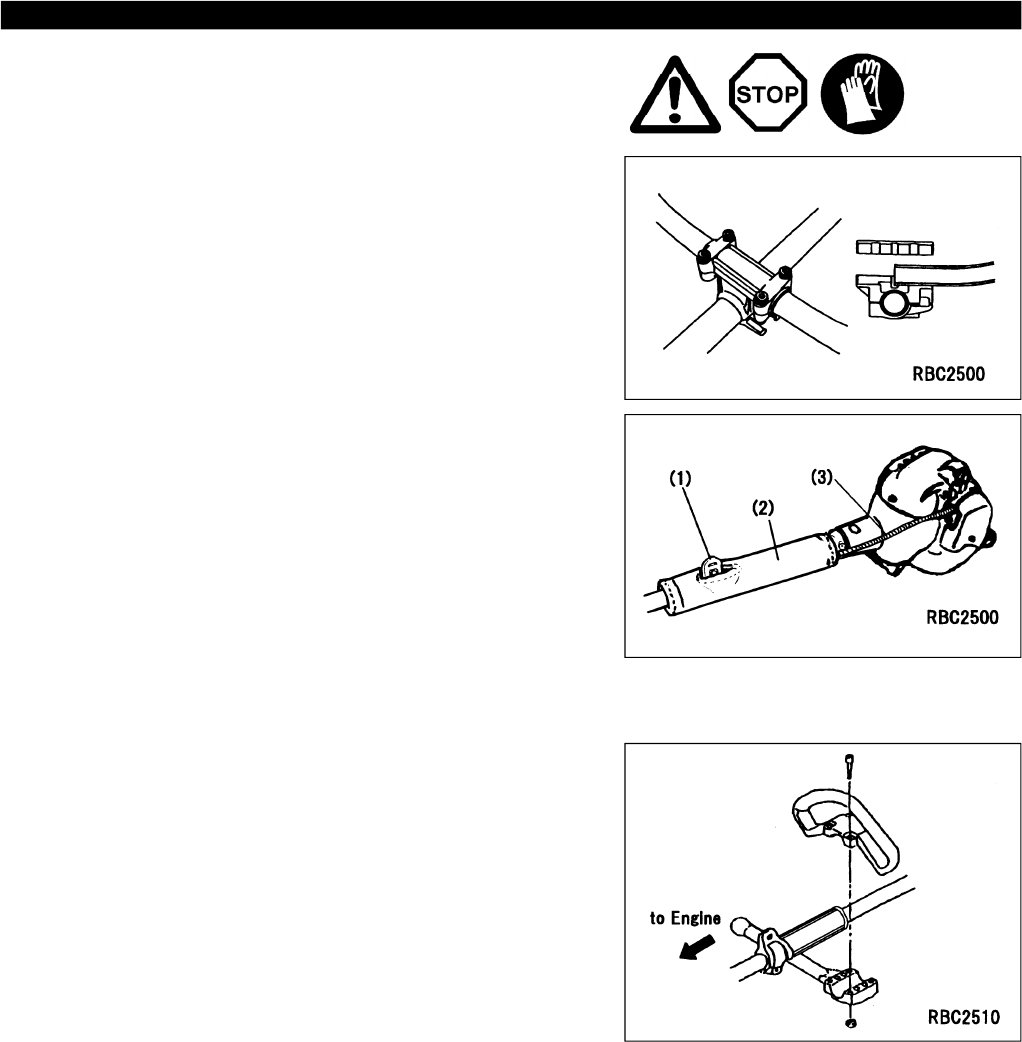
For machines with U Handle models
–Place the handle-fixing metal so that the handle with the control lever will be
positioned on the right (the right-hand grip side) as viewed from the engine
side, and the other handle on the left side.
–Fit the groove of the handle-fixing material to the handle end. Fix provision-
ally the attached metal by hexagon socket bolt supplied.
–Adjust the handle to an easy-to-operate position, and tighten securely the
four hexagon socket bolts uniformly on the right and left by Allen wrench.
–Wrap the waist pad around the shaft so that the hanger(1) will protrude
through the slit in the waist pad and the control cable and the cords(3) will
aiso be wrapped under the waist pad(2).
For machines with Loop Handle models
–Fix a barrier to the left side of the machine together with the handle for
operator’s protection.
–Do not adjust position of the loop handle too close to the control grip.
Keep not less than 250mm distance between the handle and the grip.
(a distance collar is provided for this purpose.)


