


17
ENG
ENGLISH
ASSEMBLING AND PREPARING
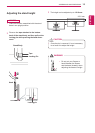
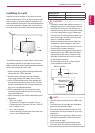
Toinstallthemonitortoawall,attachawallmount-
ingbracket(optional)tothebackofthemonitor.
Makesurethatthewallmountingbracketissecurely
fixedtothemonitorandtothewall.
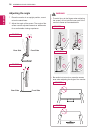
1Usethescrewsandwallmountingbracketthat
complywiththeVESAstandard.
2Screwswhicharelongerthanthestandard
lengthmaydamagetheinsideofthemonitor.
3Anon-VESAstandardscrewmaydamagethe
productandcausethemonitortofall.LGElec-
tronicsisnotliableforanyaccidentsrelatingto
theuseofnon-standardscrews.
4VESAcompatibleonlywithrespecttoscrew
mountinginterfacedimensionsandmounting
screwspecifications
5UseitaccordingtotheVESAstandardasspeci-
fiedbelow.
784.8mmorless
*Thicknessofthewallmountplate:2.6mm
*Fasteningscrew:Diameter4.0mmxPitch0.7
mmxLength10mm
787.4mmorgreater
*
Usethewallmountplateandscrewsthatcon-
formtotheVESAstandard
.
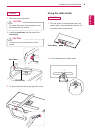
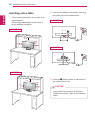
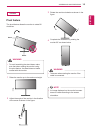
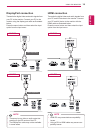
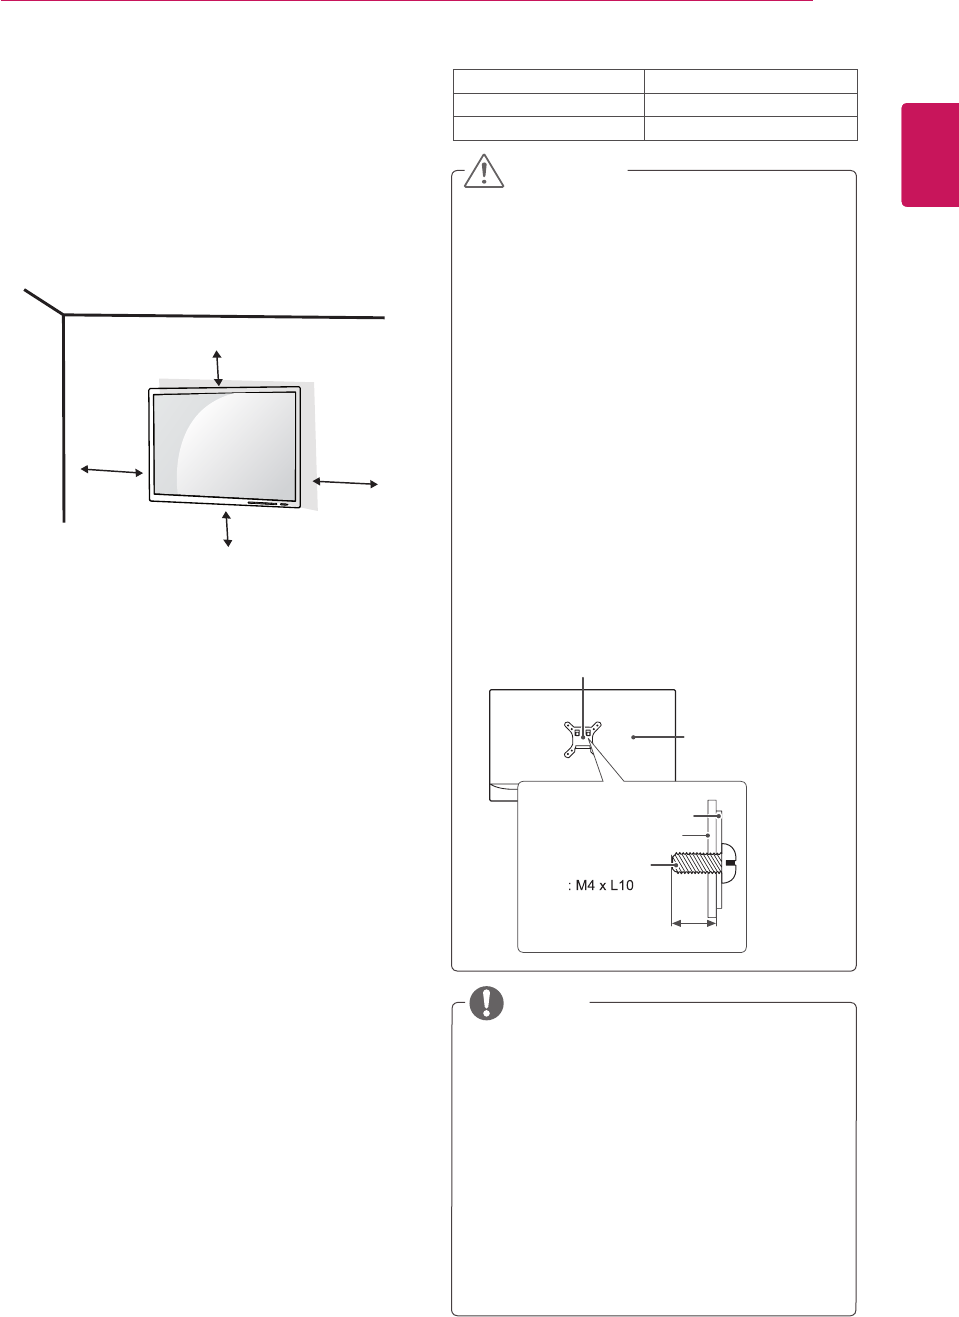
Installing to a wall
Installthemonitoratleast10cmawayfromthe
wallandleaveabout10cmofspaceateachside
ofthemonitortoensuresufficientventilation.De-
tailedinstallationinstructionscanbeobtainedfrom
yourlocalretailstore.Pleaserefertothemanual
toinstallandsetupatiltingwallmountingbracket.
10cm
10cm
10cm
10cm
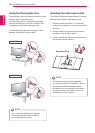
Unplugthepowercordbeforemovingorin-
stallingthemonitortoavoidelectricshocks.
Installingthemonitorontheceilingorona
slantedwallmayresultinthemonitorfalling
off,whichcouldleadtoinjury.Pleaseuse
thegenuineLGwallmountingbracket.For
moreinformation,contactyourlocalretail
storeoraqualifiedinstaller.
Applyingexcessiveforcewhenfastening
screwsmaycausedamagetothemoni-
tor.Damagecausedinthiswaywillnotbe
coveredbytheproductwarranty.
Usethewallmountingbracketandscrews
thatconformtotheVESAstandard.Dam-
agecausedbytheuseormisuseofinap-
propriatecomponentswillnotbecovered
bytheproductwarranty.
Screwlengthfromoutersurfaceofback
covershouldbeunder8mm.
UsethescrewsspecifiedbytheVESAstan-
dard.
Thewallmountkitincludestheinstallation
guideandallnecessaryparts.
Thewallmountingbracketisoptional.The
accessoriescanbepurchasedatyourlocal
retailstore.
Thelengthofthescrewmaydifferforeach
wallmountingbracket.Ensurethecorrect
lengthscrewisused.
Formoreinformation,pleaserefertothe
usermanualforthewallmountingbracket.
CAUTION
NOTE
VESA (A x B)
75x75
Stand Screw
M4x10
Required Screws
4
WallmountPad
WallmountPad
BackCover
BackCover
Standardscrew
Max.8mm