


2
Manual No. 357-554M 9/14/11
Land Pride
ZST48 Mulching Kit Assembly
■
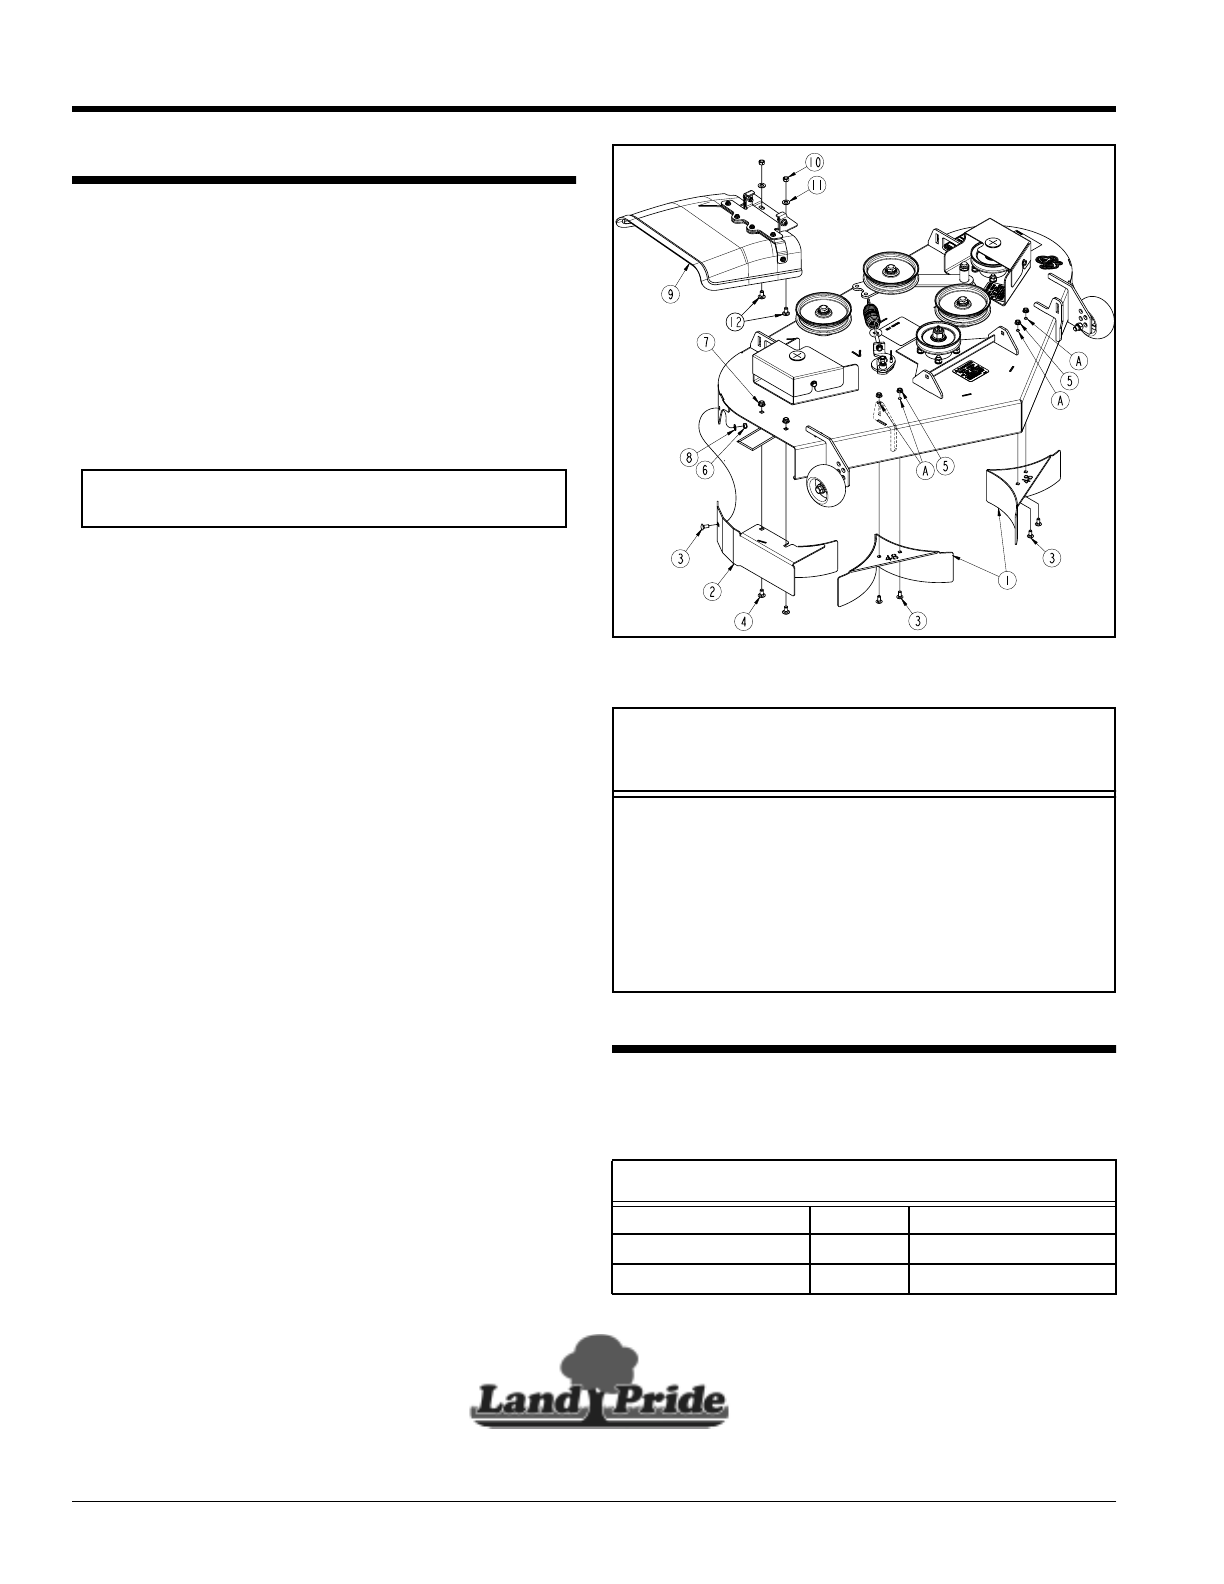
ZST48 Mulching Baffle Kit Shown
Figure 2
Mulching Blades
Mulching blades are sold separately. Use table below
when ordering blades. Each Part No. is for one blade.
Make sure you order the required number of blades
needed for your mower.
Mulching Blade Ordering Information
Mower Model Part No. Requires
ZST40 890-702C 2 Blades
ZST48 890-700C 3 Blades
27905
357-481A ZST48 MULCHING BAFFLE KIT
Your Kit Includes: (Mulching Blades Not Included)
Item Qty. Part No. Part Description
1 2 357-483H MULCH BAFFLE, 48
2 1 357-485H MULCH PLUG, 48
3 5 802-092C RHSNB 5/16-18X3/4 GR5
4 2 802-149C RHSNB 3/8-16X3/4 GR5
5 4 803-043C NUT HEX WHIZ 5/16-18 PLT
6 1 803-084C NUT HEX NYLOCK 5/16-18 PLT
7 2 803-209C NUT FLANGE LOCK 3/8-16 PLT
8 1 804-036C WASHER FLAT 5/16 SAE PLT
357-354M THIS MANUAL
Corporate Office: P.O. Box 5060
Salina, Kansas 67402-5060 USA
www.landpride.com
ZST48 Mulching Kit Assembly
ZST48 . . . . . . . . . . . . . . . . . . Kit No. 357-484A
A detailed listing of parts for this ZST48 Mulching Baffle
Kit is provided on this page. Use the parts list as a
checklist to inventory parts received. Please contact
your local Land Pride dealer for any missing hardware.
For mulching blade information, see “Mulching Blades”
on this page.
1. Park mower on a flat surface, move control levers
fully out, set park brake lever to on, shut engine off,
remove key, and remove spark plug wires from spark
plugs.
2. Remove floor platform and raise front end of mower
enough to allow room to install baffles under the deck.
Refer to Figure 2:
3. Remove hex top lock nuts (#10), flat washers (#11),
carriage bolts (#12), and discharge chute (#9). Store
removed parts in a safe location for reinstallation
should the baffles ever be removed.
4. Locate four pilot holes (A) which have knock-outs in
the deck. Punch-out these holes. Make sure knock-
outs are completely removed.
5. Attach mulching baffles (#1) to deck with
5/16"-18 x 3/4" GR5 carriage bolts (#3) and secure
with hex whiz nuts (#5). Tighten nuts to 17 ft-lbs.
6. Attach mulching plug (#2) to the deck with two
3/8"-16 x 3/4" GR5 carriage bolts (#4), hex flange lock
nuts (#7), one 5/16"-18 x 3/4" GR5 carriage bolt (#3),
flat washer (#8), and nylock nut (#6).
7. Tighten 3/8" lock nuts (#5) to 31 ft-lbs. and
5/16" nylock nut (#6) to 17 ft-lbs.
8. Lower unit down to ground and reconnect spark plug
wires.
IMPORTANT: Be sure to properly block mower up
so it can not move after it is raised.