26
Section 1: Assembly & Set-Up
RCF3696, RCFM3696, RCF3610, & RCFM3610 Rotary Cutters 326-600M
12/15/15
Table of Contents
Pull-Type Hook-Up Instructions
!
DANGER
A Crushing Hazard exists when hooking-up equipment to a
tractor. Do not allow anyone to stand between tractor and
implement while backing-up to implement. Do not operate
hydraulic 3-point lift controls while someone is directly
behind tractor or near implement.
!
WARNING
Always disengage PTO, put tractor in park or set park brake,
shut tractor engine off, remove ignition key, and wait for all
moving parts to stop before dismounting from tractor.
!
DANGER
Do not engage tractor PTO while hooking-up and unhooking
driveline or while someone is standing near the driveline. A
person’s body and/or clothing can become entangled in the
driveline resulting in serious injury or death.
!
DANGER
All guards and shields must be installed and in good working
condition at all times during cutter operation.
!
WARNING
Do not over-speed PTO or machine breakage may result.
Some tractors are equipped with multispeed PTO ranges. Be
certain your tractor’s PTO is set for the cutter’s rated PTO
speed. See Specifications & Capacities for rated PTO speed.
Tractor Hook-Up
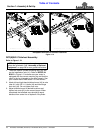
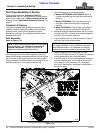
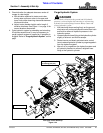
Refer to Figure 1-24 on page 27:
1. Make sure you have read and follow all Safety Alerts
and Important Notes listed above continuing.
2. Adjust drawbar length so that center of drawbar hitch
pin hole and end of tractor PTO shaft is set at the
correct distance. See “Pull-Type Hitch” on page 10
for distance.
3. Make certain parking jack (#10) is properly attached
to cutter hitch and secured with detent pin (#11).
4. Back tractor within close proximity of clevis (#2).
5. Raise or lower parking jack (#10) to align clevis (#2)
with tractor drawbar. Drawbar should fit between
lower and upper plates of clevis.
IMPORTANT: Proper distances between center of
drawbar hitch pin hole to end of tractor PTO shaft
and from top of drawbar hitch to center of PTO shaft
must be maintained for Pull-Type hitches.
IMPORTANT: Jack attachment pin must be fully
inserted and secured before working on or around a
cutter not hooked to the tractor drawbar.
6. Back tractor up to cutter hitch until holes in drawbar
and clevis (#2) are aligned.
7. Install 1" flat washers (#5) above and below drawbar.
8. Insert 1" -8 x 4 1/2" hex bolt (#3) through top of
clevis (#2), 1" flat washer (#5), tractor drawbar,
second 1" flat washer (#5) and out through bottom of
clevis hitch (#2). Secure bolt with hex locknut (#4).
Tighten lock nut snugly to remove all play and then
back nut up one-quarter turn.
9. Lower parking jack (#10) until hitch weight is
supported by tractor drawbar.
10. Fully retract parking jack (#10), remove locking
pin (#11), and store parking jack on cutter deck with
locking pin in area shown.
11. Pull back on driveline yoke collar (#9) and push
driveline yoke onto tractor PTO shaft. Release pull
collar and continue to push driveline yoke forward
until pull collar locks in place.
12. Push/pull on both ends of driveline to make sure it is
secured to tractor and gearbox shafts.
Safety Chain Hook-Up
Refer to Figure 1-24 on page 27:
When towing implements on public roads, use safety
chain (#12) with tensile strength equal to or greater than
gross weight of implement being towed. This will control
the implement in the event the hitch pin is lost.
After attaching safety chain (#12) to the tractor, make a
trial run by driving tractor to the right and to the left for a
short distance to check safety chain length. If necessary,
re-adjust chain length to eliminate a tight or loose chain.
Make sure chain hook is securely locked in place.
Hydraulic Hook-up
!
DANGER
Hydraulic fluid under high pressure can penetrate skin. Wear
protective gloves and safety glasses or goggles when working
with hydraulic systems. Use a piece of cardboard or wood
rather than hands when searching for hydraulic leaks. If
hydraulic fluid is injected into the skin or eyes, it must be
treated by a doctor familiar with this type of injury within a
few hours or gangrene may result. DO NOT DELAY.
Refer to Figure 1-24:
1. Route hydraulic hose (#8) through spring hose
loop (#6) and attach to tractor hydraulic outlet.
2. If cutter is provided with a CV driveline, route
hydraulic hose beneath trunnion support (#1).
IMPORTANT: Always store parking jack on the deck
storage holder and not on the hitch. Storing parking
jack on the hitch can damage the jack.


