


20
Section 1: Assembly & Set-up
RC4015 and RCM4015 Series 2 S/N 944961+ Rotary Cutters 330-845M
10/21/15
Table of Contents
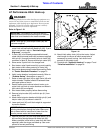
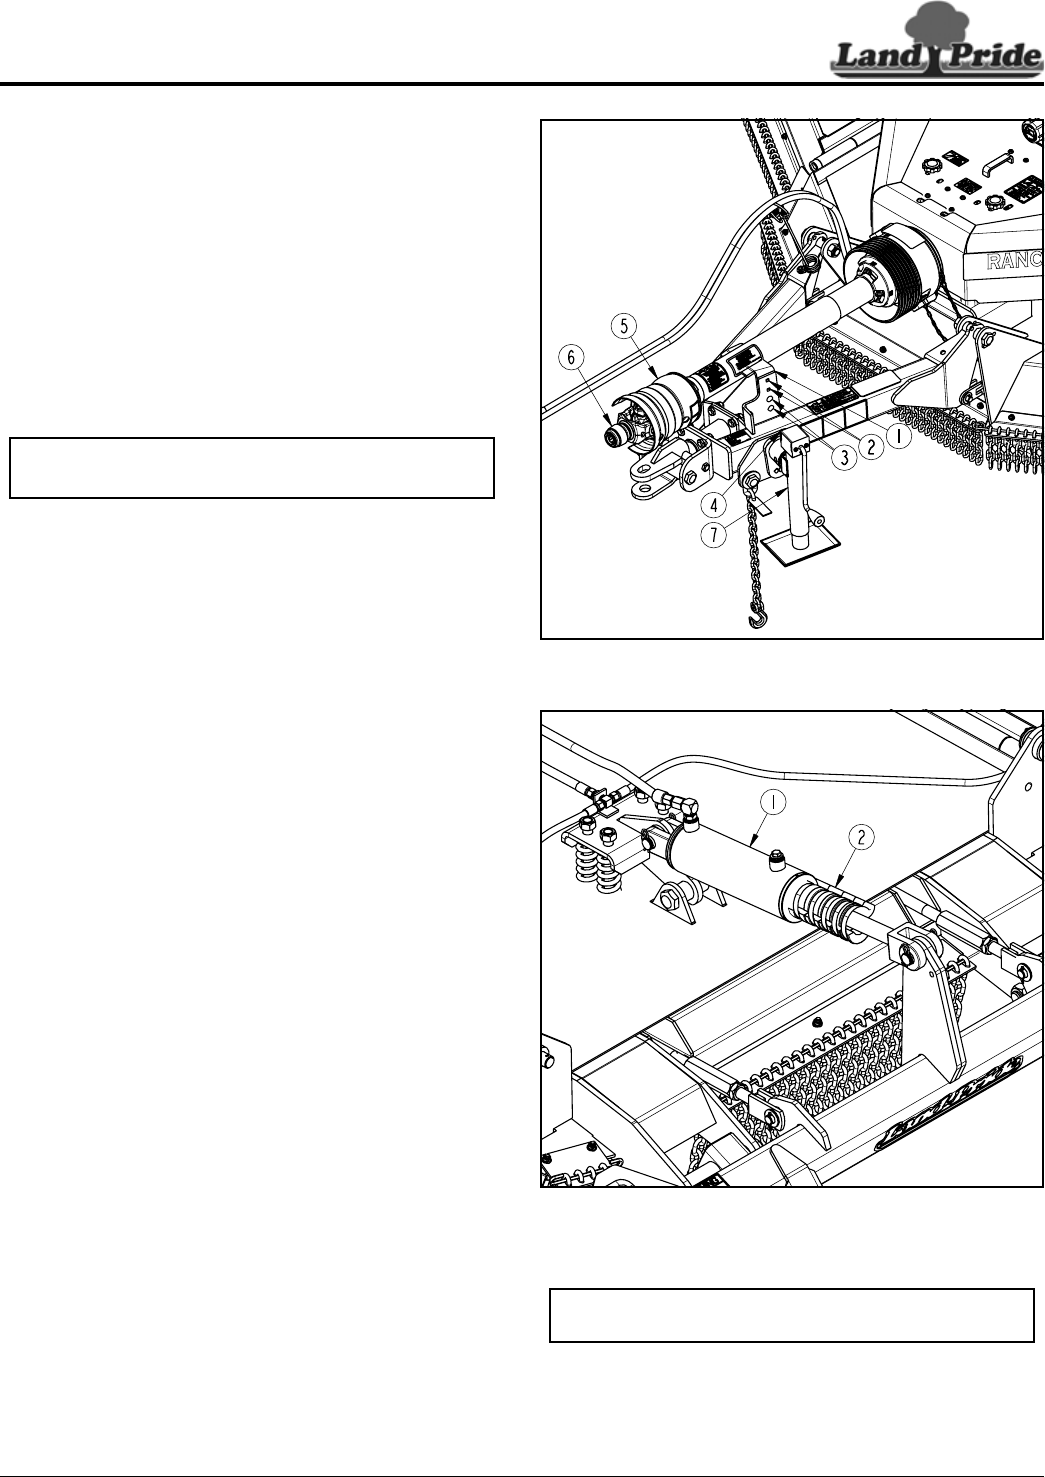
Driveline Hook-up to Tractor PTO
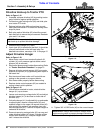
Refer to Figure 1-21:
1. If needed, collapse driveline (#5) by pushing tractor
end of driveline against splitter gearbox.
2. Pull back on yoke locking collar (#6) and slide yoke
over tractor PTO shaft.
3. Release locking collar (#6) and continue to push
outer yoke onto tractor PTO shaft until locking collar
snaps in place.
4. Both yoke ends of driveline (#5) should be moved
back and forth to ensure they are secured. Reattach
yoke end if it is loose.
5. Rotate driveline hanger (#1) down.
6. If park jack (#3) is attached to the hitch, it should be
removed and stored on the left-hand wing. For
detailed instructions, see steps 12 & 13 on page 15.
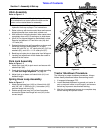
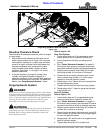
Adjust Driveline Hanger
Refer to Figure 1-22:
1. Move tractor control lever to extend hydraulic lift
cylinder (#1) until pressure against stroke control
spacers (#2) is removed.
2. Shut tractor down properly before dismounting. Refer
to “Tractor Shutdown Procedure” on page 13.
3. Remove all stroke control spacers (#2) from center
hydraulic lift cylinder (#1) by spreading them apart at
the break line.
4. Start tractor and lower cutter until front skids are
resting on the ground or on support blocks.
5. Shut tractor down properly before dismounting.
6. Replace stroke control spacers (#2) as needed to
support wheels at this position.
Refer to Figure 1-21:
7. With driveline attached to tractor, rotate driveline
hanger (#1) up as shown.
8. Loosen nuts securing carriage bolts (#3) and adjust
driveline hanger (#1) to be close to under side of
driveline (#5).
9. If driveline hanger (#1) is adjusted fully up and needs
to adjust higher, remove carriage bolts (#3) and
reattach hanger to the upper two square holes (#2)
with existing flat washers, lock washers, hex nuts,
and carriage bolts (#3). Continue to adjust hanger to
underside of driveline.
10. Draw nuts securing carriage bolts (#3) up snug and
rotate driveline hanger (#1) down. If hanger makes
contact with driveline (#5), readjust hanger down
until it misses the driveline.
IMPORTANT: Always rotate driveline hanger down
after hook-up to prevent driveline damage.
Adjust Driveline Hanger
Figure 1-21
Hydraulic Lift Cylinder With Stroke Control Spacers
Figure 1-22
11. Tighten 3/8"-16 GR5 bolts (#3) to the correct torque.
12. Rotate driveline hanger (#1) down.
37905
37907
IMPORTANT: Always rotate driveline hanger down
before moving cutter to prevent damage to driveline.