


11
Section 1: Assembly & Set-up
6/06/06
PR2572 & PR2596 Powered Rakes 314-132M
Land Pride
Table of Contents
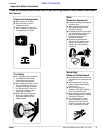
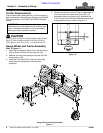
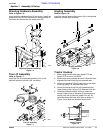
Shearing Hardware Assembly
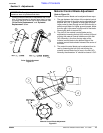
Refer to Figure 1-6:
Install shearing hardware bag (#1) as shown. Install the
three extra pins (#2) into the three pin storage holes on
the frame and secure with the cotter pins (#3).
Shearing Hardware Assembly
Figure 1-6
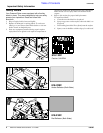
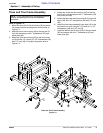
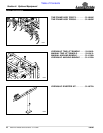
Tine Lift Assembly
Refer to Figure 1-7:
Install the tine lift turnbuckle assembly (#1) or the
optional hydraulic cylinder (#2). as shown.
Tine Lift Assembly
Figure 1-7
15827
15828
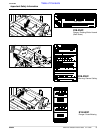
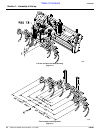
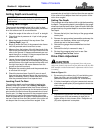
Angling Assembly
Refer to Figure 1-8:
Install the manual angling turnbuckle (#1) or the optional
hydraulic cylinder (#2) as shown.
Angling Assembly
Figure 1-8
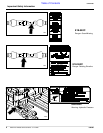
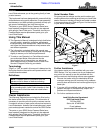
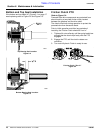
Tractor Hookup
1. When using tractors with multi-speed PTO, be
certain PTO is set for 540 RPM.
2. Back tractor up to powered rake until 3-Pointlinks are
aligned with lower hitch lugs on powered rake.
3. Secure the tractor’s 3-Point lower links to the lower
hitch lugs using 7/8" diameter hitch pins.
4. Secure the tractor’s top link to the powered rake
upper floating hitch using a 3/4" diameter hitch pin.
5. Level the powered rake by raising or lower the
tractor’s lower arms as necessary, then adjust the
tractor’s top link to place the upper hitch pin 18"
vertically above the lower hitch pins as shown in
Figure 1-9 to allow the powered rake to float.
Tractor Hookup
Figure 1-9
15829
11537