


3
8/20/07
Manual No. 330-094M
Shredder Assembly Instructions
Land Pride
■
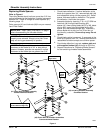
Replacing Blade Spacers
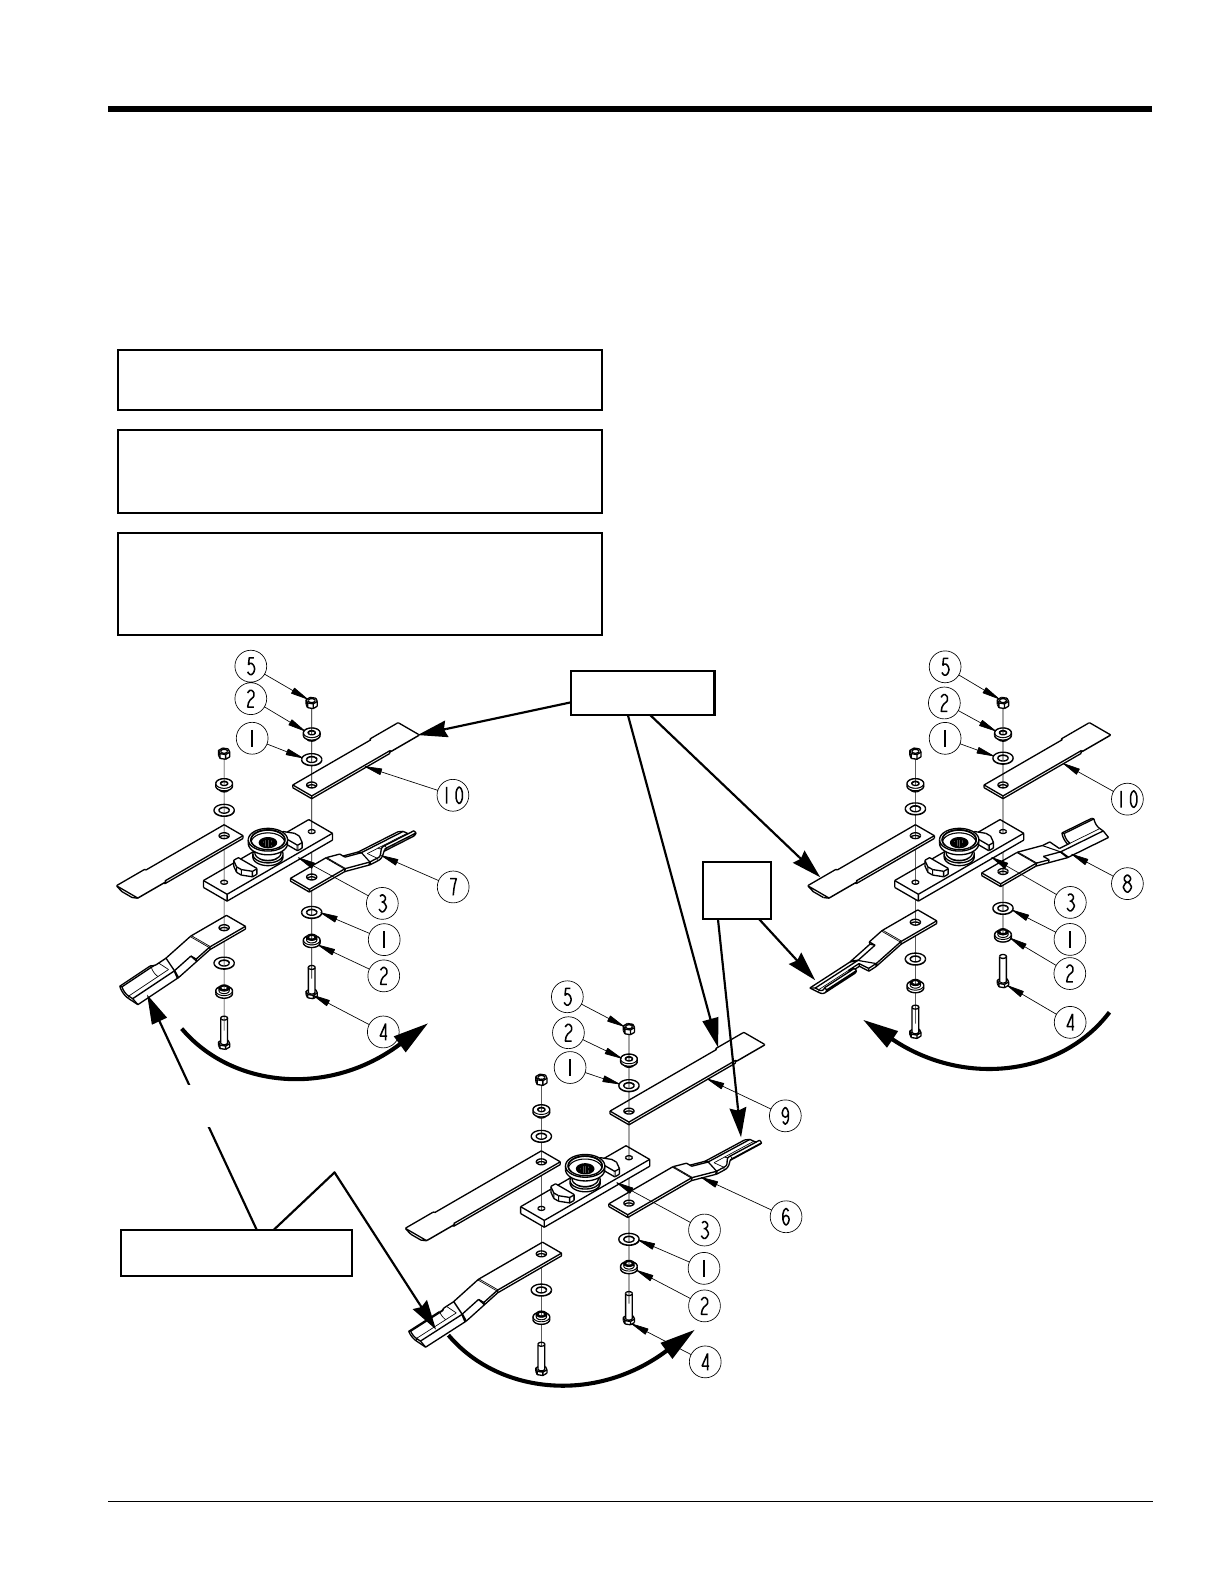
Refer to Figure 4:
The cutting blades should not have more than 3/4" free
vertical movement at the blade tips. If vertical movement
exceeds 3/4", install or change to thicker spacers (#1)
following steps 1-5.
Order spacers (#1) and locknuts (#8) from your nearest
Land Pride Dealer.
IMPORTANT: Read “Safety Information” on page 1
before disassembling the shredder blades.
IMPORTANT: Locknuts can lose their ability to lock
properly once removed. Always use a plain throw
away nut during pre-assembly of spacers.
IMPORTANT: Spacers (#1) are not used if vertical
movement at the blade tip is 3/4" or less without
spacers. However, spacers are required if vertical
movement at the blade tips are greater than 3/4".
1.
Check blade deflection. If vertical deflection at the
blade tip is greater than 3/4", remove blade bolt (#4)
and reassemble using a thicker spacer (#1). Select
spacer thickness based on deflection. The greater
the deflection, the thicker the spacer.
2.
Assemble blades by inserting 1"-8 x 4 1/2" GR8 hex
head bolt (#4) through blade bushing (#2),
spacer (#1), lower cutting blade (#6, #7 or #8), blade
carrier (#3), upper flat cutting blade (#10 or #9),
spacer (#1) and blade bushings (#2). Temporarily
secure blade with a plain hex nut (Plain hex nut
furnished by customer.) Draw nut up snug. Do not
tighten.
3.
Check blade vertical movement. If movement at the
blade tip is greater than 3/4", remove blade bolt and
reassemble as before except use a thicker spacer.
4.
Once blade deflection is correct, replace plain nut
with supplied locknut (#5) & torque to 450 ft-lbs.
5. Repeat instructions for “Replacing Blade Spacers”
for the remaining shredder blade assemblies.
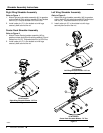
Figure 4
(#2) Center Deck & Shredder Assemblies
Counterclockwise Rotation
(#3) Left Wing Shredder Assembly
Clockwise Rotation
Position Beveled
Edges Down
(#1) Right Wing Shredder Assembly
Counterclockwise Rotation
Lower Blade Cutting Edges
Position Beveled Edges Up
Blade
Cutting
Edges
25603