Section 6 Maintenance
4400EX Heavy Duty Off Road Utility Vehicle 720-132M
7/01/05
30
Table of Contents
7. Remove belt by rolling it off over the drive pulley and
then lifting it up off the driven pulley.
8. Reinstall new belt by placing it over the driven pulley
and then rolling it over the drive pulley.
9. Re-tension power steering belt and tighten take-up
bolt.
10. Reinstall belt cover and fasteners.
11. Reconnect battery negative cable.
12. Remove blocks securing cargo box up and lower
cargo box.
Engine Air Filter
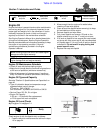
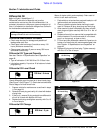
Refer to Figure 6-8
A specially designed high density paper filter element
surrounded by an oil filled foam precleaner filter element
cleans the air supplied to the engine. Protect your engine
by ordering only genuine Land Pride parts when replacing
the air filter elements.
Air Filter Maintenance Schedule
• Check air filter daily before starting engine for dirt and
debri buildup. Also check daily for loose and damaged
filter components. Tighten loose components and
replace damaged components.
• Service precleaner foam element ever 25 hours of
operation. Service more often when operating in
extremely dusty or dirty conditions.
• Service paper element every 100 hours of operation.
Service more often when operating in extremely dusty
or dirty conditions.
Air Filter Replacement Parts
Order genuine Land Pride parts when replacing the
precleaner element.
Description Part No.
Precleaner Element (61 mm deep) . . . . 24-083-02-S
Paper Element (65 mm deep). . . . . . . . .47-083-03-S
Precleaner Foam Element
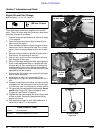
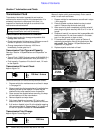
Refer to Figure 6-8 and Figure 6-9
1. Prepare vehicle for maintenance as outlined in steps
1-6 on page 24.
2. Safely secure the seat console in the raised position.
3. Loosen air cleaner cover knob and remove cover.
4. Remove outside precleaner element from the paper
element.
5. Wash precleaner element with warm water and
detergent. Rinse thoroughly to remove all traces of
detergent. Do not wring precleaner. Squeeze
excess water out and allow time to air dry.
NOTE: Do not operate engine with a damaged airfilter
or without the air filter elements installed. Dirt will
enter the engine and cause a dust ingested engine
failure.
6. Saturate precleaner with new engine oil and gently
squeeze all excess oil out.
7. Inspect precleaner element for holes and tears before
reinstalling it. Replace element if damaged.
8. Reinstall precleaner element over the paper element
being careful not to damage the elements.
9. Reinstall air cleaner cover and secure with cover
retaining knob.
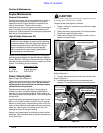
Figure 6-8
Figure 6-9
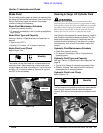
Figure 6-10
Air Cover Knob
Air Cleaner Cover
21368
21369
Element Cover
Wing Nut
Element
Cover
Paper Element
Behind Precleaner
Precleaner Foam
Element
21370
Rubber Seal On
Air Cleaner Stud
Air Cleaner
Base


